Do you have a question about the AFL FlexScan FS200 OTDR and is the answer not in the manual?
AFL products are warranted against defective material and workmanship for one year from date of delivery.
WARNING! Use of procedures or adjustments other than specified may result in hazardous radiation exposure.
Statements regarding compliance with FCC Rules and Industry Canada license-exempt standards.
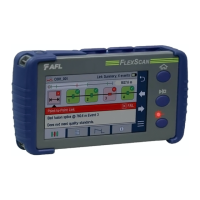
Detailed description of the FlexScan OTDR's physical components, ports, buttons, and indicators.
Explains how to interpret the battery charging indicators and status icons on the FlexScan.
Description of the main screen displayed at startup and its navigation elements.
Overview of available test modes like SmartAuto, Expert, and Real-Time OTDR.
Summary of utility functions such as USB transfer, viewing results, and settings.
Configuration of fundamental device settings like language, units, volume, date, time, and Bluetooth.
Adjusting screen brightness, auto-dim, and configuring the auto-off timer for power saving.
Managing remote control, launch quality check, received images, screenshots, and auto-save/send results.
Restoring factory default settings and configuring MPO switch control.
Guidance on navigating and interacting with the SmartAuto OTDR setup screen using the touchscreen.
How to view the predefined Pass/Fail rule settings for ITU G.671 and TIA-568.3-D standards.
Steps to view and modify custom Pass/Fail thresholds for splices, connectors, and splitters.
How to view default parameters for standard G.65x fiber types, including GIR and Backscatter Coefficient.
Procedure to view and edit custom fiber parameters like GIR, Backscatter Coefficient, and Attenuation.
How to enable the feature that checks OTDR connection quality for dirty or damaged connectors.
Setting the length parameters for launch and receive cables used in testing.
Steps to start an automated OTDR test, including live fiber and launch quality checks.
Explanation of the feature that detects live fiber to prevent service disruption.
Description of key parameters for Expert and Real-Time OTDR modes, including trace length and pulse width.
Procedure for setting up and configuring parameters for a Real-Time OTDR test.
Explanation of how to interpret trace data, including cursor placement and measurement displays.
How to enable, disable, and configure the light source modes and test wavelengths.
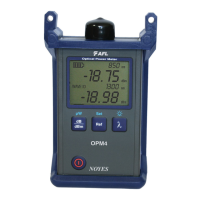
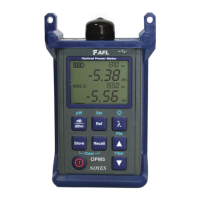
How to synchronize, reference, and measure optical power using the power meter function.
Description of the FOCIS Flex probe's controls, display, and interfaces for fiber inspection.
Steps to enable Bluetooth on the FlexScan device for probe pairing.
Steps to enable Bluetooth on the FOCIS Flex probe and pair it with the FlexScan.
Procedure for using the FOCIS Flex probe to capture, analyze, and transmit fiber end-face images.
How to view fiber inspection results received from the FOCIS Flex probe on the FlexScan display.
Explanation of how FlexScan test results files are named, including parameters like Job, Cable, and Wavelength.
Using editor screens to customize file names for Job, Link number, and other parameters.
Procedures for saving test results to a newly created folder or the current folder.
How to copy test results from FlexScan to a PC using a USB cable connection.
Guidance on wirelessly transferring results to a mobile device using the FlexApp.
Instructions for installing FlexReporter and downloading test data from the cloud platform.
Overview of the process for generating comprehensive test reports using FlexReporter software.
Contact details for technical support, sales, and service requests, including phone numbers and email addresses.
Information on accessing AFL's website, product registration, and customer portal.
| Battery Life | 12 hours |
|---|---|
| Interface | USB, Ethernet |
| Wavelengths | 1310 nm, 1550 nm |
| Event Dead Zone | 0.8 m |
| Pulse Width | 5 ns to 20 μs |
| Operating Temperature | -10°C to 50°C |
| Storage Temperature | -20°C to 60°C |
| Connector | FC, SC |
| Attenuation Dead Zone | Single mode: 3.5 m; Multimode: 3.5 m |