Replacing Assemblies 6
16900A, 16902A, and 16903A Service Guide 73
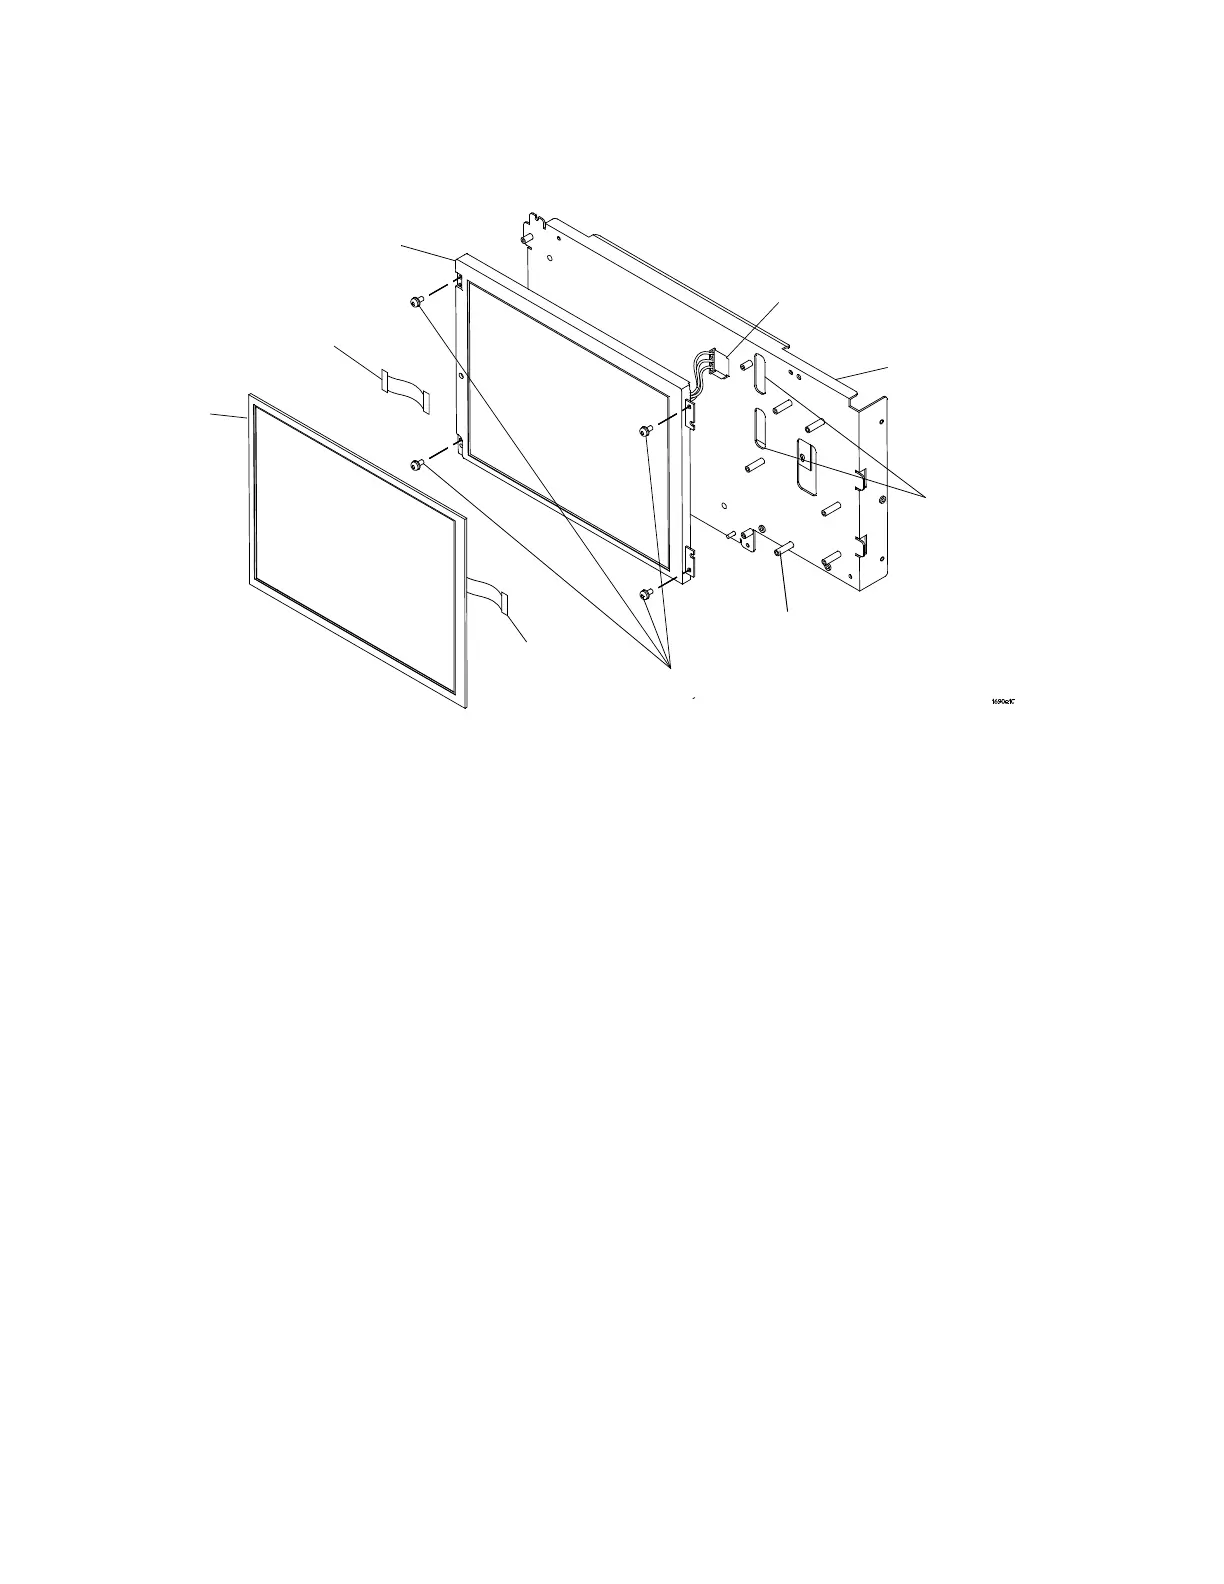
5 When re- assembling, feed the keypad cable and the power
On|Off cable through the LCD bracket.
6 Align the 6 long pins on the LCD bracket with the guide
pins sticking through the keypad board.
7 Press on the LCD bracket assembly firmly to ensure the
LCD display is attached to the touch screen.
8 Using a Torx T10 screwdriver, screw the 6 screws into the
LCD bracket to secure it to the front frame.
T10 Screws (6)
Slots
LCD Bracket
Pink LCD
Cable
Liquid Crystal Display
(LCD)
LCD Cable
To u ch
Screen
To u ch
Screen
Cable
Long Alignment Pins (6)