76 16900A, 16902A, and 16903A Service Guide
6 Replacing Assemblies
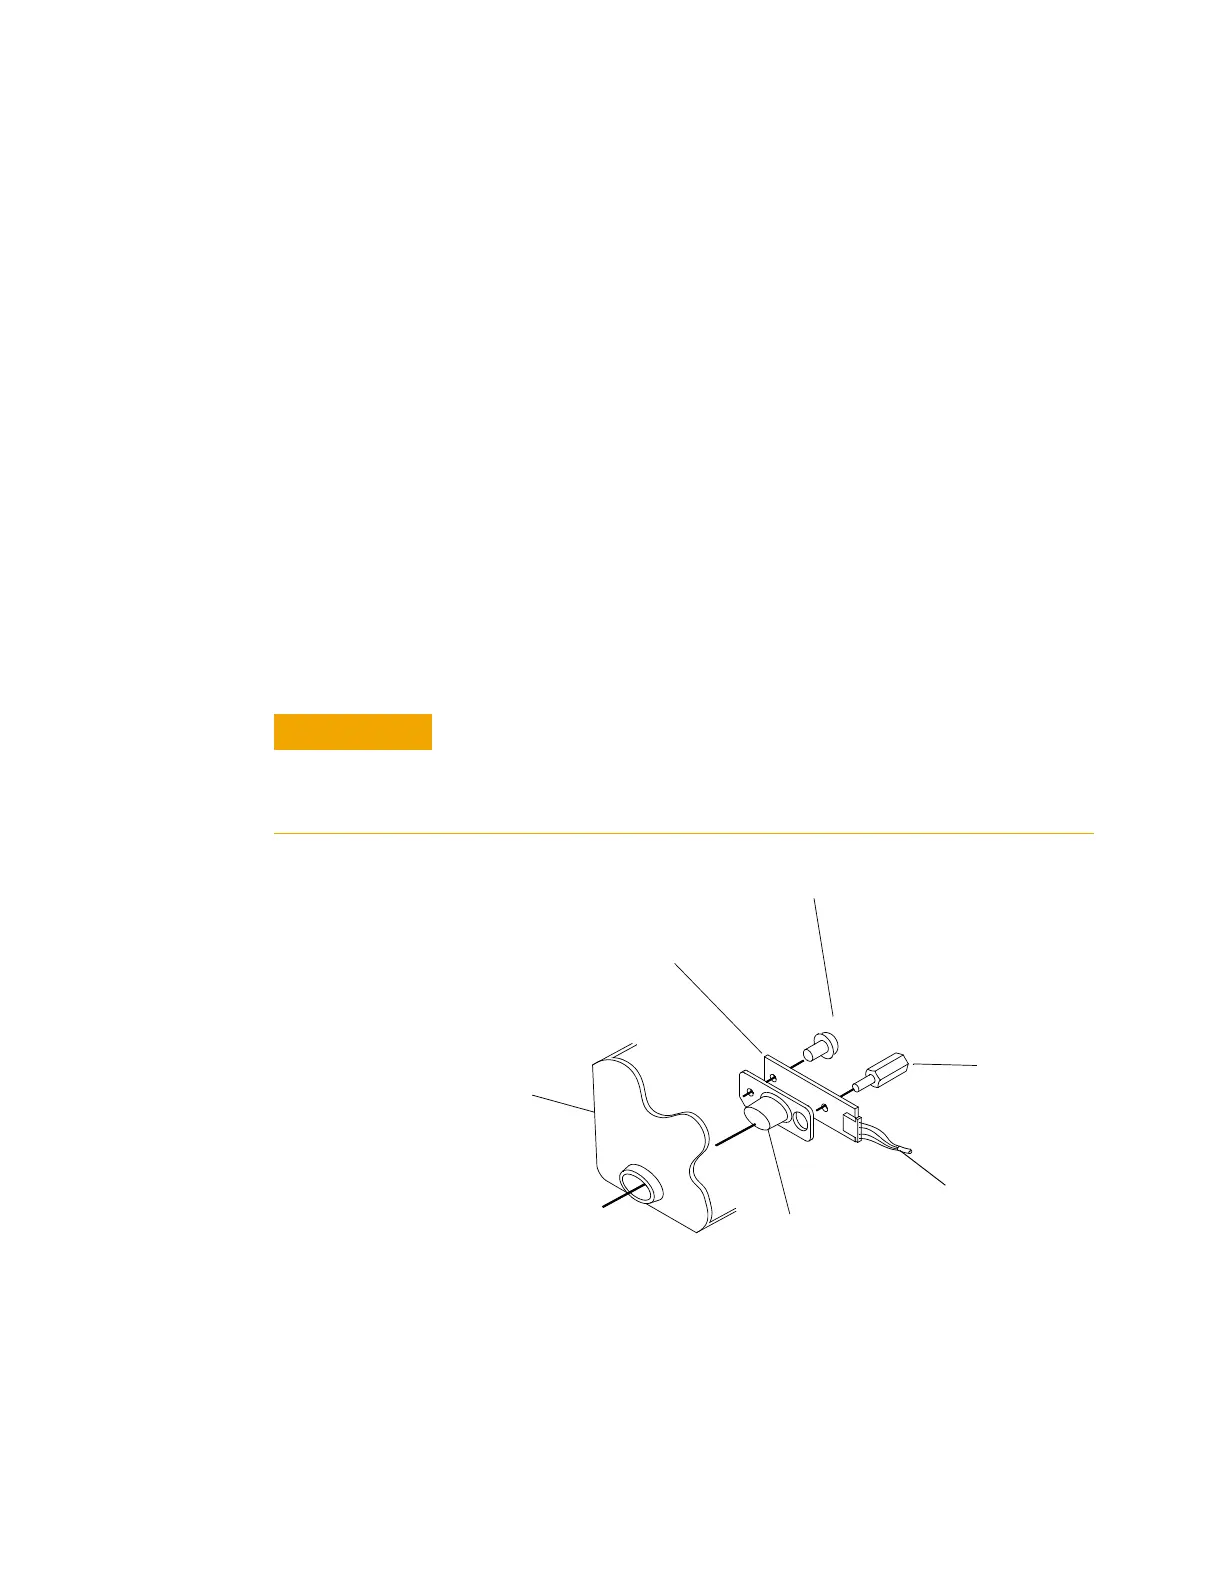
To remove and replace the On|Off key
Perform previous procedures:
• “To prepare the instrument for disassembly" on
page 48
• “To remove and replace the cover" on page 52
• “To remove and replace the front panel assembly" on
page 64
• “To remove and replace the LCD bracket assembly" on
page 71
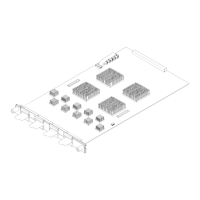
6 Using a Torx T6 screwdriver, remove the screw securing
the On|Off board to the front frame.
7 Using a 1/4- inch hex socket, remove the shoulder screw
securing the On|Off board to the front frame.
8 Remove/replace the keypad and board.
CAUTION
Wear ESD finger cots or use care not to touch the black pads on
keypad and on the keypad board. Finger oils can impair contact. If
necessary, carefully clean the contacts using alcohol and lint-free
swabs or wipes.
Hex
Shoulder
Screw
On|Off Board
Front
Frame
On|Off
Keypad
T6 Screw (1)
On|Off
Cable