Maintenance
Agilent 55B AA Spectrometer User’s Guide 125
6 Disconnect the white plug at the end of the D
2
lamp lead and remove the D
2
lamp assembly from the instrument.
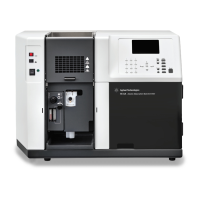
7 Loosen the Philips head screw in the lamp holder assembly (1 in Figure 87)
and slide out the lamp.
8 Slide a new D
2
lamp through the clamp until the notch in the backing plate (2)
is aligned with the lamp aperture (3) shown in Figure 87.
Figure 87. D2 lamp alignment (top view)
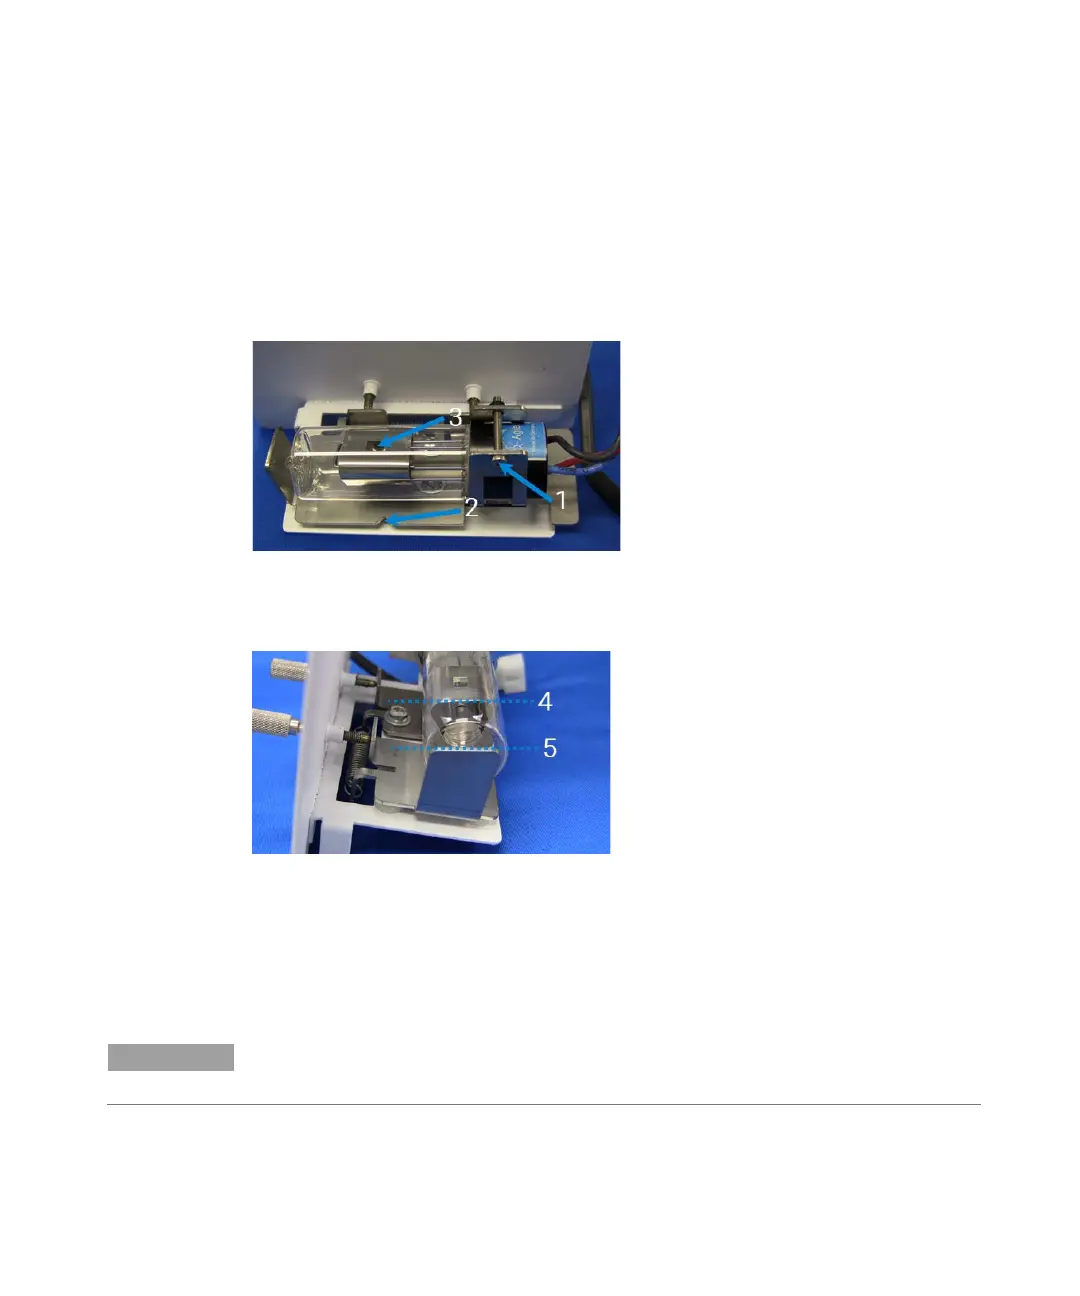
9 Rotate the lamp so that the face with the aperture (4) is parallel with the top
edge of the bracket (5) – see Figure 88 below.
Figure 88. D2 lamp alignment (end view)
10 Tighten the Philips head screw to secure the lamp in the holder.
11 Reconnect the D
2
lamp plug.
12 Replace the lamp assembly in the lamp compartment.
13 Replace the thumbscrew at the top of the D
2
lamp compartment.
After installation, a new D
2
lamp must be aligned. Refer to Optimization for
instructions on how to align lamps – see Page 74.
 Loading...