Operating the 7693A Automatic Sampler 5
Operating Guide 53
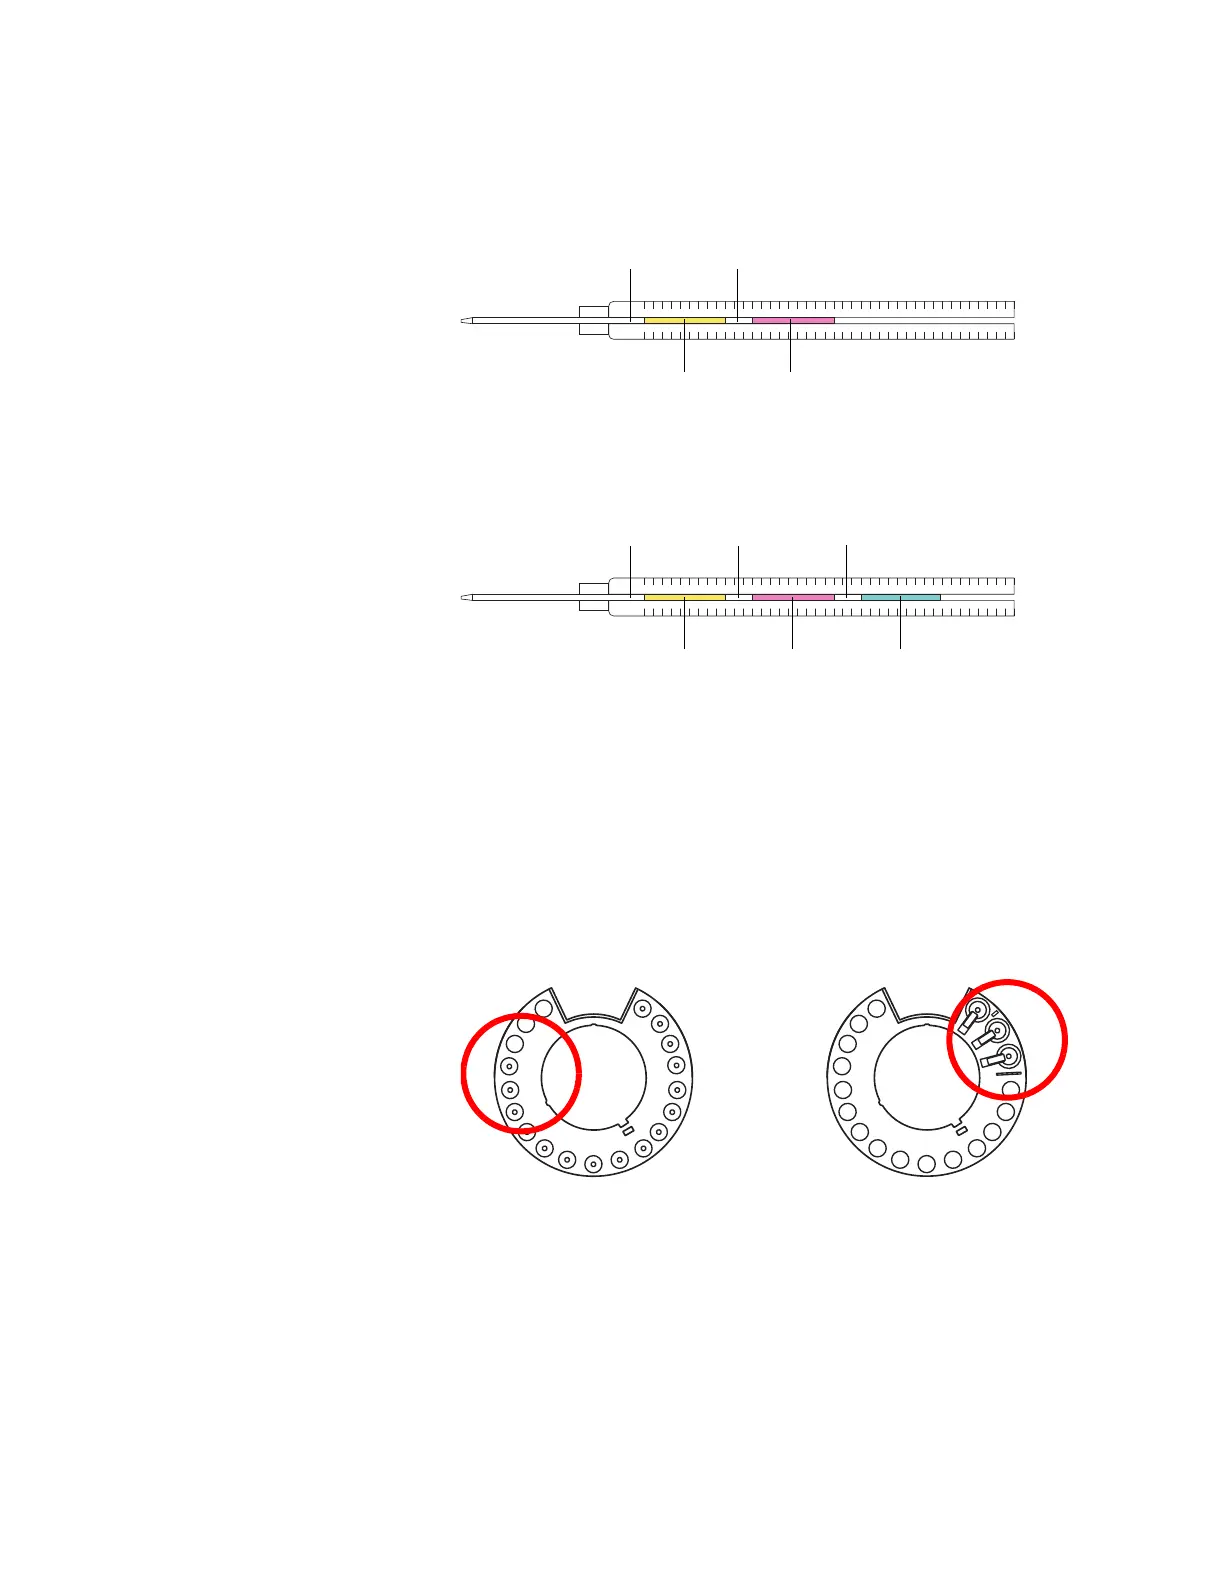
When loading vials for sandwich injections, layer 1 (L1) can
be placed in any turret position 1- 14 if using a standalone
turret, or in any tray position 1- 150 if using a transfer
turret with sample tray. The vials for layer 2 (L2) and layer
3 (L3) must be placed in turret positions L2 and L3
(Figure 5), respectively.
Figure 3 2-layer sandwich injection
Figure 4 3-layer sandwich injection
Figure 5 Turret vial locations for sandwich injections
Air gap 1 Air gap 2
Layer 1 (L1) Layer 2 (L2)
Air gap 1 Air gap 2
Layer 1 (L1) Layer 2 (L2)
Air gap 3
Layer 3 (L3)
Transfer turretStandalone turret
A
B
16
3
1
5
7
9
12
14
W
15
13
11
10
8
6
4
2
A
A2
A4
L3
L1
WB
WA
WA
B2
A6
A3
A5
B
B3
B4
WA
WB
L2
L3
L2