72 Operating Guide
6 Operating the 7683 Automatic Sampler
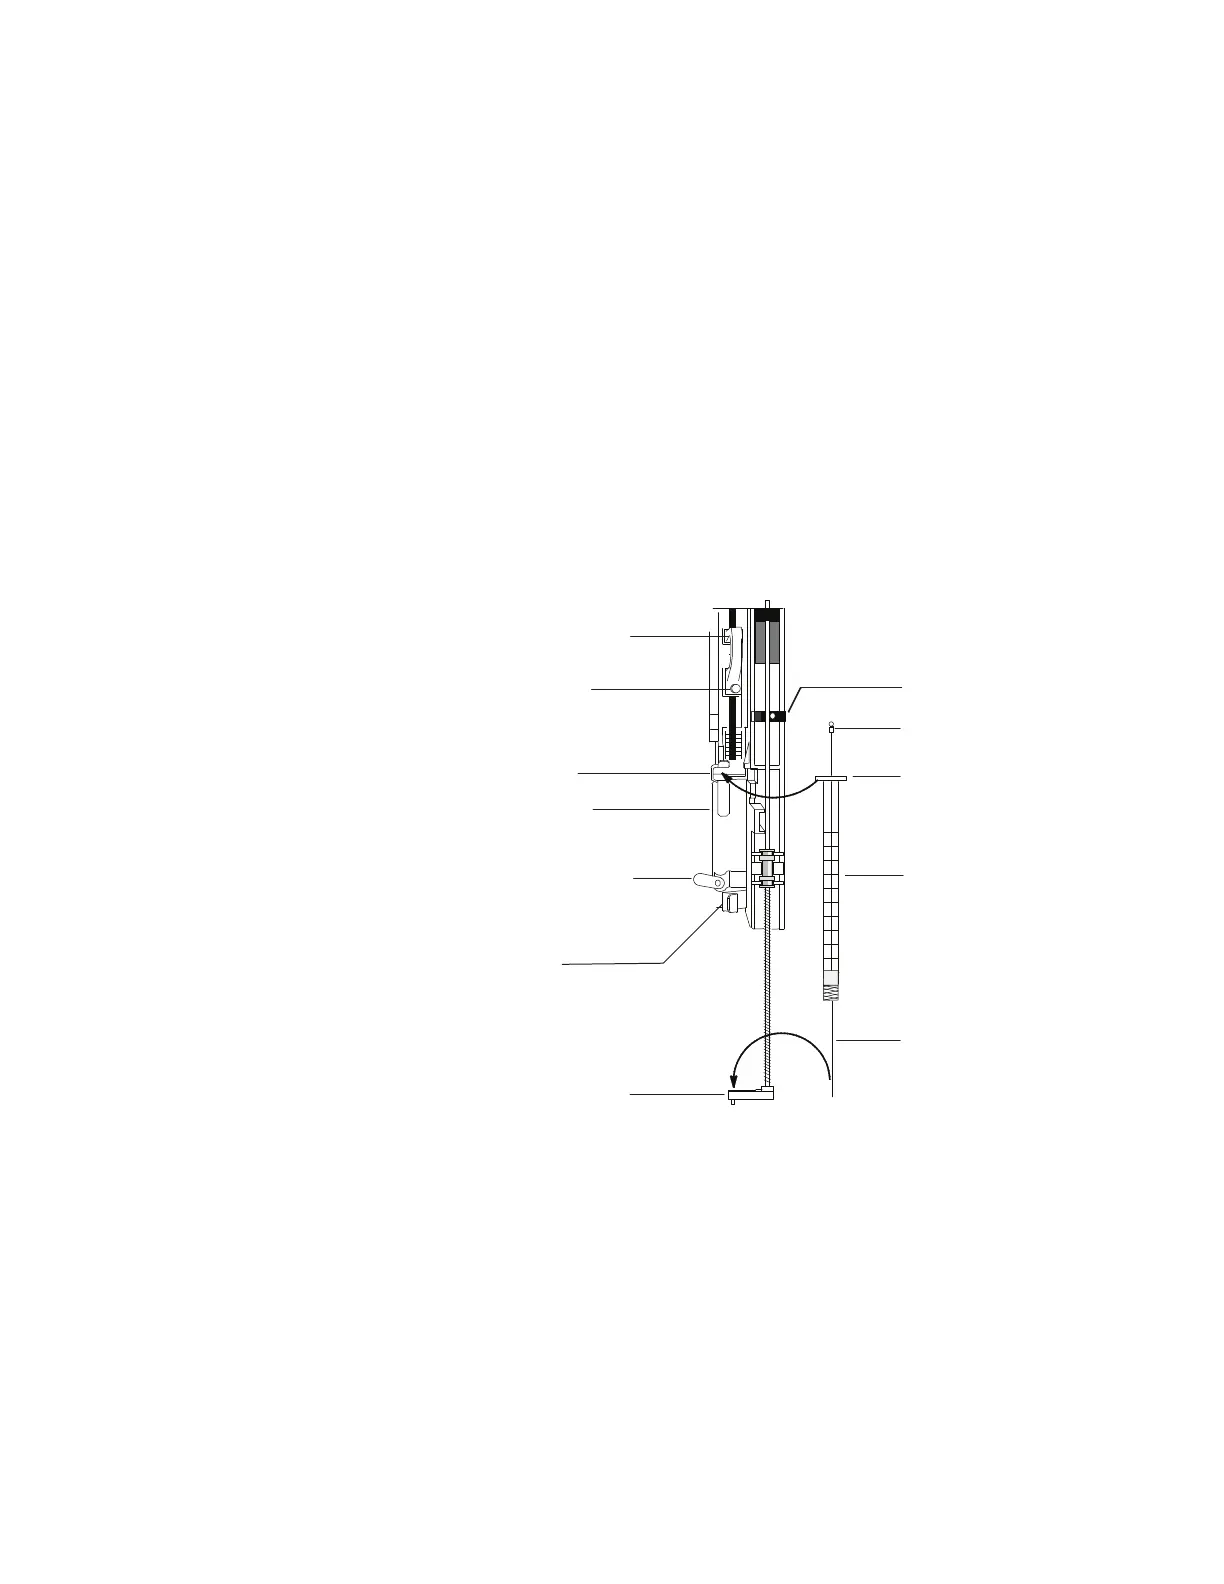
To Install a Syringe on the 7683 ALS
1 Open the injector door.
2 Remove the syringe, if necessary. (See “To Remove the
Syringe on the 7683 ALS”.)
3 Slide the syringe carriage up (or down).
4 Pass the syringe needle through the hole in the needle
support foot.
5 Align the syringe barrel with the flange guide and syringe
clip and press the syringe into place, keeping the needle
in the hole of the needle support foot.
6 Close the syringe latch by swinging it clockwise.
7 Loosen the plunger screw until the stop is reached.
8 Move the plunger carrier loop down and tighten the
plunger screw.
9 Move the plunger carrier loop up and down. If the syringe
plunger does not move along with the plunger carrier
loop, repeat steps 4 through 8. Be sure the plunger screw
is tight.
10 Check that the needle is aligned with the needle guide in
the needle support foot by moving the slide up and down.
The needle should slide smoothly in the needle guide.
Plunger carrier loop
Plunger screw
Flange guide
Syringe carrier
Syringe latch (open)
Syringe clip
Needle support foot
Slide
Plunger
Flange
Barrel
Needle