Chapter 3: Installation
VSpin User Guide
26
Preparing the Mounting Surface
Overview Before you install the VSpin, refer to this topic for the dimensions of the
VSpin door and the position of the buckets so that you can set up your
robot to access the buckets properly.
Before mounting the VSpin you must prepare the mounting surface.
!! DAMAGE HAZARD !! If you drop or otherwise impact the
VSpin or the buckets, the VSpin rotor or the buckets could be
damaged. Either of these could lead to a failure that could
further damage the unit during a spin. If you have dropped or
subjected the VSpin to a forceful impact, contact Velocity11, and
do not use the VSpin until it is determined to be safe to operate.
About Installing the
VSpin
For the robot to move plates to and from the VSpin buckets, the three-
dimensional position of the buckets must be fixed and known to the
controlling software of the lab automation system. This requires that the
VSpin is mounted on a stable base that does not move in relation to the
robot.
You can mount the VSpin directly on a benchtop or on a mounting plate
that also holds other components of your system. You should have the
benchtop or mounting plate accurately drilled and tapped to create
screw holes, according to the dimensions given in this topic.
When you are planning where to install your VSpin, make sure you
choose a place that allows access on all sides for cleaning and
maintenance.
Preparing the Bench
Surface for
Installation
To prepare your bench surface for installation:
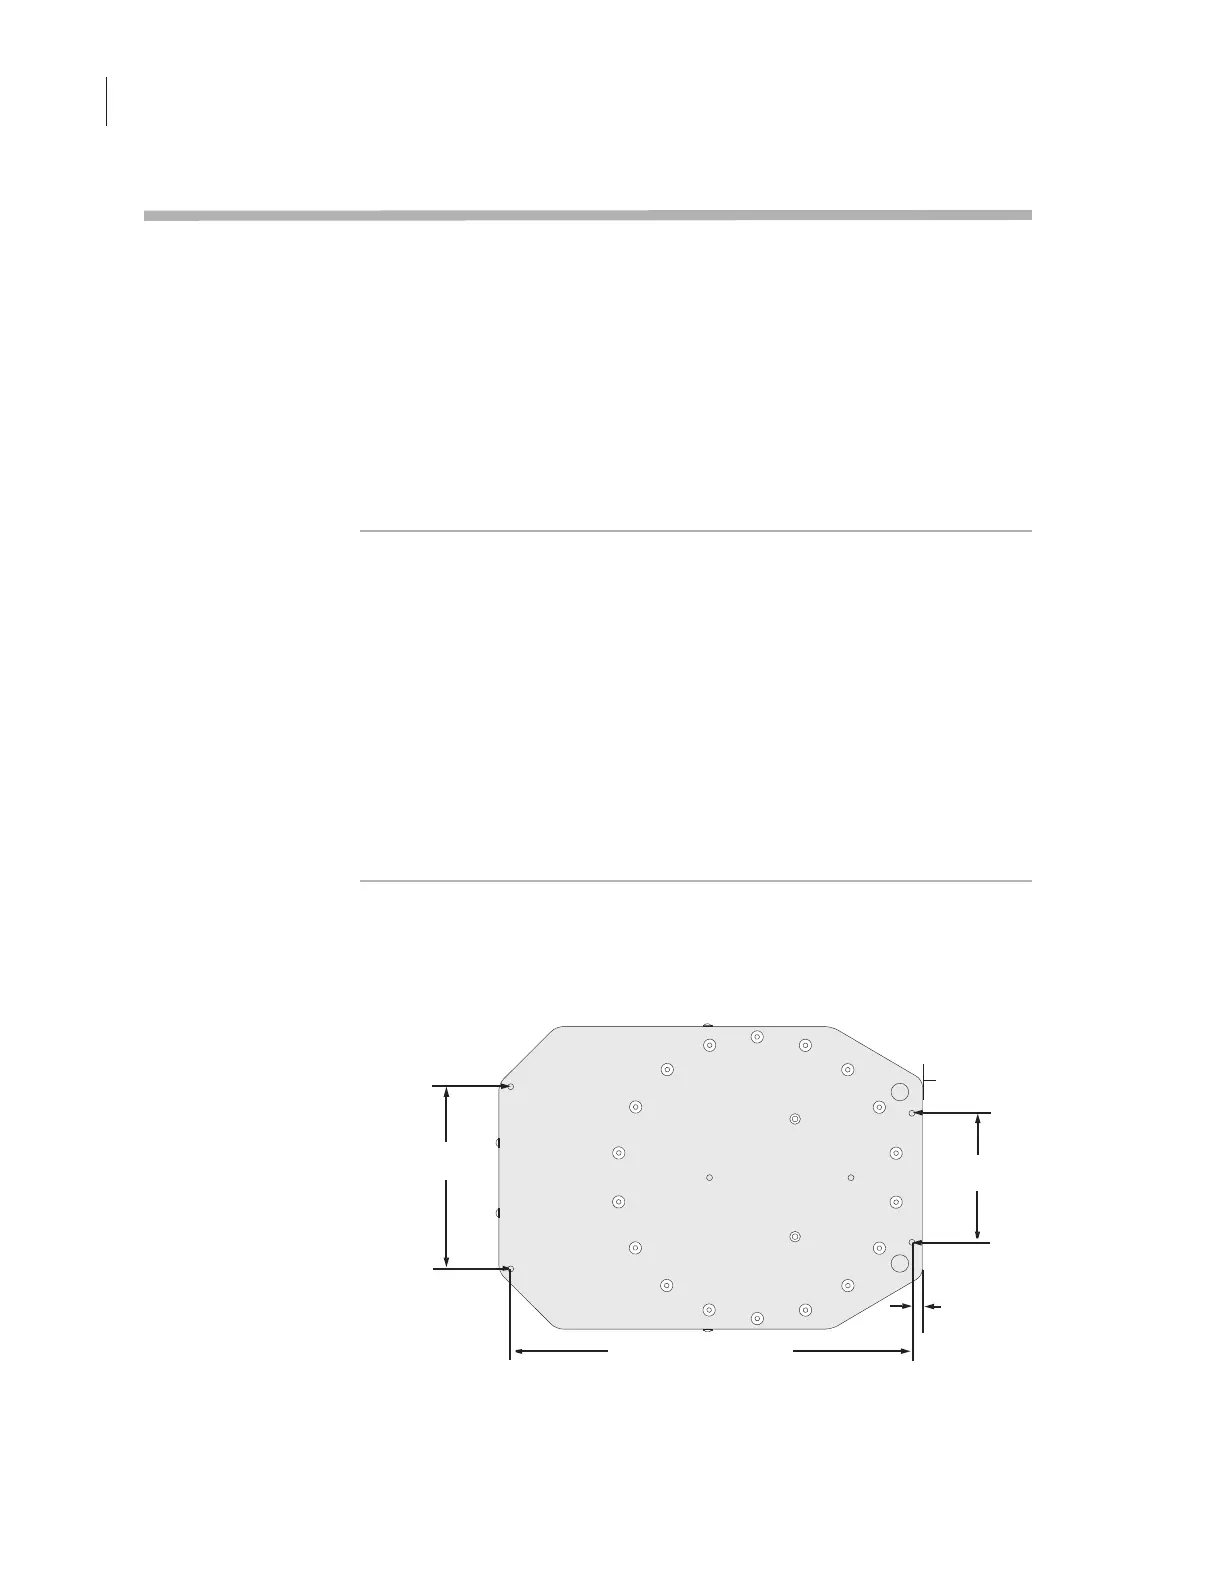
1. Prepare your mounting holes to accommodate the VSpin using the
following diagram of the bottom of the VSpin.
Use a #9 drill bit with an M6 tap to prepare the holes.
00070
Vspin
Bottom mounting position
00070
17.10 inches (43.4 cm)
5.50 inches
(14.0 cm)
0.441 inches
(1.12 cm)
7.75 inches
(19.7 cm)
VSpin front
 Loading...