44
AIRZONE LITE SETUP
Important: To configure a Lite thermostat you must move it away from its base. Once the microswitches are configured, put it back
in its original position.
Setting wireless device (only available for wireless thermostat)
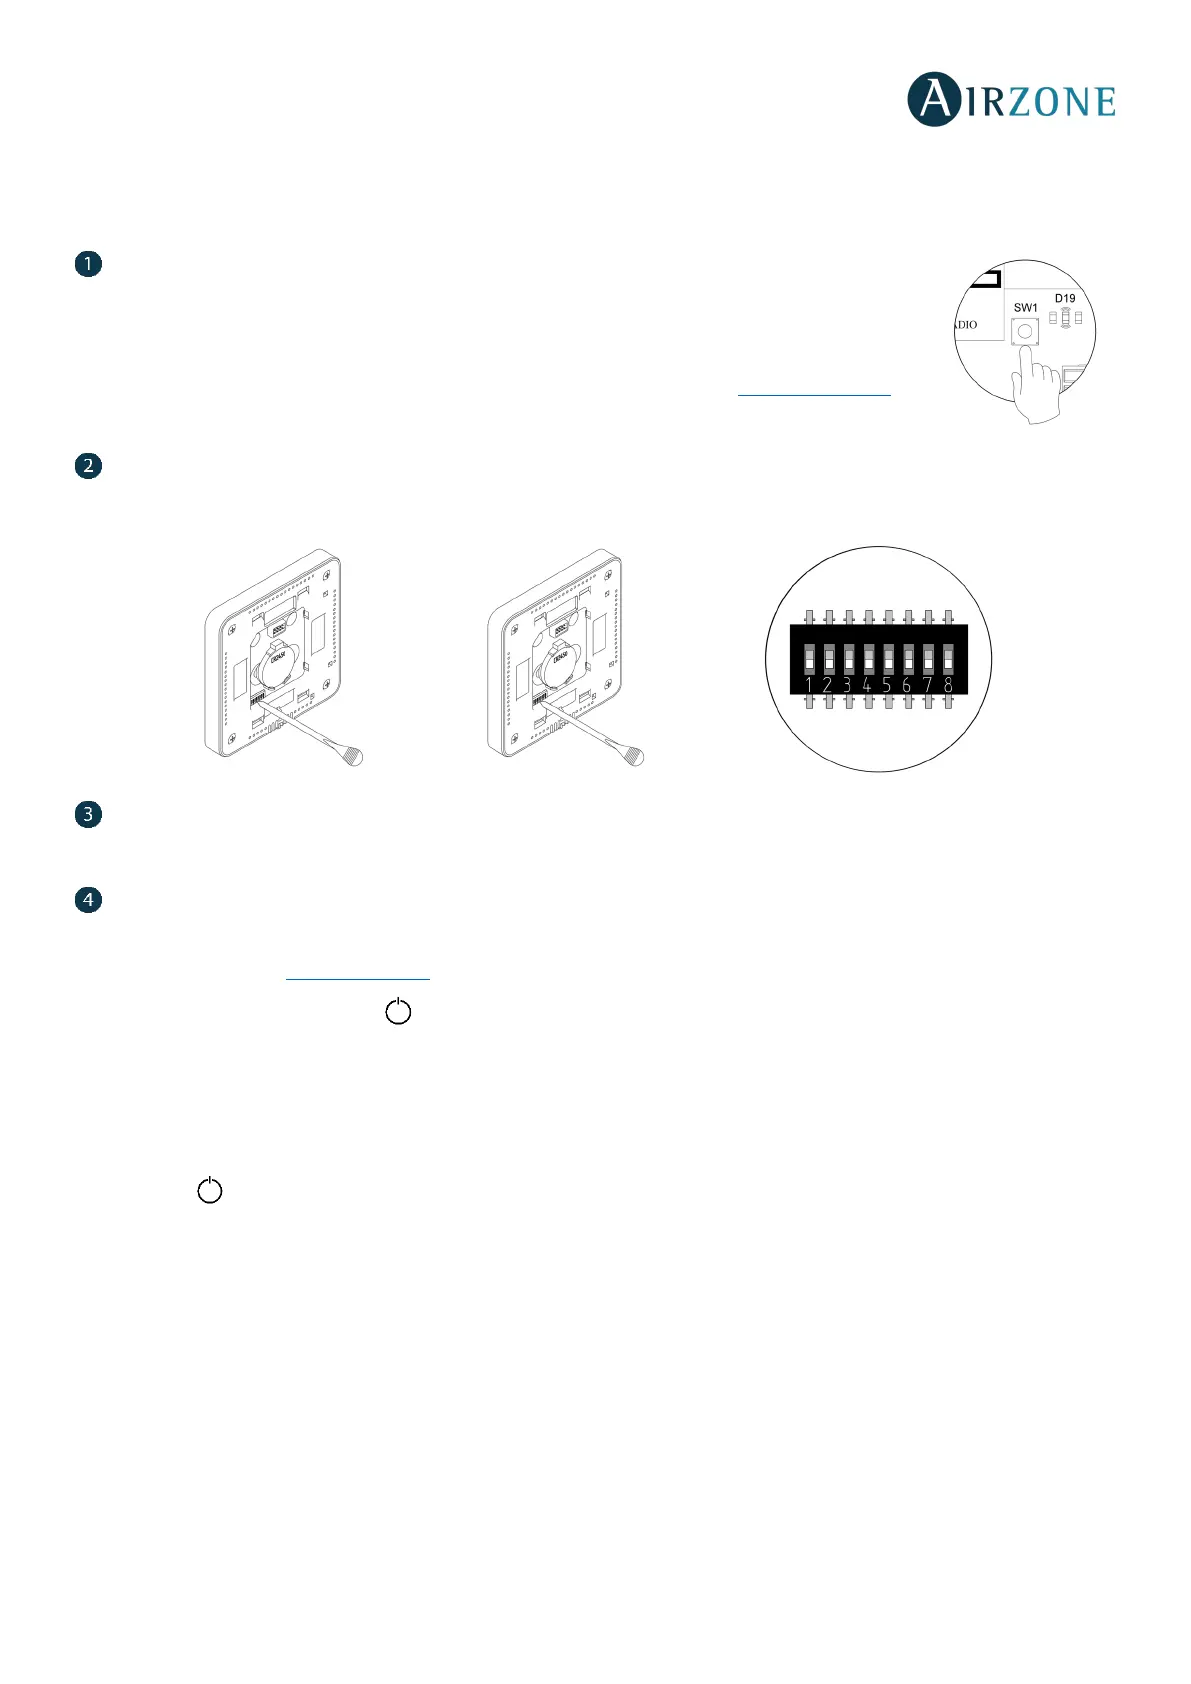
Open the radio channel. To do that, press on SW1. The LED D19 will remain solid red. Once open, you
have 15 minutes to make the association. If that period of time expires, start the process over again.
Remember not to open more than one module at the same time, it may alter the process. You can also
open the channel association radio through the Blueface and Think (see section System parameters
).
IMPORTANT: not to open more than one radio channel at the same time, it may alter the process.
Zone address
Select the zone associated to the thermostat pulling up the microswitch of the corresponding zone.
Associated outputs
If required, select other control outputs associated to the zone. The address zone will be the one with a lower value.
Other settings
Configure other functionalities of the LITE thermostat from the advanced configuration menu of a Blueface thermostat (see
section Advanced Settings, Zone parameters
).
If the association is correct, the icon will flash green 5 times. If it flashes red, it means the zone is already occupied. If it
flashes red twice, it means the thermostat is out of range.
Remember: If you need to change the zone number, reset the thermostat and start association process.
Lite thermostat reset
If you want to return your Lite thermostat to factory values, pull down all the microswitchs and reinsert the thermostat in its
base. The icon will flash green twice when the reset process is completed.
INITIAL CONFIGURATION EVALUATION
Check the following aspects:
- AC unit-system communication: Choose any mode (except STOP mode) and switch on the zone to generate demand.
Verify that the selected operation mode in the Master thermostat is shown in the indoor unit thermostat and the set-
point temperature changes.
- Opening-closing of the dampers and control outputs: Turn on the system and generate demand in all the zones. Then,
switch off and on all the zones to verify the associated control outputs are correct.
- Verify that the static pressure of the duct system complies with the air distribution network conditions where is
installed (check the Manufacturer’s Manual of the equipment if you need to modify this parameter).
Important: For security reasons, the last zone will take around 4 minutes to close.
 Loading...