21
5.1.2 Launching Clips
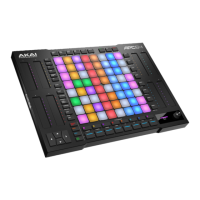
When Session View is active, pressing the pads in the pad grid will launch a clip if one is loaded. If the clip slot is
empty, it will stop playback on the selected track, or create a new clip if the track is record-armed.
To launch a clip, press a pad. Depending on the launch quantization value, the selected
pad will begin flashing green as it prepares to play. Once the clip begins playing, the
pad will slowly pulse green.
If a track is selected and record-enabled, a new clip will be created if there is not one in
the selected clip slot. See 5.1.3 Recording Clips for more information on creating clips.
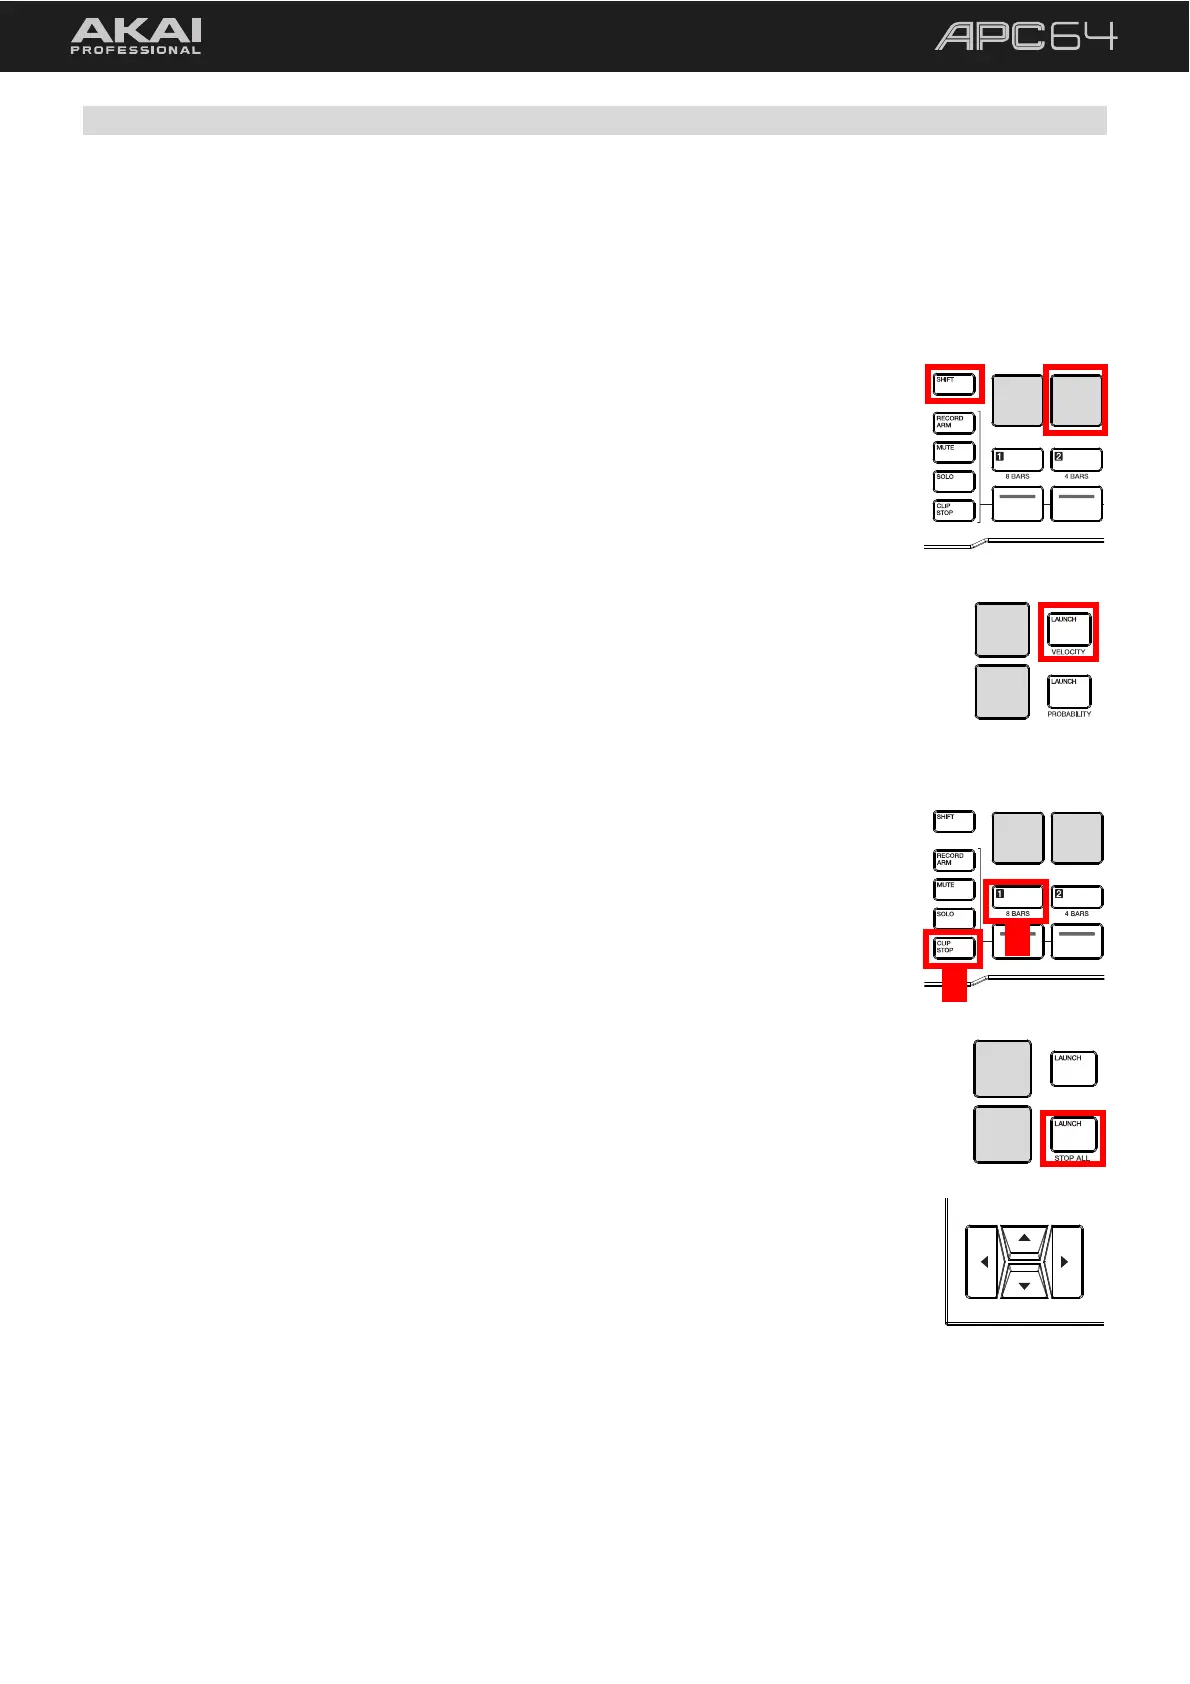
To select a clip without launching it, press and hold SHIFT and then press the pad.
In addition to launching individual clips, you can also launch an entire row of clips (called
a scene). This is useful for creating distinct song sections where you want several clips to
begin playing simultaneously.
To launch a scene (or row of clips), use the LAUNCH buttons on the right side of
the pad grid.
To stop a clip:
1. Press the CLIP STOP button to set the function of the Control Row.
2. Press the Control Row button that corresponds with the track of the clip you would
like to stop. The Control Row button will begin flashing until the clip stops (depending
on the global launch quantization value).
To stop all clips, press and hold SHIFT and press the Row 8 LAUNCH / STOP ALL
button.
To move the current matrix display view, use the cursors. Hold SHIFT and use the
cursors to move the 8x8 focus by eight rows or columns at a time. The red outline in
Ableton Live will move accordingly.
2
1
 Loading...