Identifier GUID-2DF70EB1-9D26-4051-8B7C-FB14A89925D8
Status Translated
装回显示屏部件
警告: 拆装计算机内部组件之前,请阅读计算机附带的安全信息,并遵循拆装计算机内部组件之前中的步骤。拆装计算机
内部组件之后,请遵循 拆装计算机内部组件之后中的说明。有关其他最佳安全操作信息,请参阅 www.dell.com/
regulatory_compliance 上的 Regulatory Compliance(管制标准)主页。
Identifier GUID-42877463-8CFB-44C6-9EBB-88ED1BC0B548
Status In Translation
Procedure
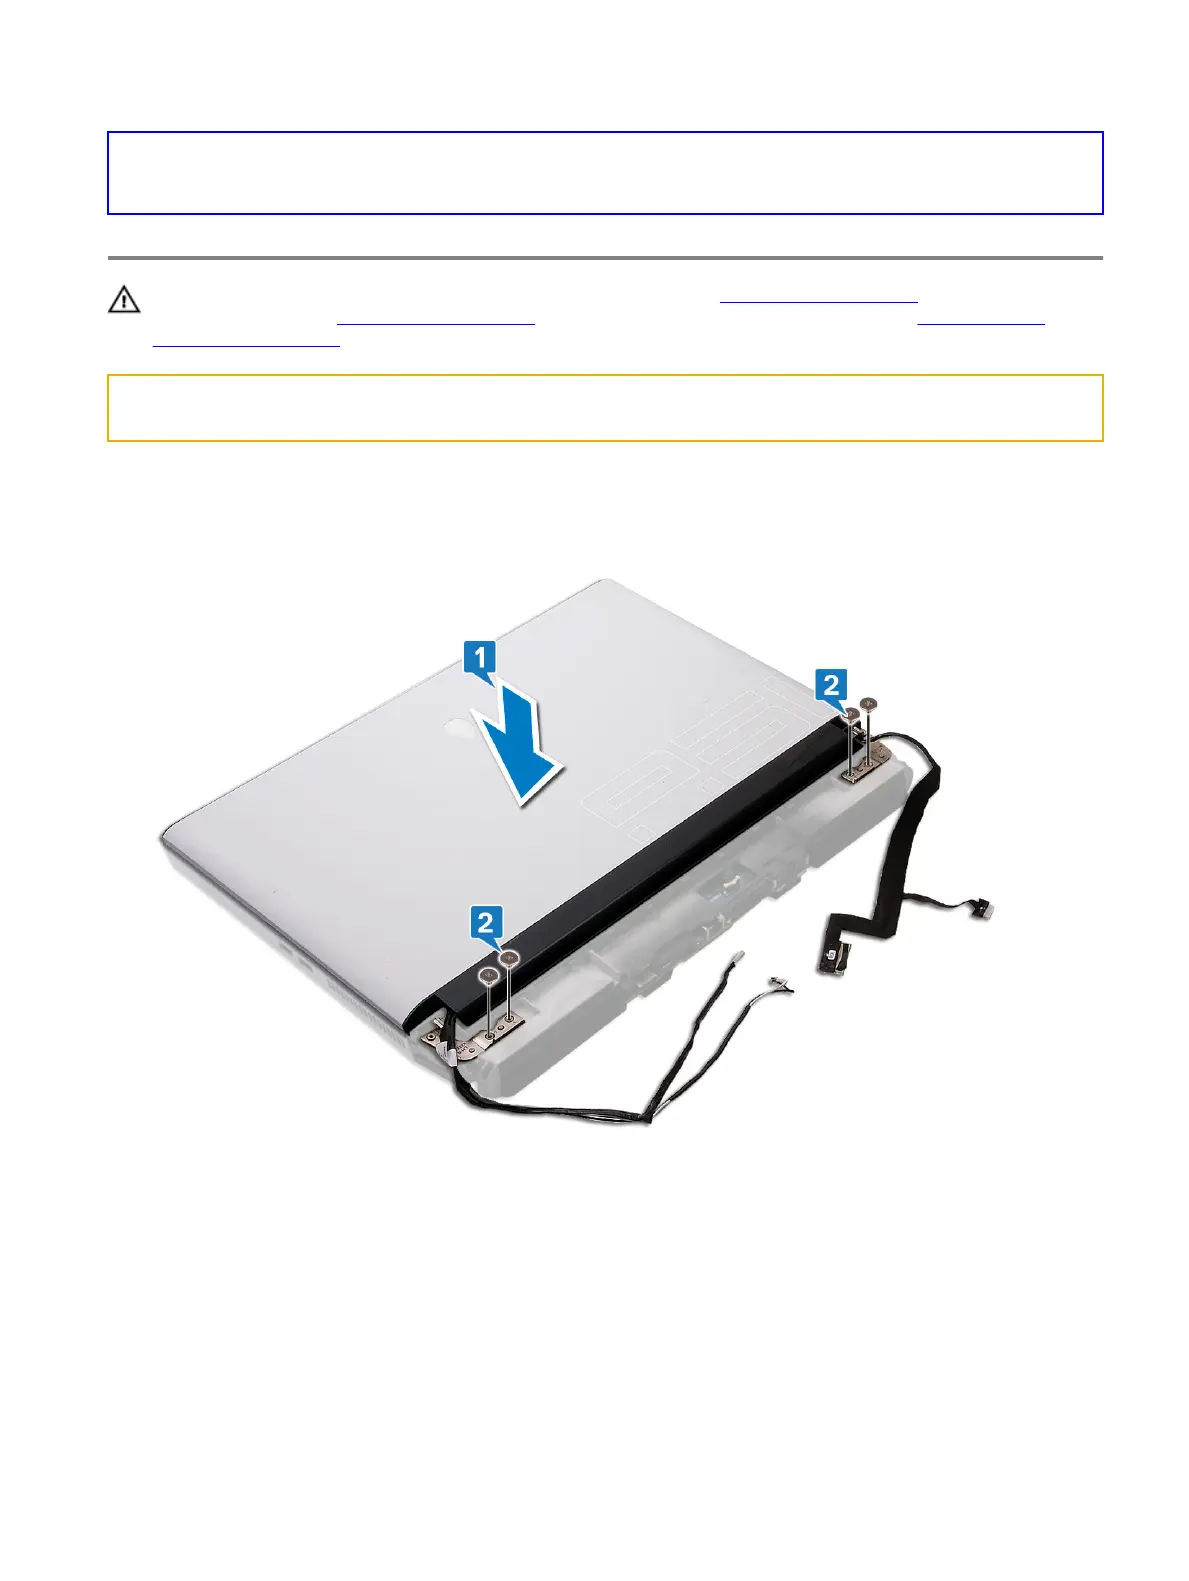
1 Align the screw holes on the display hinges with the screw holes on the palm-rest assembly.
2 Replace the four screws (M2.5x2.5) that secure the display assembly to the palm-rest assembly.
3 Turn the computer over.
4 Replace the two screws (M2.5x8) that secure the computer base to the display assembly.
5 Adhere the tobii cable to the computer base.
6 Route the antennas cable through the routing guides on the computer base.
7 Connect the tobii cable to the system board.
8 Adhere the display cable and the camera cable to the computer base.
9 Connect the camera cable to the system board.
10 Connect the display cable to the system board.
11 Align the screw hole on the display-cable bracket with the screw hole on the system board.
64