78
Installation, Operation and Maintenance Manual
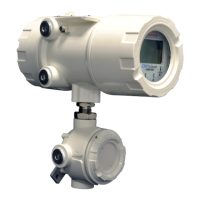
OXYvisor Optical Oxygen Analyzer
Follow the steps below to congure and trigger the Test Gas Insert feature of the OXYvisor. If you have already
setup the Test Gas Insert previously, via the software or the HMI, you can proceed to steps 3 and 4 to activate
and deactivate this feature manually.
Before conguring the Test Gas Insert, ensure that the auto calibration has been enabled [Address- 40131 (1
to activate and 2 to deactivate)].
1. To set the test gas insert time, set the value in minutes between 1-100 to address 40405
2. Set the test gas insert output to either Zero Gas (0X01) or Span Gas (0X02) to address 40407
3. Activate test gas insert (0x01), address 44009.
4. Deactivate/stop the test gas insert before specied time, set value (0x02) to address 44009.
The Auto-Cal feature in the OXYvisor has 4 dierent schedules. Each schedule can be activated/deactivated,
set up for 1st calibration time and calibration interval individually. First Schedule = [0], Second Schedule = [1],
Third Schedule = [2], Fourth Schedule = [3]
Follow the steps below to setup and trigger the Auto-Cal feature of the OXYvisor. If you have already setup
the Auto-Cal previously or via the software or the HMI, you can proceed to steps 15 and 16 to activate and
deactivate this feature manually. [Address- 44000 (write 4 to activate and 5 to deactivate)].
1. Set the auto calibration type (Register Address: 40130). The value can be either Dry Gas (0X01) or
Humid Gas(0x02).
2. Turn o auto calibration (Register Address: 40131). The value should be set to (0x02).
3. Deactivate each calibration schedule (Register Address: 40132, 40142, 40152, 40162). The value
should be set to (0x02).
4. Set the calibration interval for each schedule (Register Address: 40138, 40148, 40158, 40168). The
value should be between 0 – 5184000 which is 60days in seconds. For example, calibration interval of 1
calibration a day is 86400 seconds. Calibration interval of once a week is 604800 seconds. The value to write
to the register is in seconds.
5. Set the rst calibration time for each schedule(Register Address : 40140, 40150, 40160, 40170). The
value should be between the current time in seconds (UTC time) + the UTC time within the next 60 days.
For example, if the current date and time is February 13th, 2018 – 5:00PM, the UTC value in seconds is
A7.4.3 Congure and Trigger Test Gas Insert
A7.4.3 Congure and Trigger Test Gas Insert
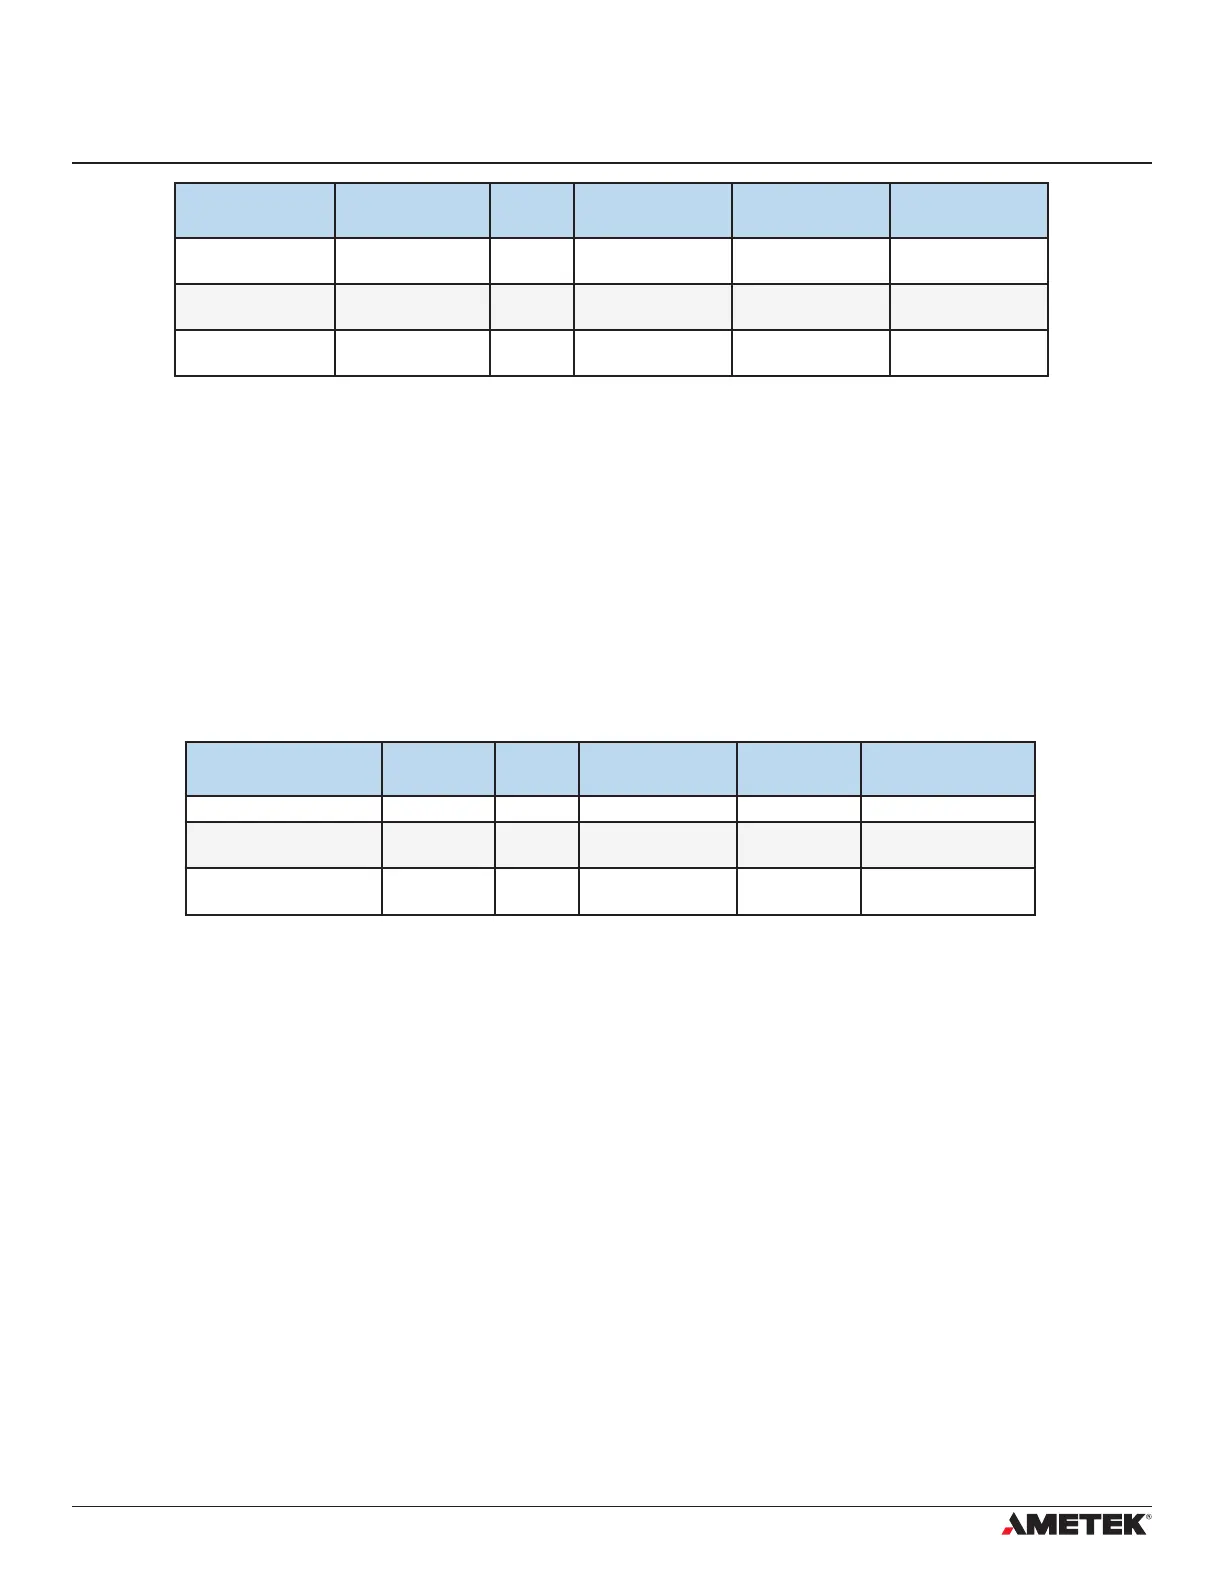
RELAY
REGISTERS
FIRST REGISTER MINUS
OFFSET
FUNCTION CODE DATA TYPE VALUE TO WRITE
Relay Test Number 44010 40000 6 Uint16 1,2,3 or 4 for
corresponding relay
Relay Test Position 44011 40000 6 Uint16 0=Open; 1=Close
Relay Test Status 44012 40000 6 Uint16 1=Activate;
2=Deactivate
REGISTER NAME FOR
TEST GAS INSERT
FIRST
REGISTER
MINUS
OFFSET
FUNCTION CODE DATA TYPE VALUE TO WRITE
Time Period 40408 40000 16 Float 1-100 (in mins)
Dene Output 40410 40000 6 Uint16 Zero Gas (0X01) or
Span Gas (0X02)
Activate/Deactivate 44009 40000 6 Uint16 Start (0X01) or Stop
(0X02)