1-58
S-4000
Revised 01/2005
e-mail: service@amfreece.cz; parts@amfreece.cz; website: www.amfreece.com
Phones: +420 582 309 146 (Service), +420 582 309 286 (Spare Parts); Fax: +420 582 360 606
ADJUSTMENTS
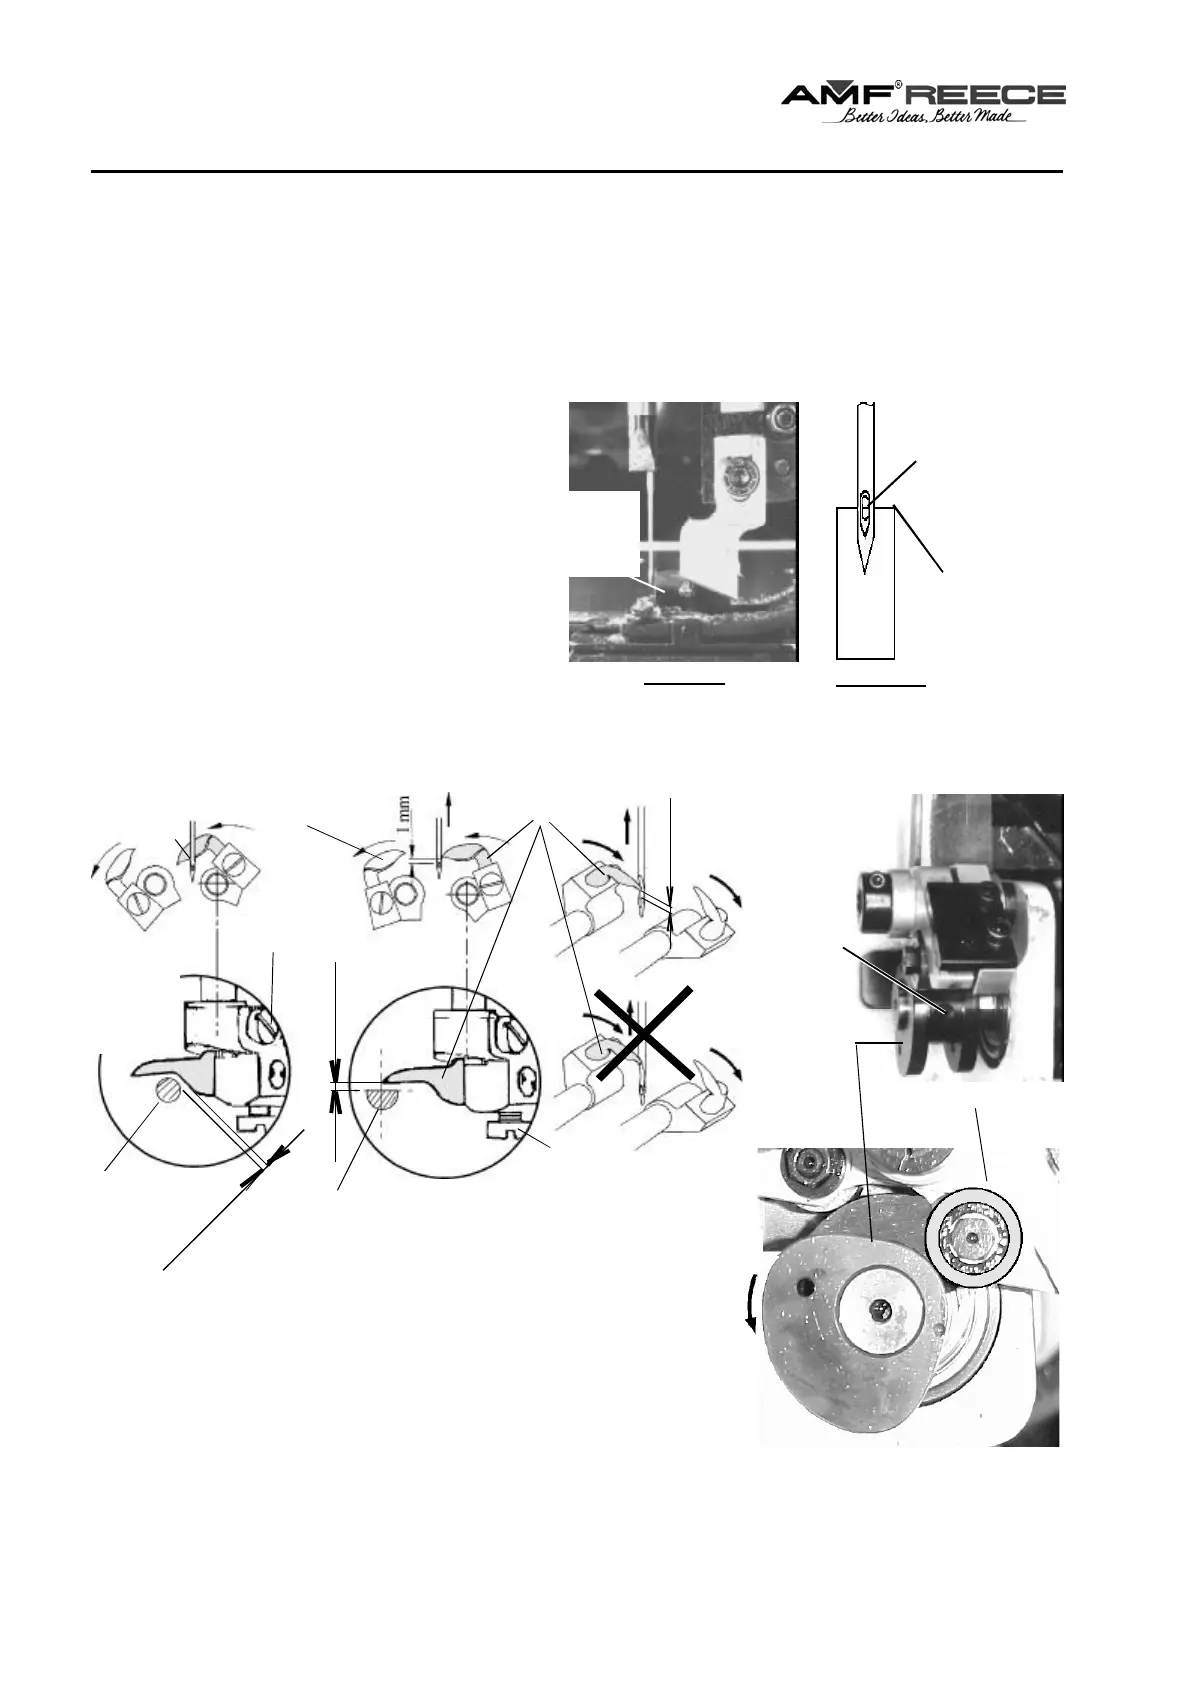
Looper Position
Note: Ensure the machine is in the home position, with the needle top dead center.
1. Position the needle bar height 16 mm (5/8") from the top of the throat plate to the center of the needle
eye. Check the height with gauge number 22.0209.0.000.
2. Dismantle the cover, clamp plate, throat plate and
pick-up hook for better adjustment of loopers.
3. Install the first looper with looper holder and trim
knife, lightly tighten.
4. Position the looper and holder to ensure the
needle will pass on the inside, (right side).
5. When the machine is in home position (the needle
is maximum up, cam follower bearing
should be on its lowest position on the looper cam
(see picture), the needle must freely move around recess
of the looper heel Πwith minimal clearance.
Adjust this clearance after loosing the screw •.
Side View
Front View
Top of
gauge
Center of the
needle eye
aligns with the
top of the gauge
Set screws
Looper cam
Needle
height
gauge
Œ
0.4mm (1/64”)
6. During the second puncture (see picture 4, page 1-59), when the
needle bar returns from lower position to the home position, the tip
of the looper must cross the axis of the needle 1 mm above eye of
the needle. Adjust minimal clearance in this position after loosing the
screw Ž and turning the looper Œ.
If the crossing of the looper is bigger than 1 mm, turn looper cam anticlockwise.
If you change the looper cam position, it is necessary to check needle to looper heel position.
Œ
•
Ž
minimal clearance
•
Needle
Needle rising
1 mm
Cam Follower
Bearing
Set the side of
each looper to to
clear the needle
by 0,4 mm (1/64”)
maximum.
Set the of each looper as close
as possible to the needle,
without touching.
 Loading...