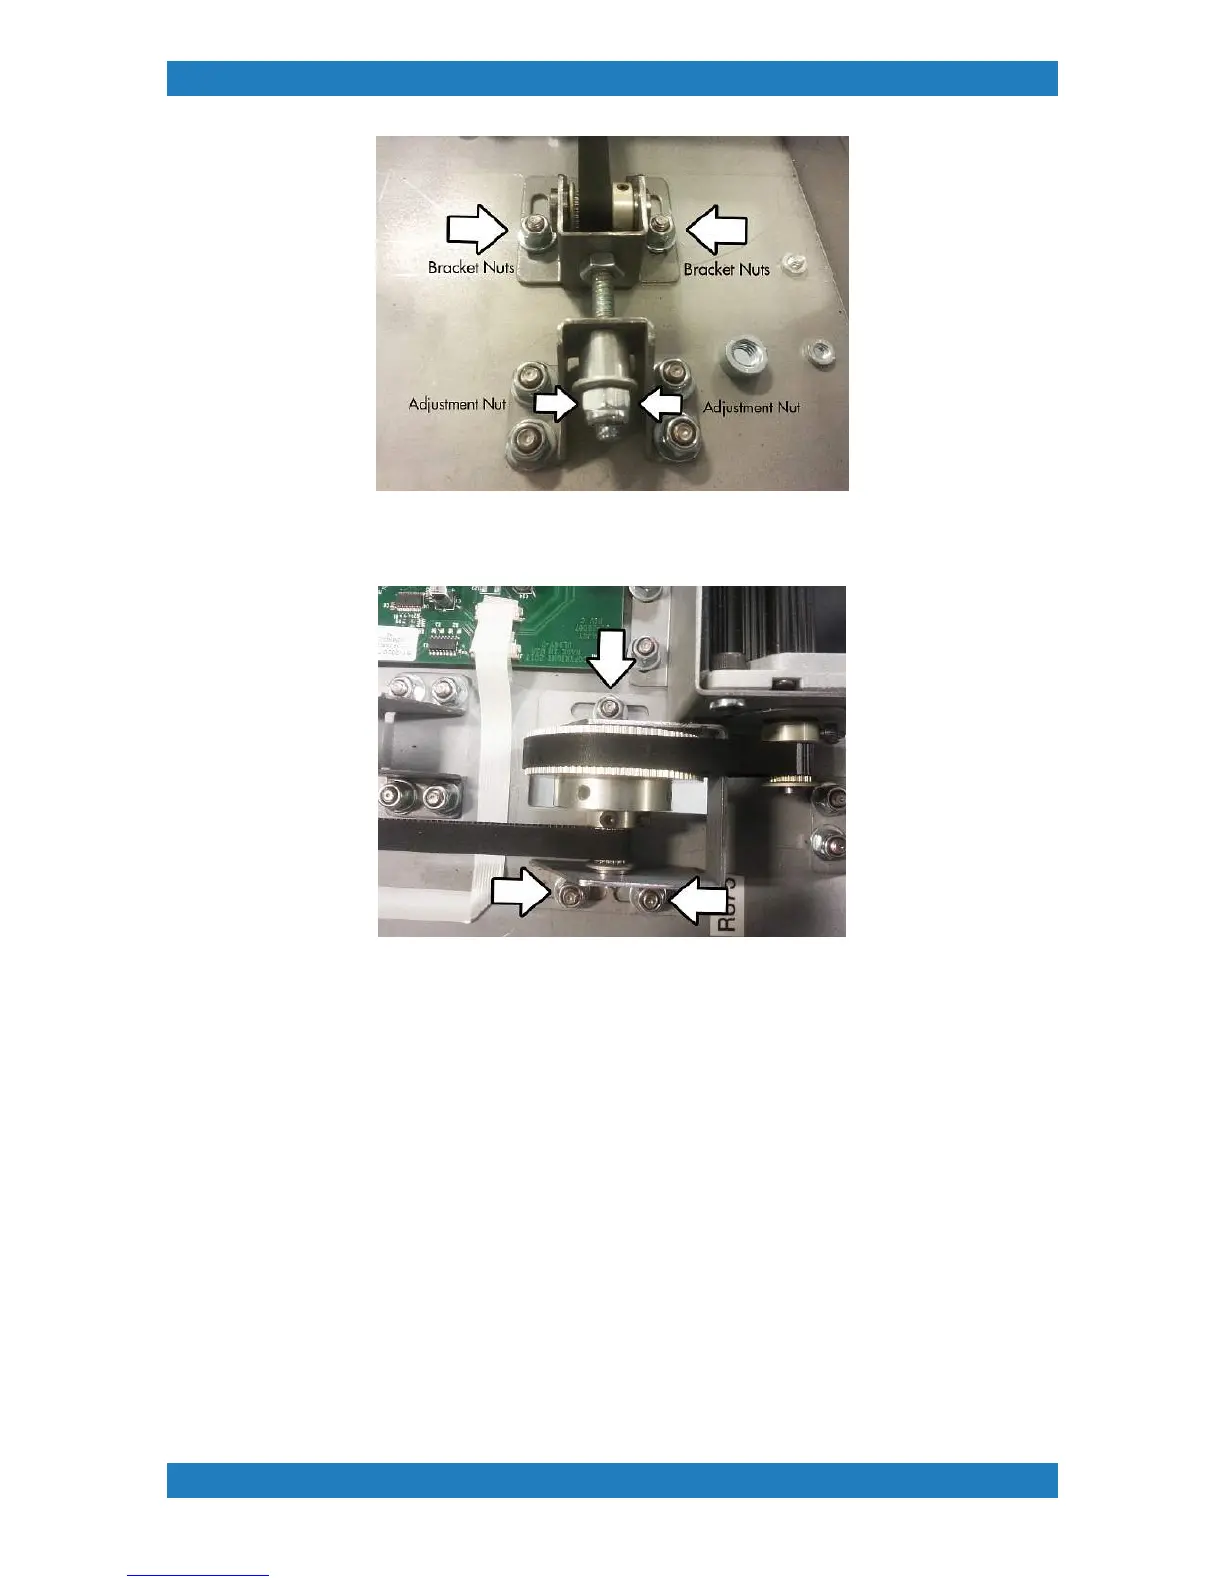
Photo 2.3.7
4. Loosen the three nuts holding the pulley bracket. See photo 2.3.8
Photo 2.3.8.
5. With the pulley bracket loose you can now adjust the tension by moving the pulley bracket foward or back
until the required tension is achieved. Once adjusted tighten the screws back to hold down the pulley bracket
in place and measure the tension using a Gates belt tension meter. The specifications for the table motor belt
are below.
Mass (M) 001.4 g/m
With (W) 009.0 mm/r
Span (S) 0047 mm
............................................................................................................................................................
The correct tension for the table motor belt is 9 to 12 n (32 to 43 ozf). Measurements should be made at
several positions of the pulley to account for any eccentricity.
Please note: When adjusting the tension on the table motor belt you will
have to also re-tension the table belt again. Please see section 2.2 for
instructions on how to tension the table belt.
6. Retighten all screws and reverse these steps to place back your table assembly into your printer. Don't
forget to re plug all cables back to the table board.