Follow these steps backwards to assemble your carriage. Once the machine is
powered on we recommend calibrating the print heads and doing 1 heavy Clean.
3.6 Ricoh Carriage Controller Board Replacement
Tools Needed
o
Phillips Screwdriver
o
Ricoh Gen 4 Carriage Controller (P/N: 51-20003-001)
Ricoh Carriage Controller can be damaged is moisture or ink come in contact with the board. Electrical
surges or improper cable connections can also cause the board to become damaged. A red LED light will be
on when there is damage to the board.
1. Begin by releasing your carriage and remove your print head cage.
2. Remove all print head boards see section 3.6
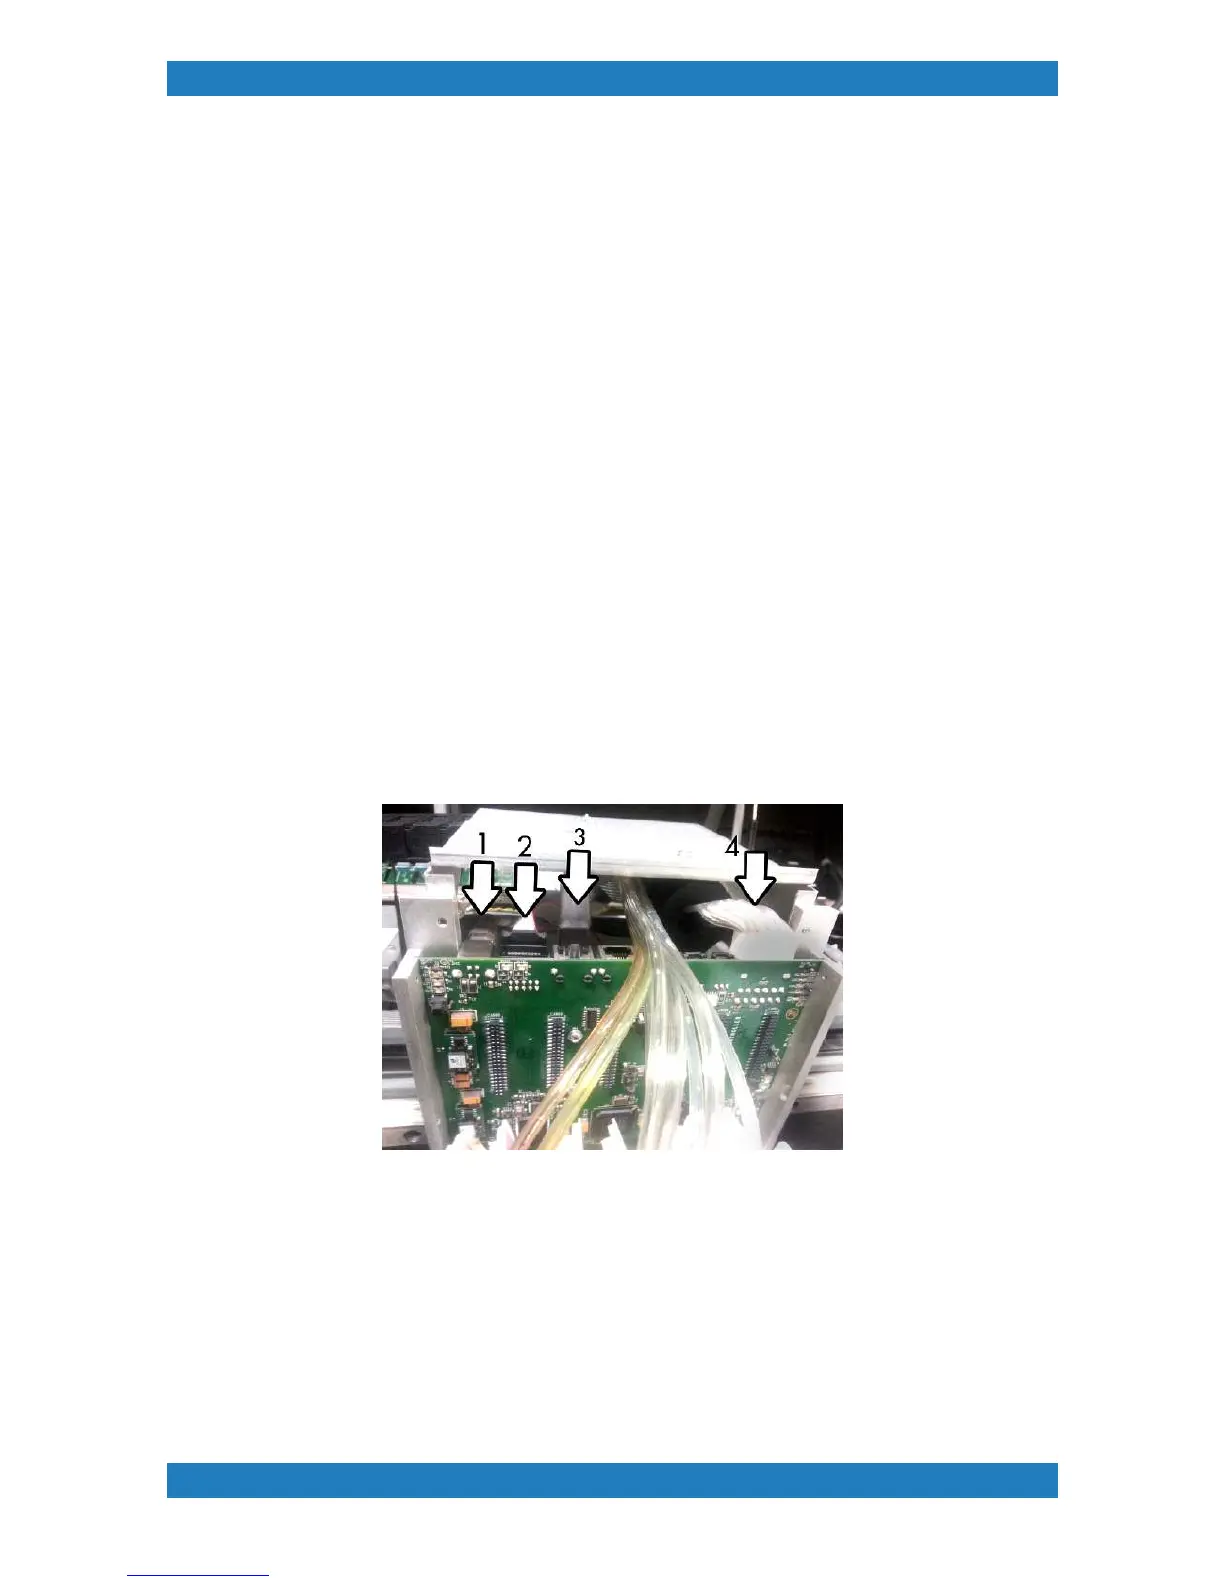
3. Unplug all cables from the Ricoh Carriage Board. See photo 3.6.1
Photo 3.6.1
4. Remove the 4 screws located in the back of the carriage to remove the top carriage cover. One of the
screws will have a ground cable connected to it. See Photo 3.6.2