Model 101/2100 Doors Service & Installation
TITLE:
99-13312-S001 Model 101/2100 Doors Service &
Installation
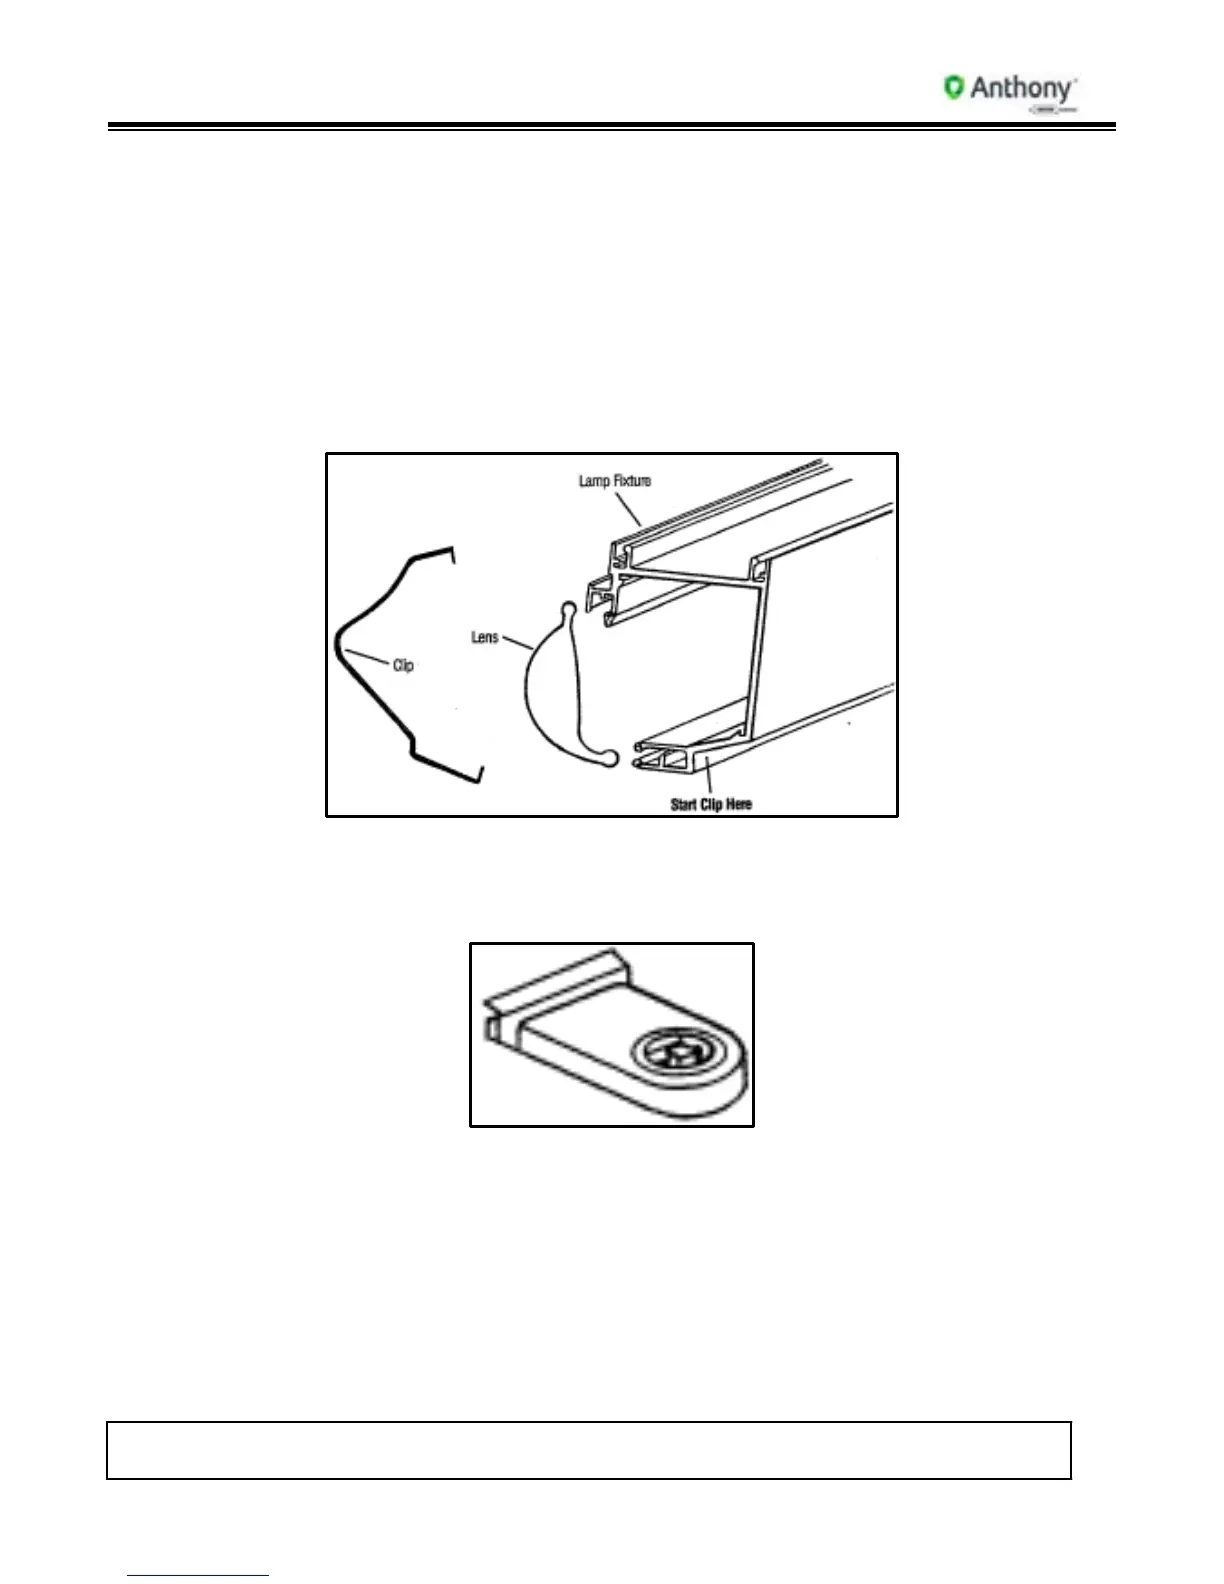
3. Remove top and bottom spring steel clips. Insert small flat-head screwdriver under clip
to release clip from side of fixture. On one side at a time, pull clip out of pre-punched
holes in side of mullion.
4. Gently pull clips away from fixture and set clips aside for re-installation.
5. Remove “ELS” lens. Starting at the top, pull lens away from front of light fixture, next
to frame mullion. (If necessary, a small flat-head screwdriver can be inserted between
lens and back mullion plastic to ease lens out of groove.) There is no need to remove
lens from the bridge. (The “bridge” is the black or clear plastic piece connecting the
two lenses at the back of the fixture.)
6. Remove bulb.
7. From the front of the socket, depress both sides of socket and push socket out through
front of mullion.
8. Cut ballast lead wires to socket as close to socket as possible.
9. To replace a socket, insert socket into access hole in mullion and push until tabs on
side of socket snap in place on back side of mullion.
10. Insert ballast lead wires into socket connections.
11. Re-install bulb, lens and front contact plate.