Chapter 2: Installation
16 1X-X3 Installation Manual
Note: Standard supervised outputs are polarity sensitive. Observe polarity or
install a 1N4007 diode or equivalent to avoid inverted activation issues.
Connecting the extinguishing actuator output
Note: Observe the polarity of the extinguishing actuator output to ensure proper
operation.
WARNING: Risk of death or serious injury. Test the line supervision (for open
and short circuit faults) and the activation function before connecting the
extinguishing agent to the actuator.
The extinguishing actuator output is the most critical output of the system, as it
controls the release of the extinguishing agent into the extinguishing area.
A special end-of-line circuit (the 2010-1EXT-EOL board) is required for proper
operation so that the wiring to the extinguishing agent actuator is supervised.
Note: To ensure reliable operation, locate the end-of-line board as close as
possible to the extinguishing actuator device.
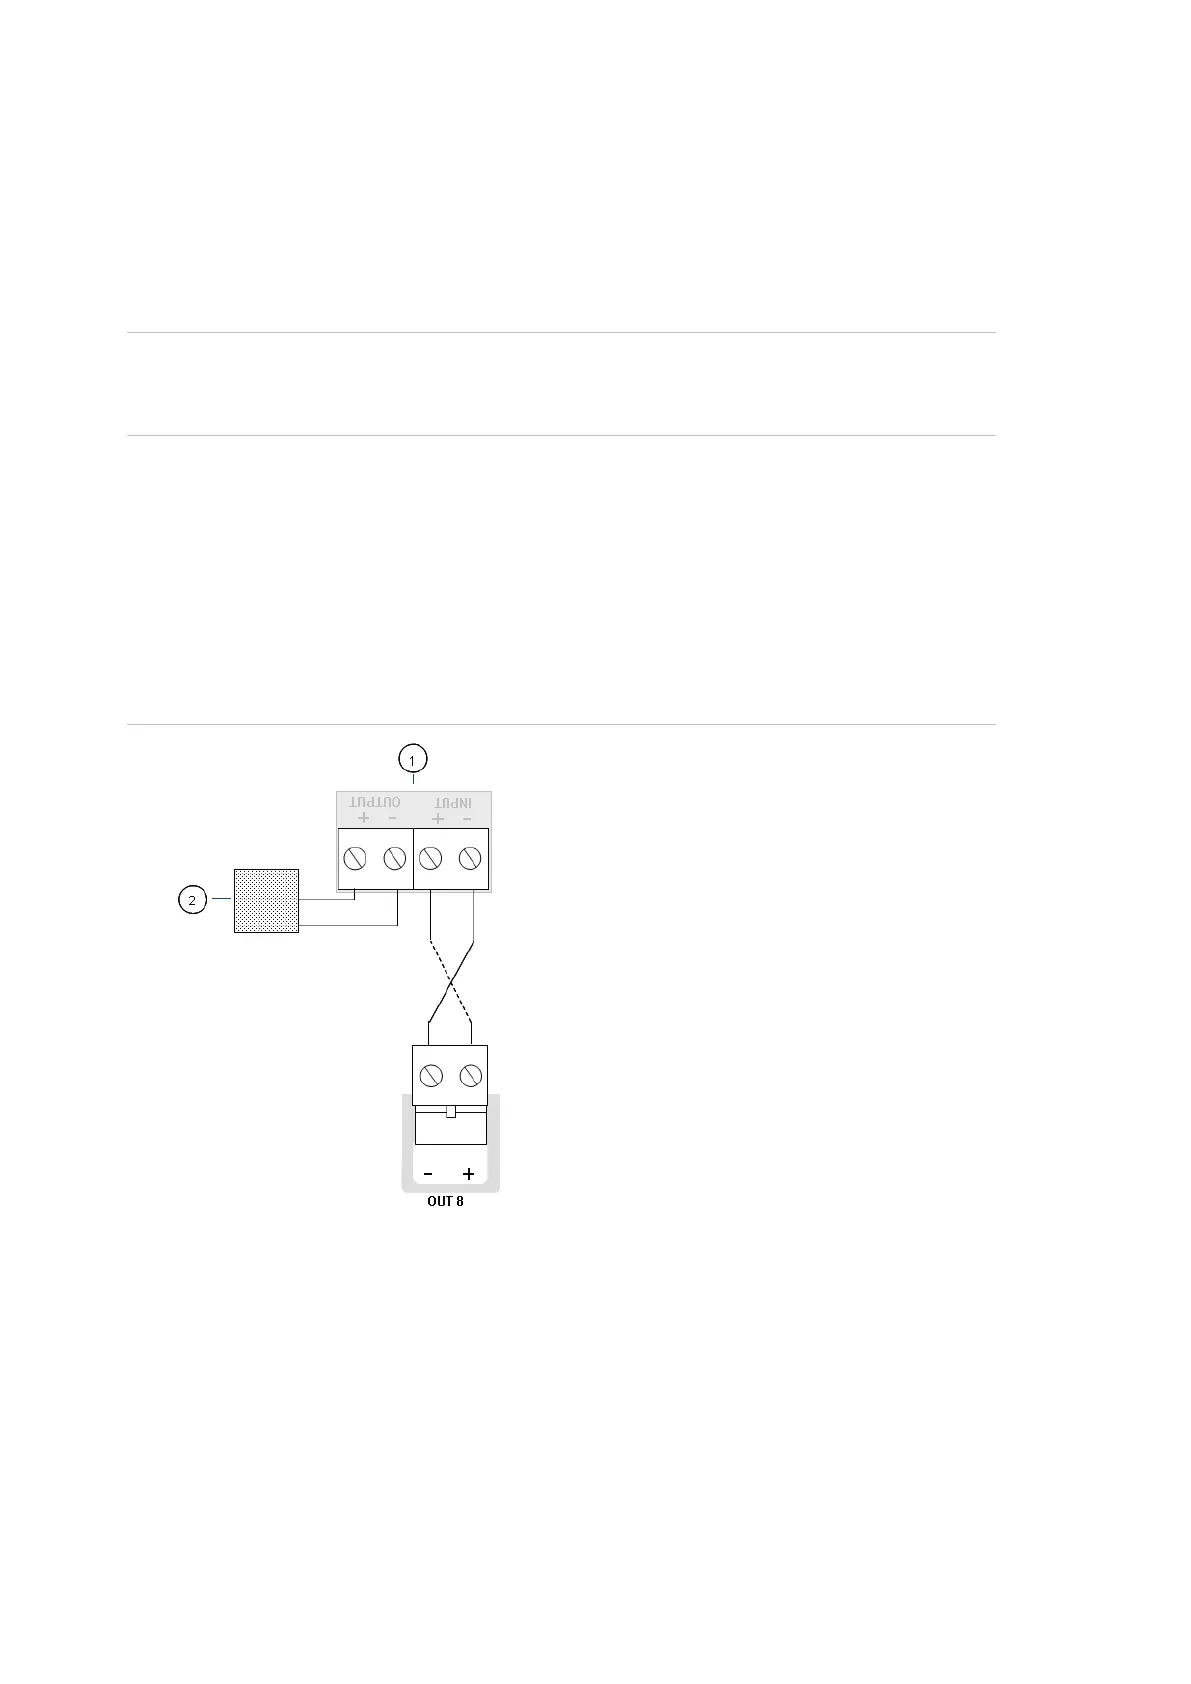
Figure 7: Control panel extinguishing actuator connection
1. 2010-1EOL-EXT end-of-line board
2. Extinguishing actuator device
Connecting the mains power supply
Note: To avoid unwanted arcing, connect the mains power supply before
connecting the batteries.
The control panel can be operated at 110 VAC / 60 Hz or 240 VAC / 50 Hz
(+10% or −15%).
 Loading...