4. Lamp & lamp house
12
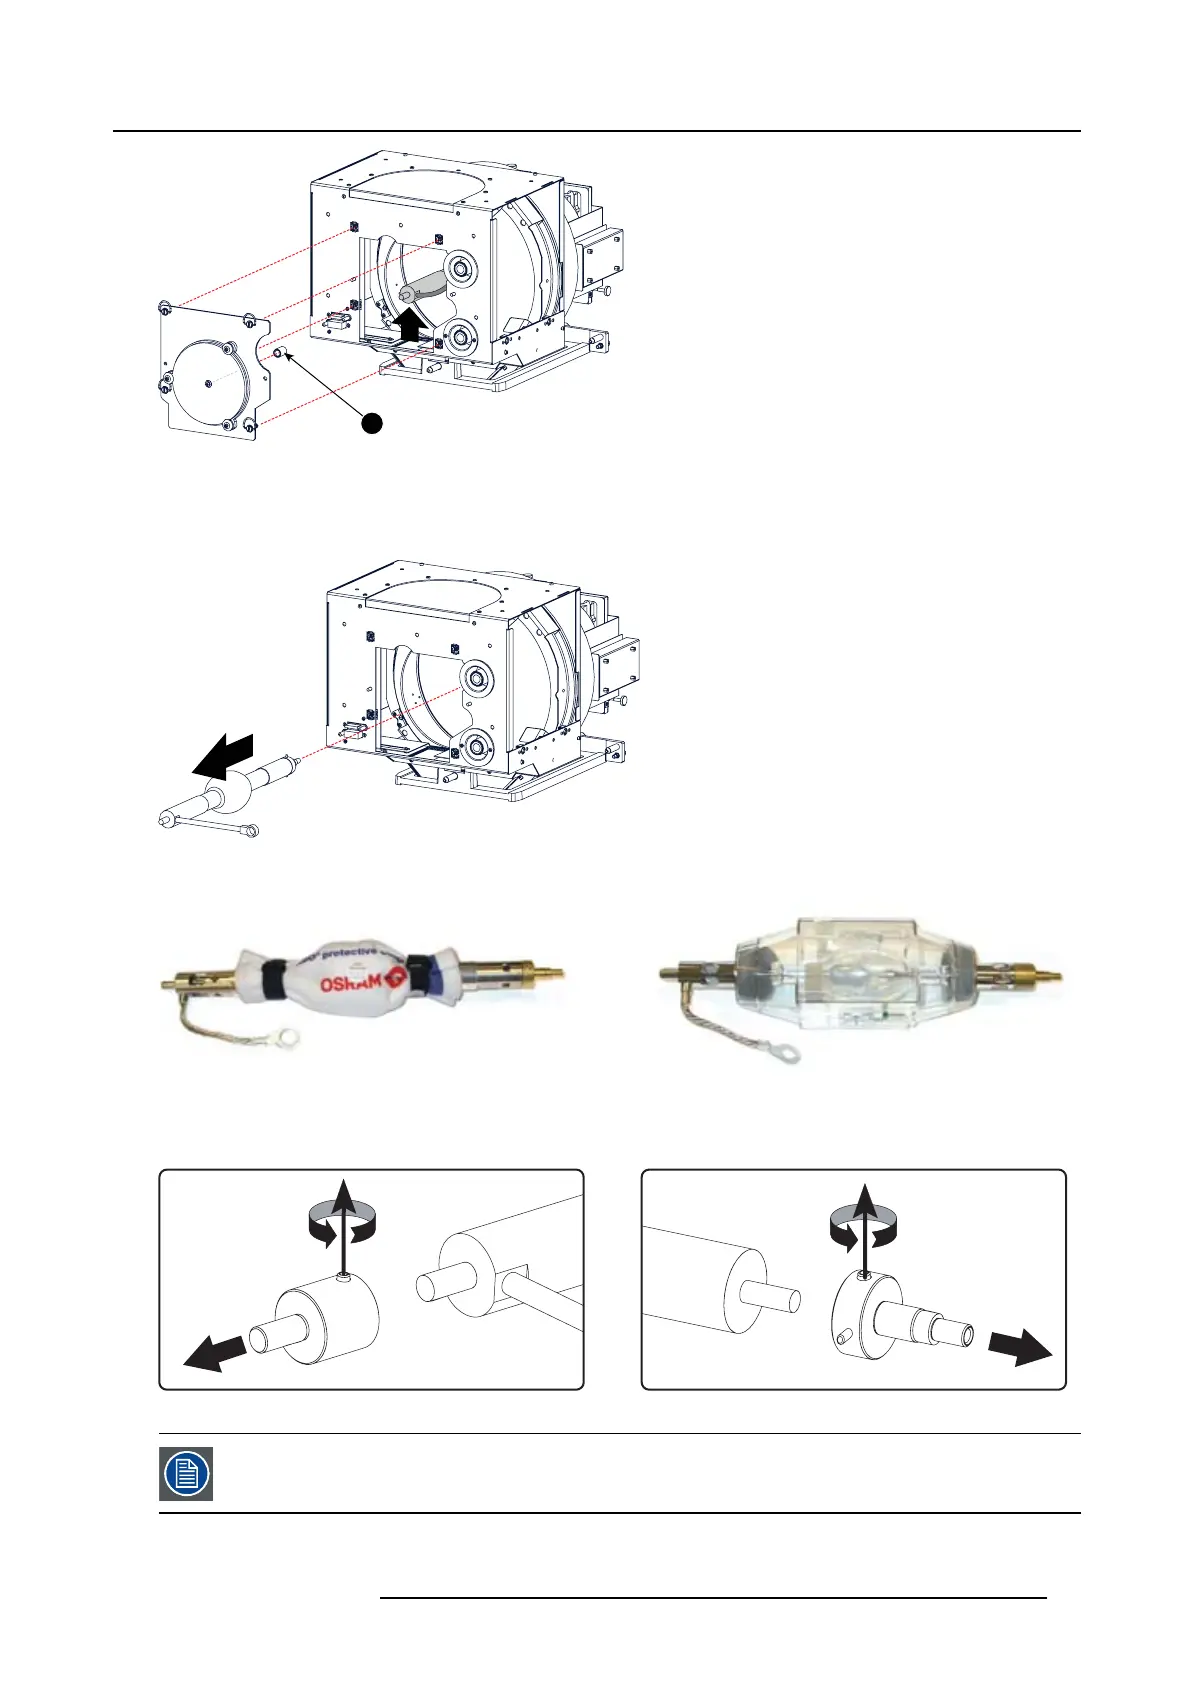
Image 4-11
6. Gently r emove the xenon lamp o ut of the Lam p H ous e. Do not use e xcessive force upon the xenon lamp. Normally the xenon
lamp will eas ily slide out the cathode socket of the Lamp House.
Warning: Supporting the xenon lamp with one hand w hile pulling it out with other hand prevents it from bumping aga inst the
chassis o f the Lamp House.
Image 4-12
7. Place the xenon lamp in its protective container or wrap the x enon lamp in a pr otective cloth and secur e w ith two binders.
Image 4-13
Left: Xenon lamp wrapped in a protective cloth. Right: Xenon lamp captured in a protective container.
8. R emove the adapter(s) from the xenon lamp by releasing the h exagon socket head set screw of the lamp adapter as illustrated.
Use for that a 2,5 mm Allen wrench.
Image 4-14
Reinstall the UV blocker assembly and the side cover in case you d o not intend to install another xenon lamp
immediately in the Lamp House.
R59770491 DP2K-32B 30/04/2010 39