4. Lamp & lamp house
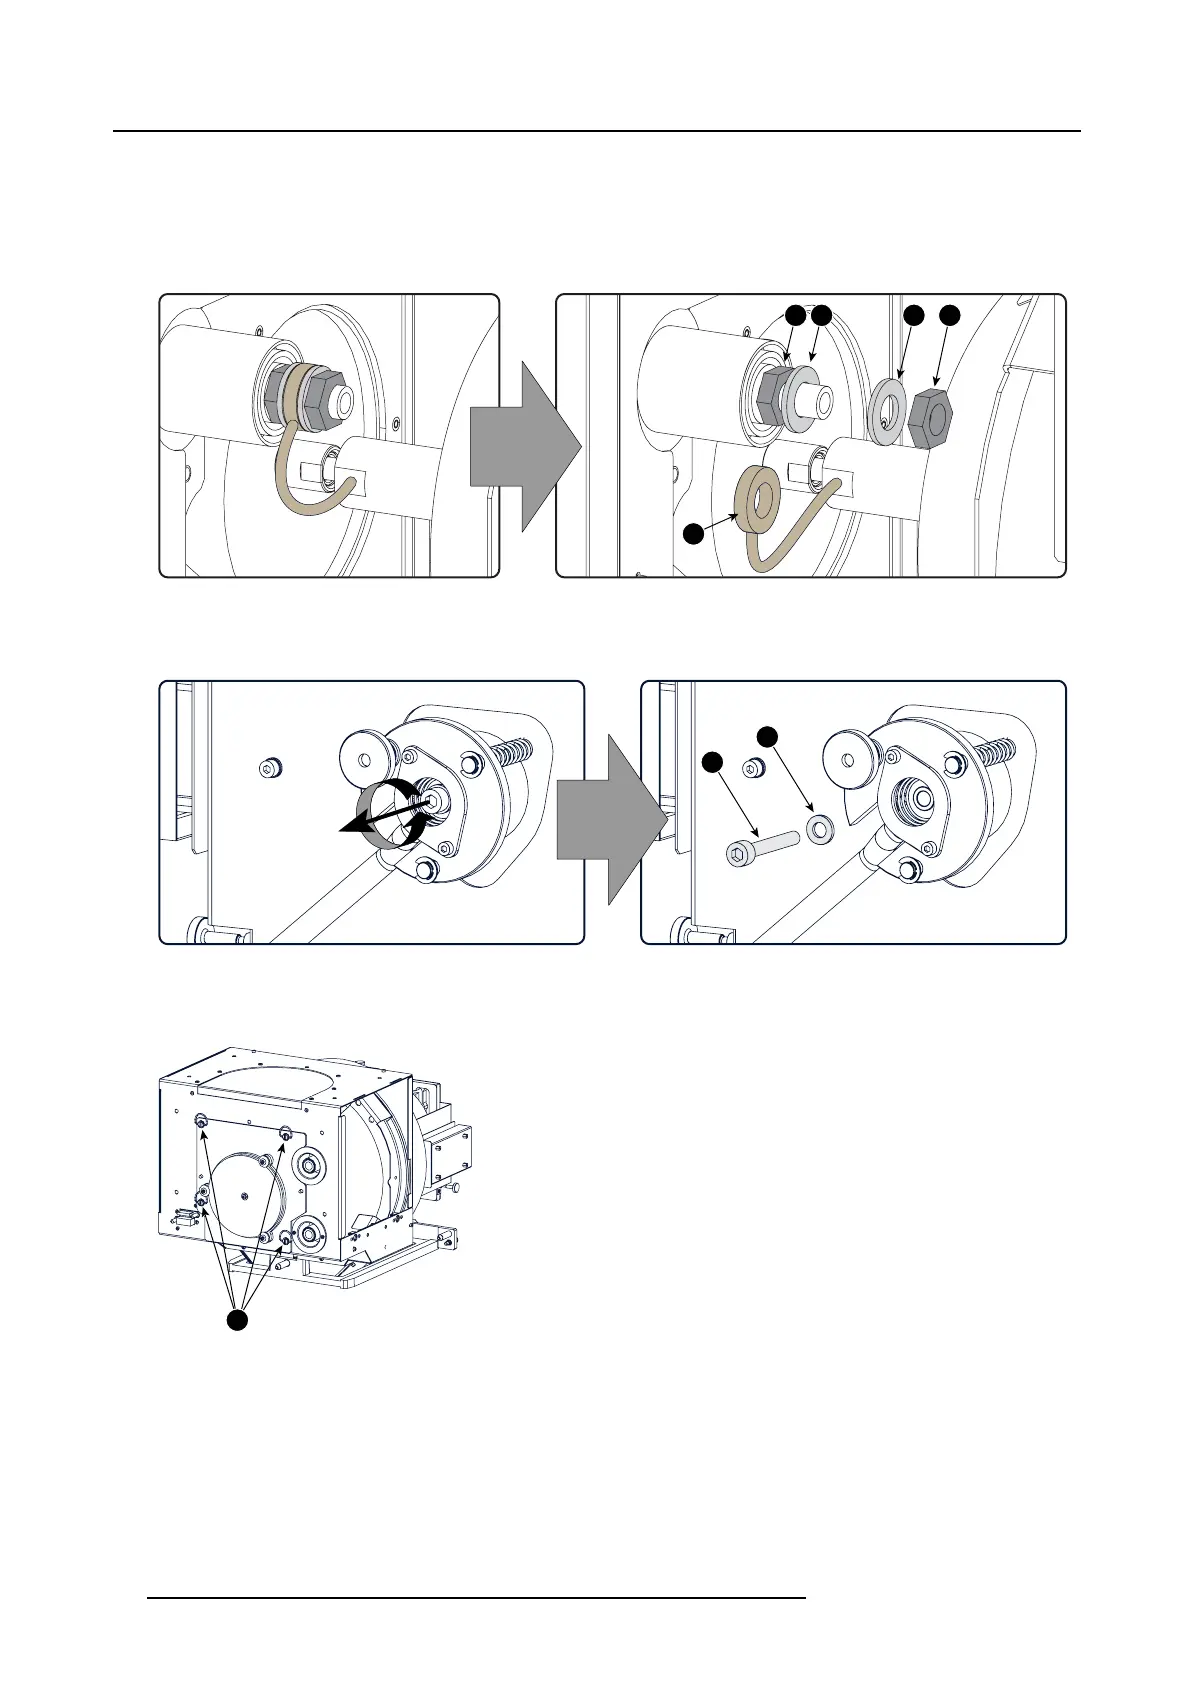
2. R emove the anode wire lug (reference 3 image 4-8) from the anode so cket. Use for that two open ended spanners of 22 mm.
Hold the first nut (reference 4) with one spanner while releasing the second nut (reference 5 image 4-8) with the other spanner.
Tip: Place the flat washers (reference 6 & 7 image 4-8) and nut back on the rod after the lug is rem oved.
Note: The most r ecent Lamp Houses for the DP2K -32B makes it possible to remove the anode socket together with the x enon
lamp from the Lamp House. The anode socket can be release from the xenon lamp once the xenon lamp is safely
sheltered in its protective container or wrapped in a protective cloth.
4 6
3
7 5
Image 4-8
3. R emove the hexagon s ocket head cap screw (reference 9) which fasten the cathode of the xenon lamp. Us e a 5 mm Allen
wrench.
Note: The cathode wire remains in its position after the s crew (reference 9) and washer (reference 10) are removed.
9
10
Image 4-9
4. R elease the four quarter turn screws (reference 2 image 4-10) of the UV blocker assem bly as illustrated. Make s ure that the
anode support remains in its position w
hile releasing the screws.
Caution: Ensure that you w ear protective clothing, a full face shield and protective gloves.
2
Image 4-10
5. Support the xenon lamp inside the Lamp House with one hand while rem oving the UV blocker assem bly from the lamp house.
Note that some xenon lamps are installed w ith an anode adaptation bushing (reference 12 image 4-11) .
Warning: Supporting the xenon lamp with o ne hand to prevents it from bumping against the chassis of the L amp House.
38
R59770491 DP2K-32B 30/04/2010