4. Lamp & lamp house
2,5 Nm
Image 4-15
Mount adapter
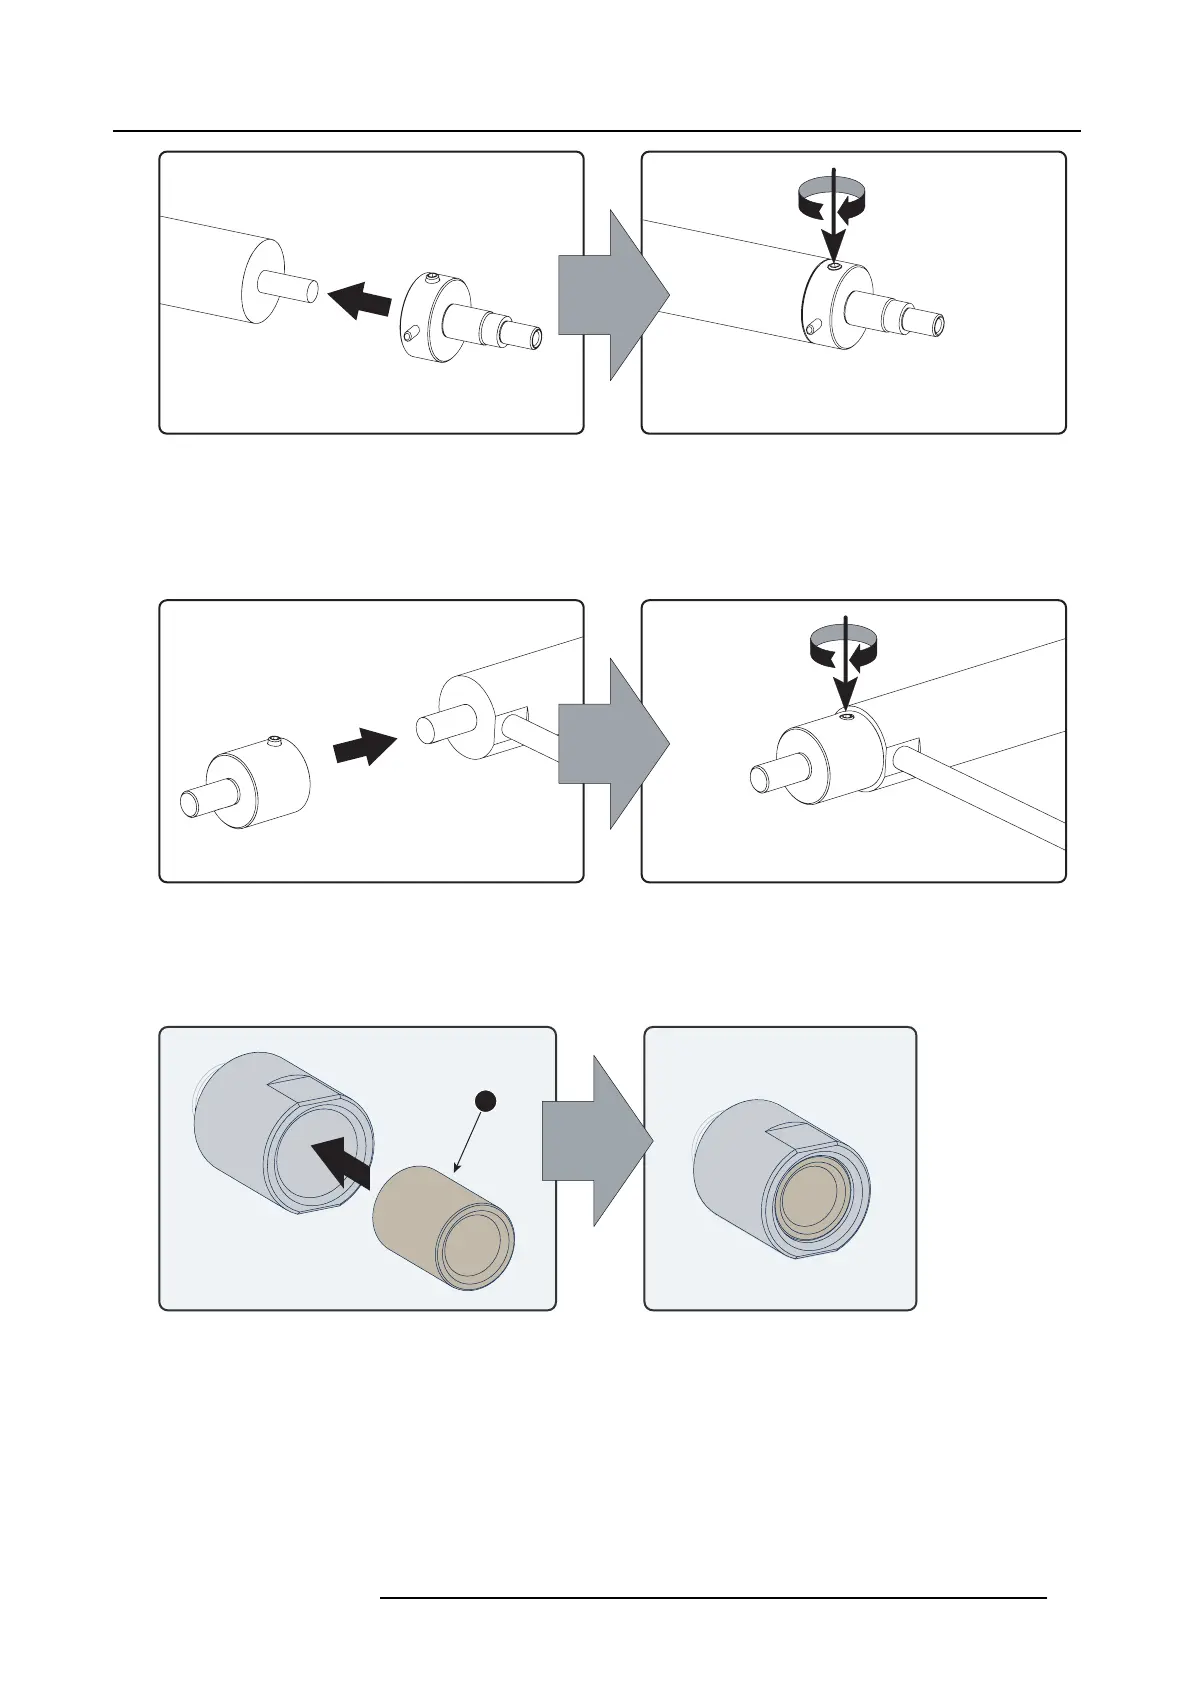
2. D oes the xenon lam p you want to ins tall require an anode adapter?
Tip: See "Introduction", page 32, supported xenon bulb lamps to know if your lam p requires an anode adapter.
If yes , install t he appropriate lamp anode adapter upon the anode of the xenon lamp. Fasten the set screw of the anode adapter
with a torque of 2,5 Nm (1,84 lbf*ft). Use for that a torque wrench with a 2,5 mm Allen socket. Mak e sure that there is full contact
between the adapter flat su rface and the lam p base.
2,5 Nm
Image 4-16
If no , make sure that there is no anode adapter installed up on the anode of the xenon lamp.
3. D oes the x enon lamp you want to install require an anod e adaptation bushing ins ide the anode support?
Tip: See "Introduction", page 32, supported xenon bulb lamps to k now if your lamp requires an anode adaptation bushing.
If yes, insert the anode adap tation bus hing (ref 4) into the integrated anode suppor t of the UV blocker.
4
Image 4-17
If no , make sure that there is no anode adaptation bushing inserted into the anode support.
4. R emove the protective packin
g from the xenon lamp and gently insert the xenon lamp into the Lamp Hous e as illustrated. Lam p
cathode first, M ake sure that the w ire of the lamp anode is upwards oriented. While inserting the lam p, ro tate it slightly, engaging
the pins (reference 11) of the cathode ada pter in the foreseen s lots. This is to ensure the lamp cathode is c ompletely inserted.
Keep supporting the anode
of the lamp w ith one hand onc e the xenon lamp is in position.
Caution: Ensure that you w ear protective clothing, a full face shield and protective gloves.
Tip: Write down the serial num ber of the xen on lamp. You w ill need this while updating the lamp parameters after installation
of the xenon lamp. The s erial num ber of the xen on lamp is engr aved in the ne ck of the xenon lam p.
R59770491 DP2K-32B 30/04/2010
41