4. Lamp & lamp house
4 6
3
7 5
25 Nm
Image 4-21
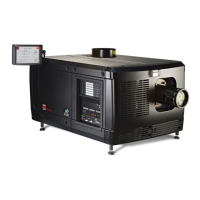
8. C heck the cathode connection inside the lamp house. Use an 22 mm open-end wrench to hold the fi rst nut while fastening the
second nut on the rod with a torque of 25 Nm (18,4 lbf*ft) using a torque wrench with 22 mm hexa
gon socket. Ensure that there
is a flat was her at both sides of the wire lug.
Caution: These cathode connections must be checked with every lam p chan ge!
25 Nm
Image 4-22
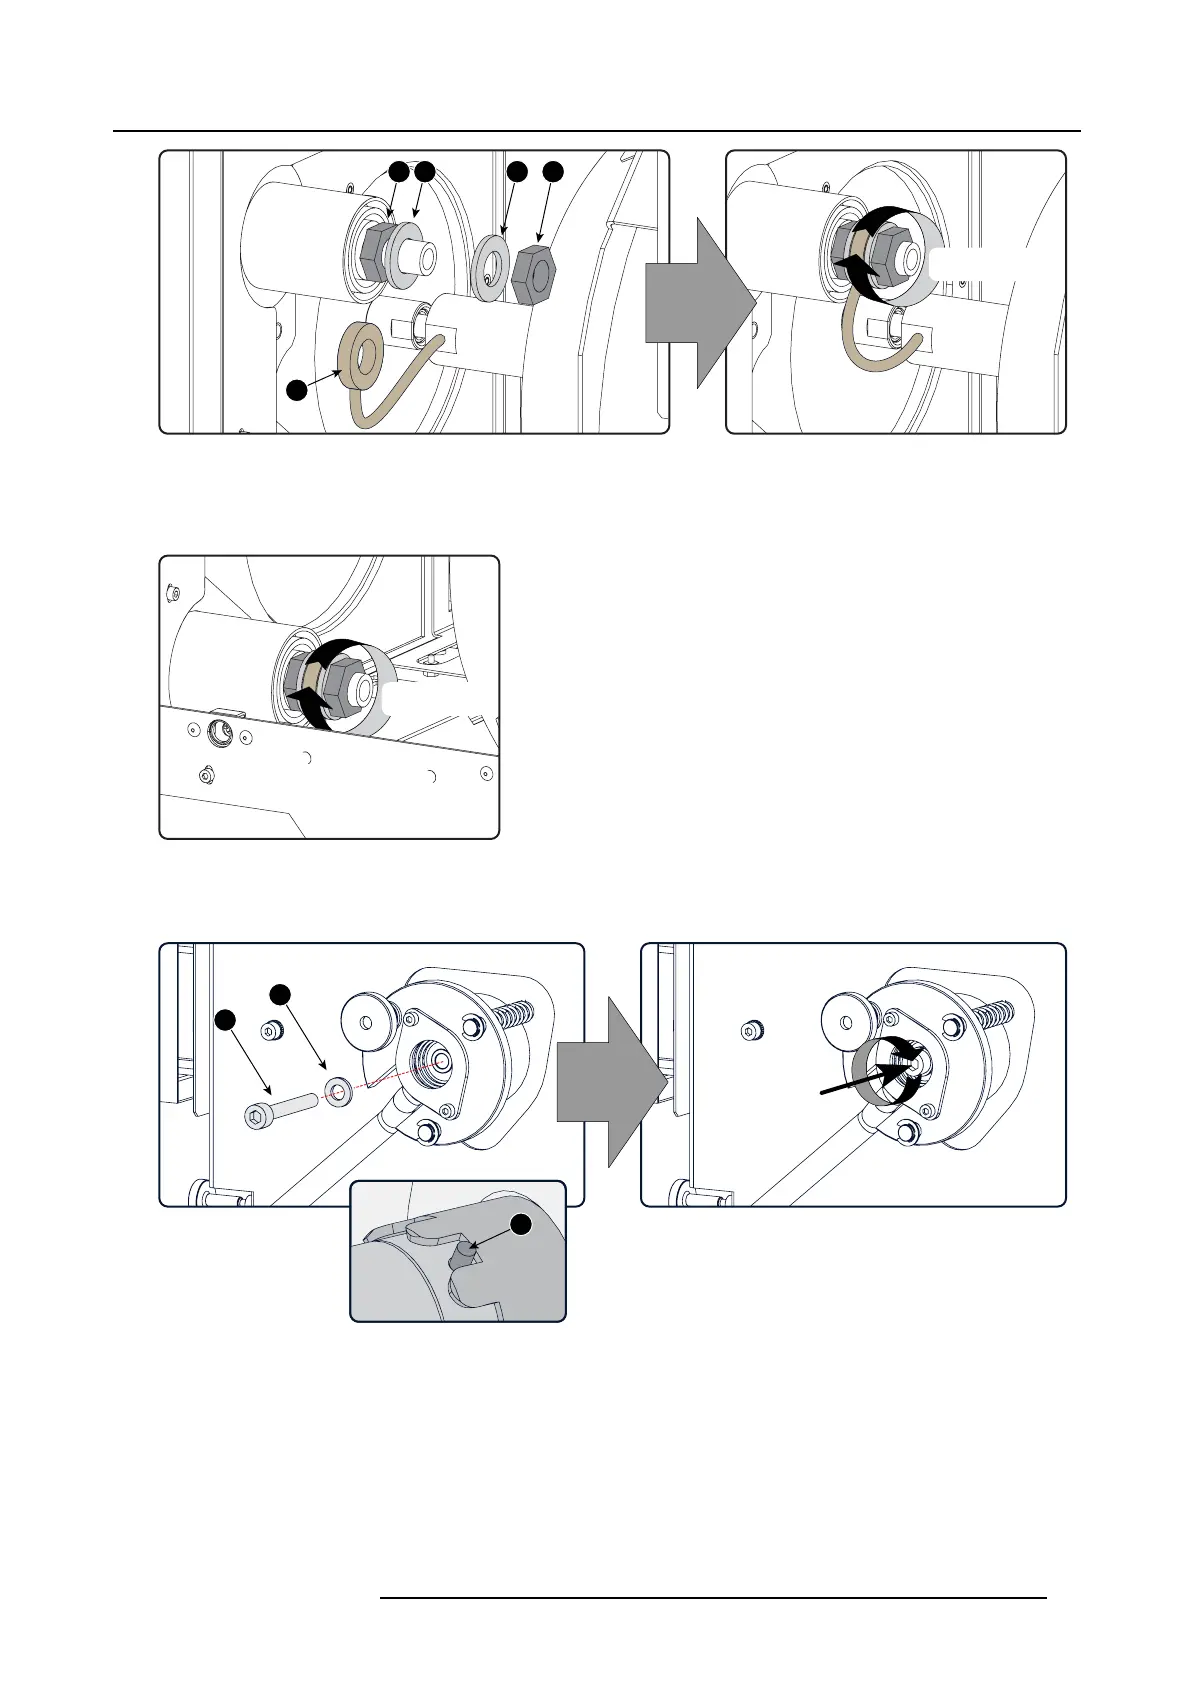
9. Secure the xenon lamp cathode with the hexagon socket head c ap screw (reference 9) and washer (reference 10) as illustrated.
Fasten the sc rew with a torque of 5Nm(3,7lbf*ft).Useatorquewrenchwitha5mmAllensocket.
Caution: Make s ure that both pins (reference 11) of the cathode adapter rem ain engaged in the foreseen slots
5 Nm
9
10
11
Image 4-23
10.Install the side cover of the Lamp House and fasten the two quarter turn screws (reference 1) at the bottom of the cove r.
Note: Please e nsure that the quarter turn screws turning w ires are flush w ith the c over or interference will occur while inserting
the Lam p House into the projector.
R59770491 DP2K-32B 30/04/2010
43