12. Lamp House & Lamp replacement
Image 12-21
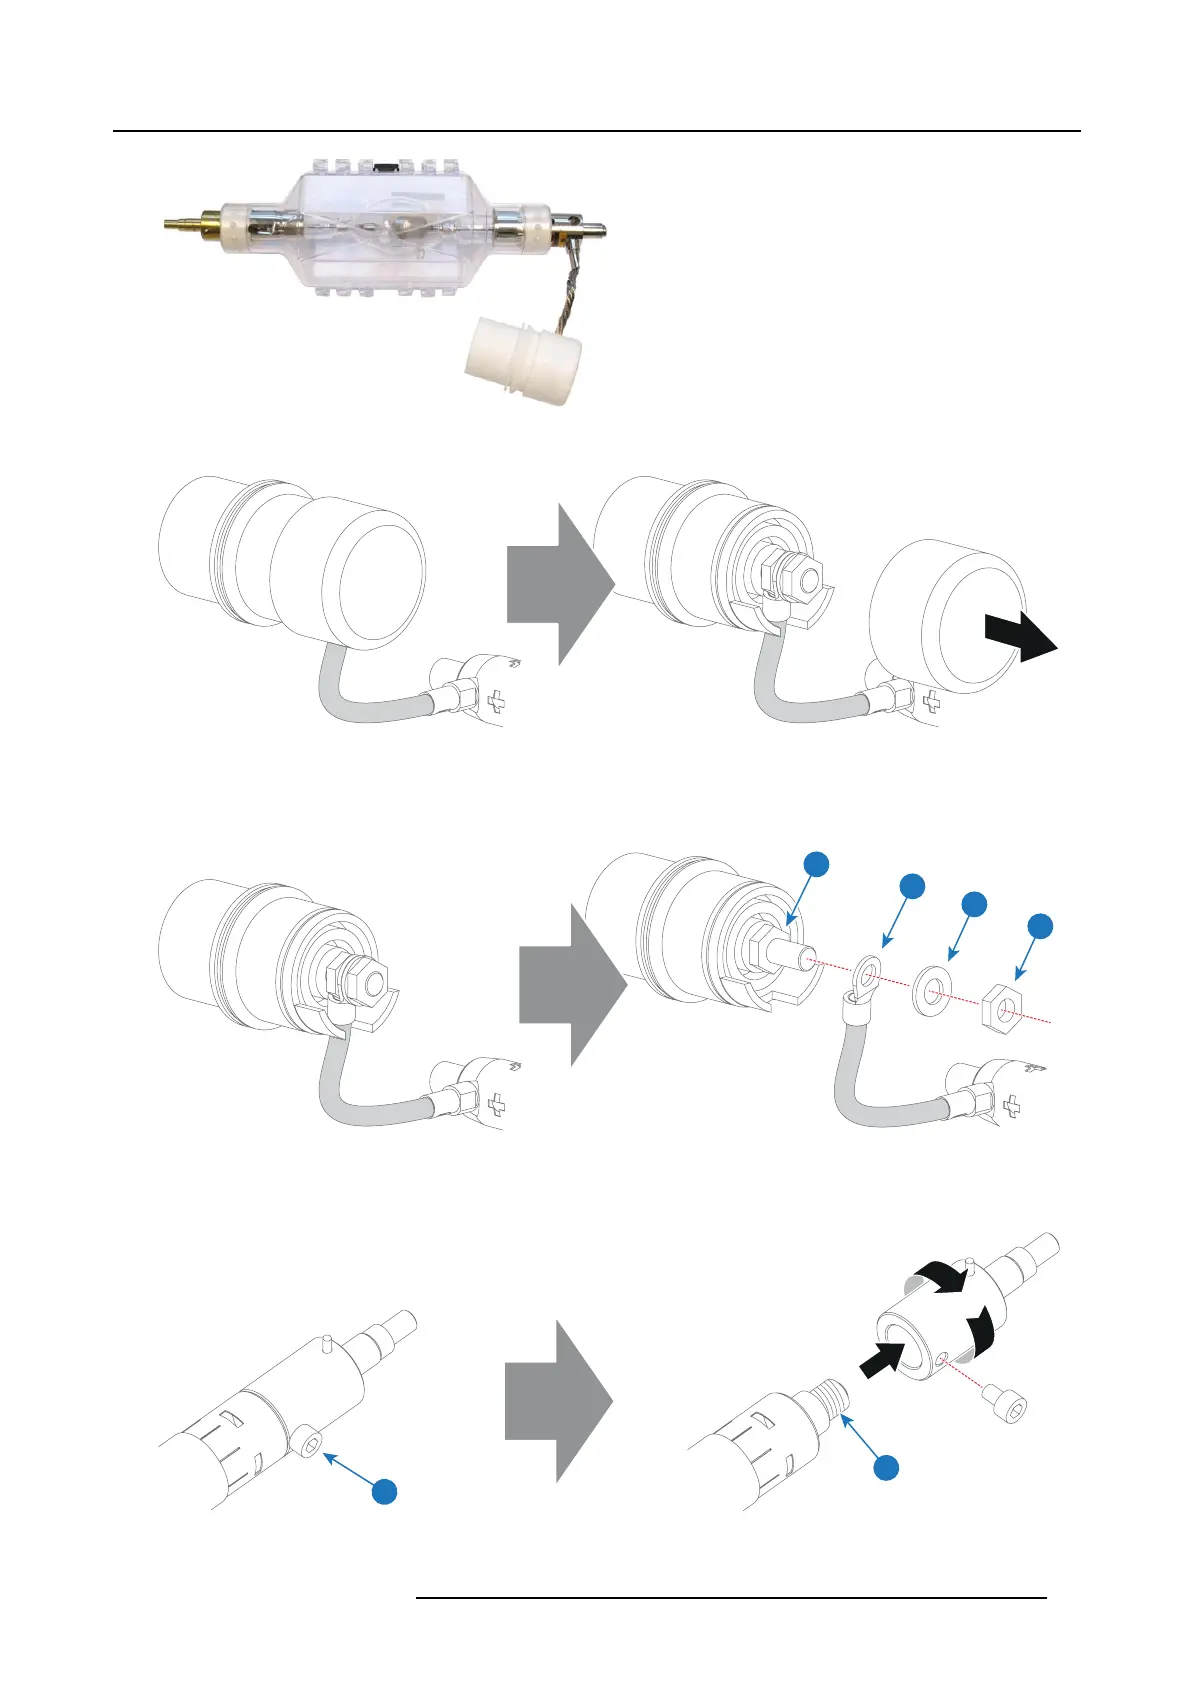
8. R emove the protection cap from the anode connector.
Image 12-22
9. R emov e the anode wire lug from the a node connector. For this, use a 17m m open end wrench and a 17mm nut driver. Hold one
nut (reference 6 image 12-23) with the open end wr ench while releasing the other nut (reference 9 image 12-23) with the nut
driver. Note that there is a plain washer (reference 8 imag e 12-23) in front of the wire lug ( reference 7 image 12-23).
Tip: To a void losing the plain washer and bolt ( reference 8 & 9 image 12-23), place these back immediately after lug removal.
7
6
8
9
Image 12-23
10.R emov e the cathode adapter from the xenon lam p by releasing the hex agon socket head cap screw (reference 10 image 12-24)
of the adapter as illustrated. Use a 5mm Allen wrench.
Note: The xenon lamp has a cathode pin w ith screw thread (reference 11 image 12-2 4).
11
10
Image 12-24
R5977692 DP2K-S SERIES 10/12/2012 87

 Loading...


