12. Lamp House & Lamp replacement
11 10
2.5Nm
Image 12-25
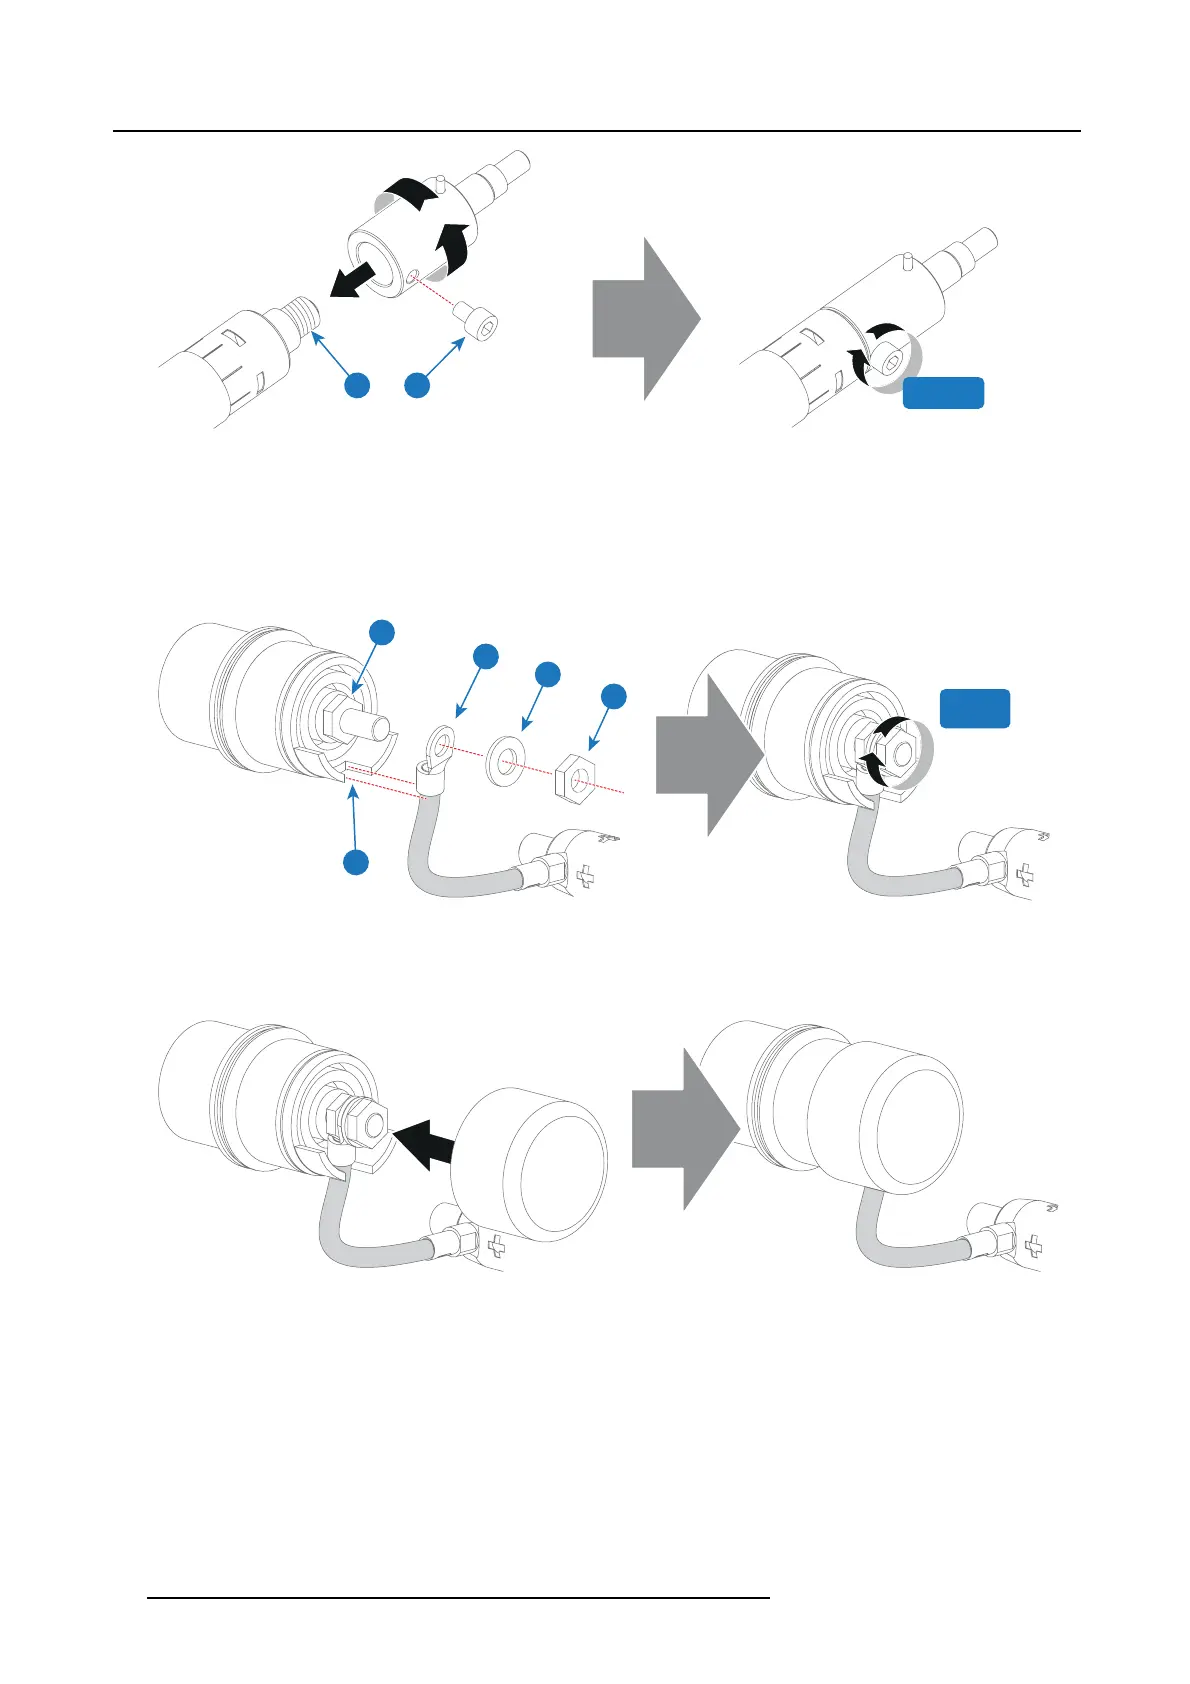
3. Install the anode wire lug (reference 7 image 12-26) onto the anode socket of the Lamp House as illustrated. Take care of
wire orientation (mus t fit through slot of w hite Teflon pa rt). Use an open-end wrench of 17 m m t
o hold the first nut (reference 6
image 12-26) while fastening the second nut (reference 9 image 12-26) with a torque of 9Nm (6.64 lbf*ft) using a torque w rench.
Ensure that there is a flat washer (reference 8 image 12-26) between the second nut a nd f the w ire lug (reference 7 image 12-26).
Warning: A torque of 9Nm (6.64 lbf*ft) must be applied to fasten the nuts. Make sure that there is no
tension on the anode
wire of the xenon lamp.
Note: Alter tightening the two nuts, the connector should still be “floating”.
7
6
8
9
14
N
9Nm
Image 12-26
Tip: W rite down the serial num ber of the xen on lamp. You will need this while updating the lamp parameters after installation
of the xenon lam p. The serial number of the xenon lamp is engraved in the neck of the xenon lamp.
4. Place the protection cap onto the anode socket.
Caution: Ensure the cap is properly installed. It may not c ome loose from the socket.
Image 12-27
5. R emove the protective packing from the xenon lamp and gently insert the xenon lamp into the Lamp House as illustrated. Lam p
cathode first. Make sure that the anode soc ket is oriented towards the up per left as illustrated. While inserting the lamp, rotate it
slightly, engaging the pins (reference 11 image 12-28) of the ca thode ada pter in the foreseen slots. This is to ensur e the lamp
cathode is completely inserted. Keep su pporting the anode of the lamp with one hand once t he xenon lamp is in position.
Caution: Ensure that y ou wear protective clothing, a full face shield and protective gloves.
Tip: Retain the protective packaging for future use (you will need it when replacing the next lamp).
90
R5977692 DP2K-S SERIES 10/12/2012

 Loading...


