12. Lamp House & Lamp replacement
5
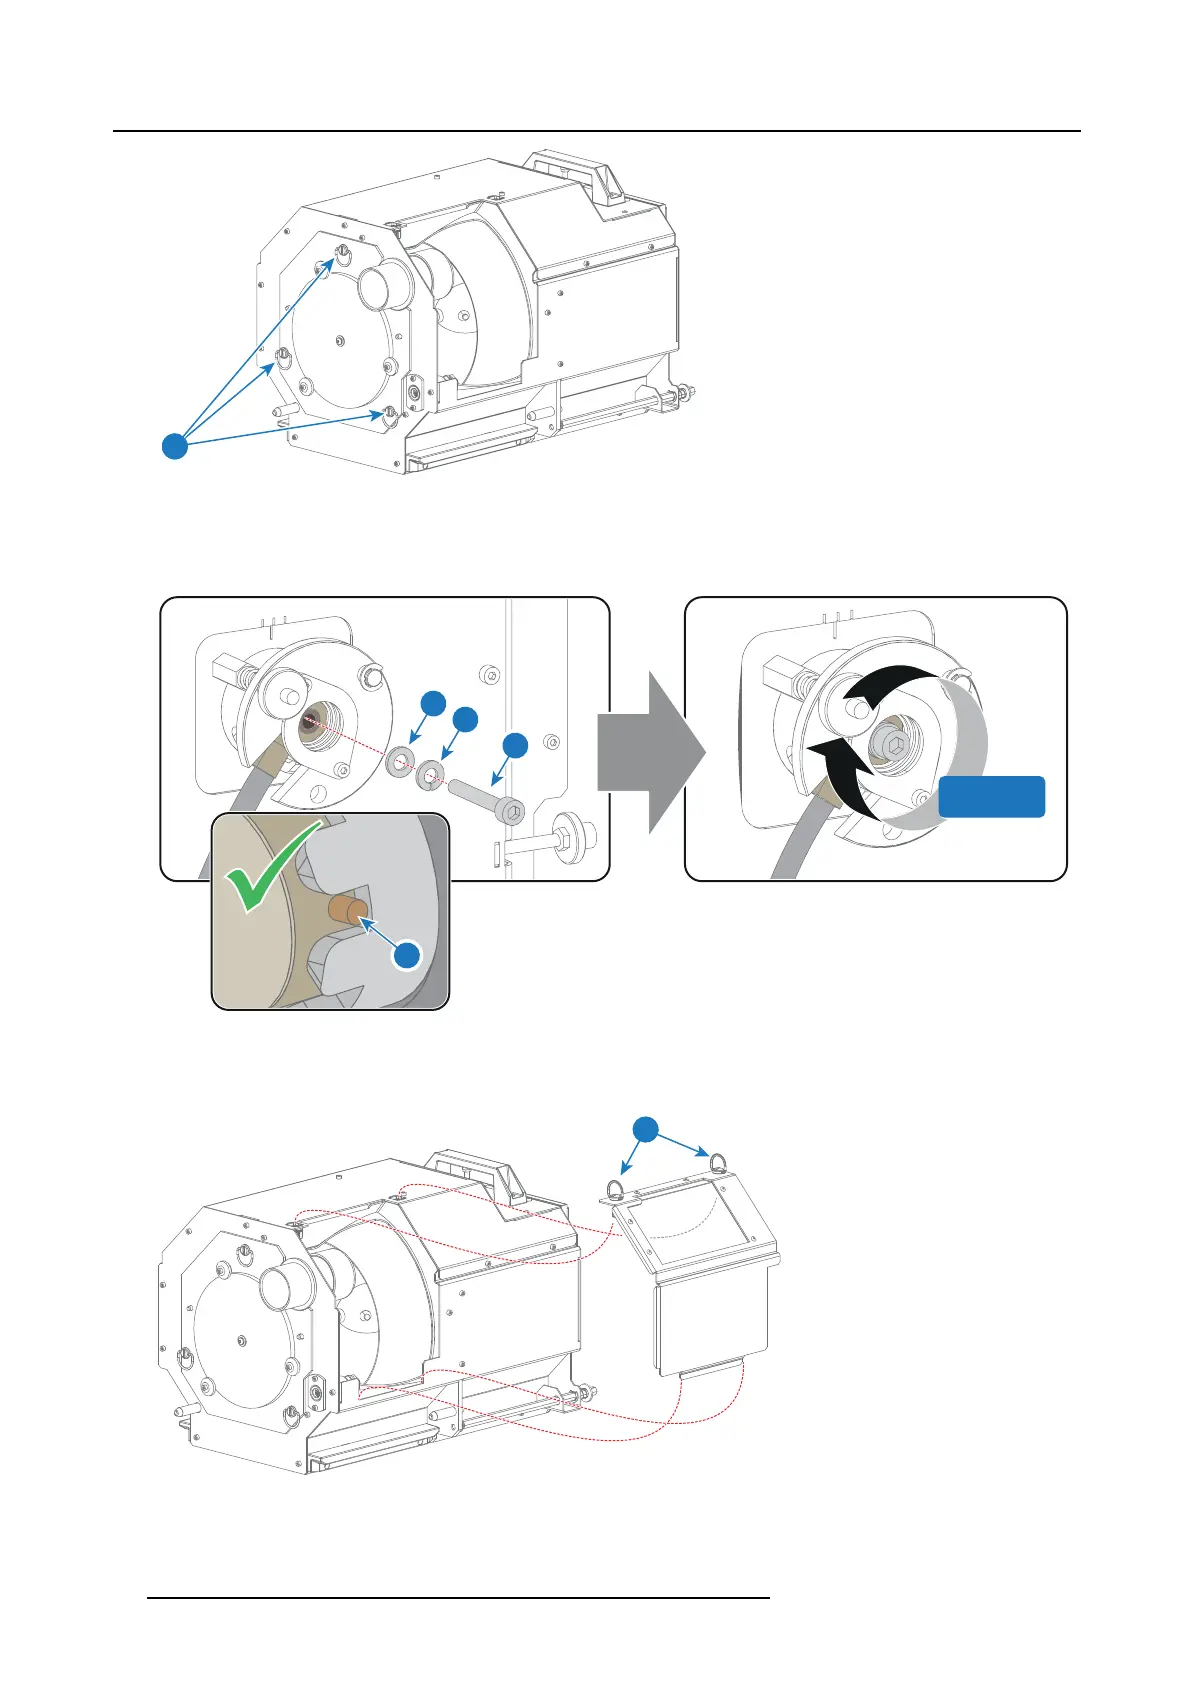
Image 12-31
9. Secur e the xenon lam p cathode with the hex agon socket head cap s crew (reference 1 image 12-
32), sp ring washer (reference
2 image 12-32 and plain was her (reference 3 image 12-32). Fasten the screw with a torque of 2.5Nm (1.84 lbf*ft). Use a torque
wrenchwitha5mmAllensocket.
Caution: Make sure that both pins (reference 11 image 12-32) of the cathode adapter rem ain engag
ed in the foreseen slots.
3
1
2
11
2.5 Nm
Image 12-32
10.Install the side cover of the Lamp House and fasten the three quarter turn screws (reference 4 image 12-3 3) of the cover.
Note: Please e nsure that the quarter turn screws turning w ires are flush with the c over or interference will occur while inserting
the Lamp House into the projector.
4
Image 12-33
92 R5977692 DP2K-S SERIES 10/12/2012
 Loading...


