601–0445 /05 Loki 93
Image 8-41
8.4.7 Warping – Latency control in a multi projector setup
Transport latency
The added delay in the image processing chain. The value is the number of lines relative to the
output resolution.
Latency
The total time from the first pixel is coming in on an input source, until the first light representing that
pixel is visible on the screen. This includes the transport delay. The value is normally given in
milliseconds.
Functional description
Every projector in a multi–projector setup will have a different latency. This latency depends on the amount of
warp and on the frequency of the projected image. In order to have no visible difference in the overall
projected image, the user needs to be able to control the latency of each projector.
The latency value can be read out in the status menu for each individual projector.
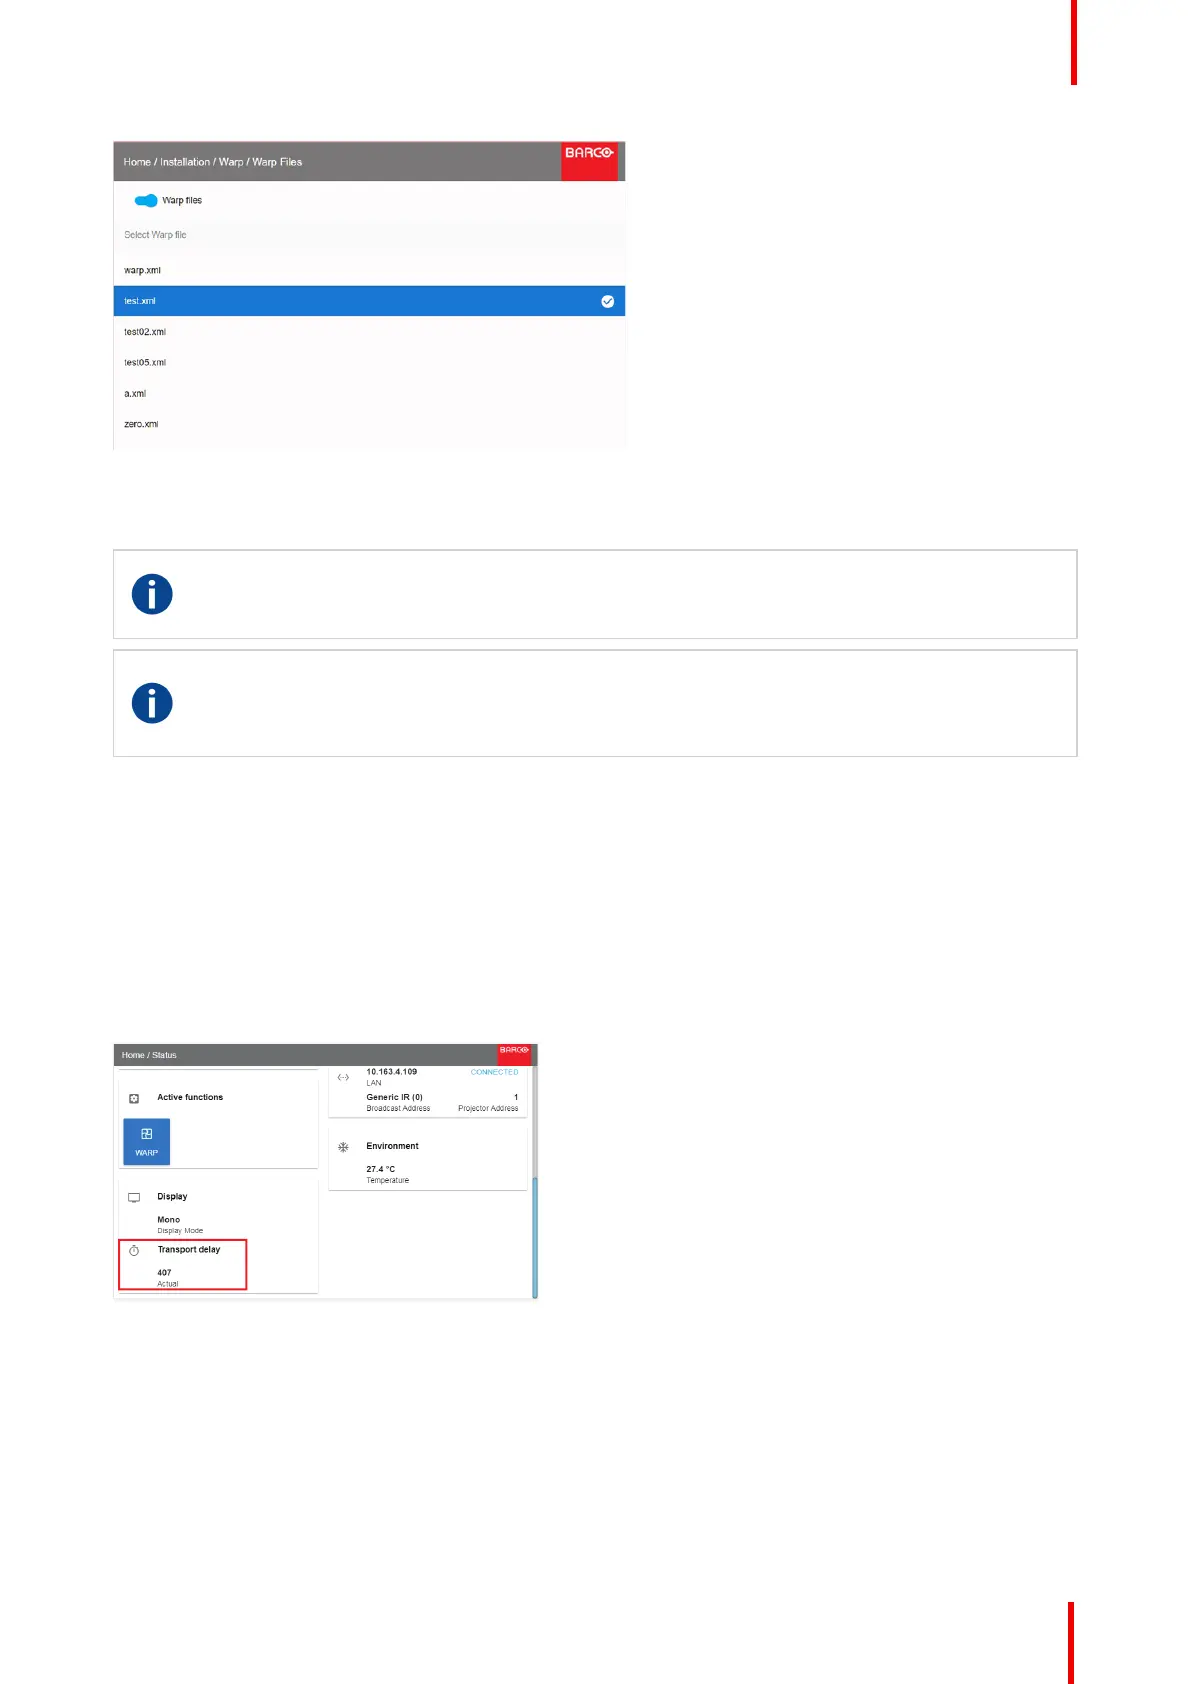
How to configure transport delay?
1. Read out and note the latency of each projector in the multi-projector setup. You can find this latency under
Transport delay in the status menu for each projector.
Image 8-42: Example of the latency readout
2. Identify the projector with the longest delay.
3. For each projector in the setup, select Installation → Warp in the main menu.
Installation menu