4. Lamp & Lamp House
6. Gently remove the xenon lamp together w ith the anode socket out of the Lamp H ouse. Do not use excessive force upon the
xenon lamp. Normally the xenon lamp will easily slide ou t the cathode socket of the Lamp House.
Warning: Supporting the xeno n lam p with one hand while pulling it out w ith other hand prevents it from bumping aga inst the
chassis o f the Lamp House.
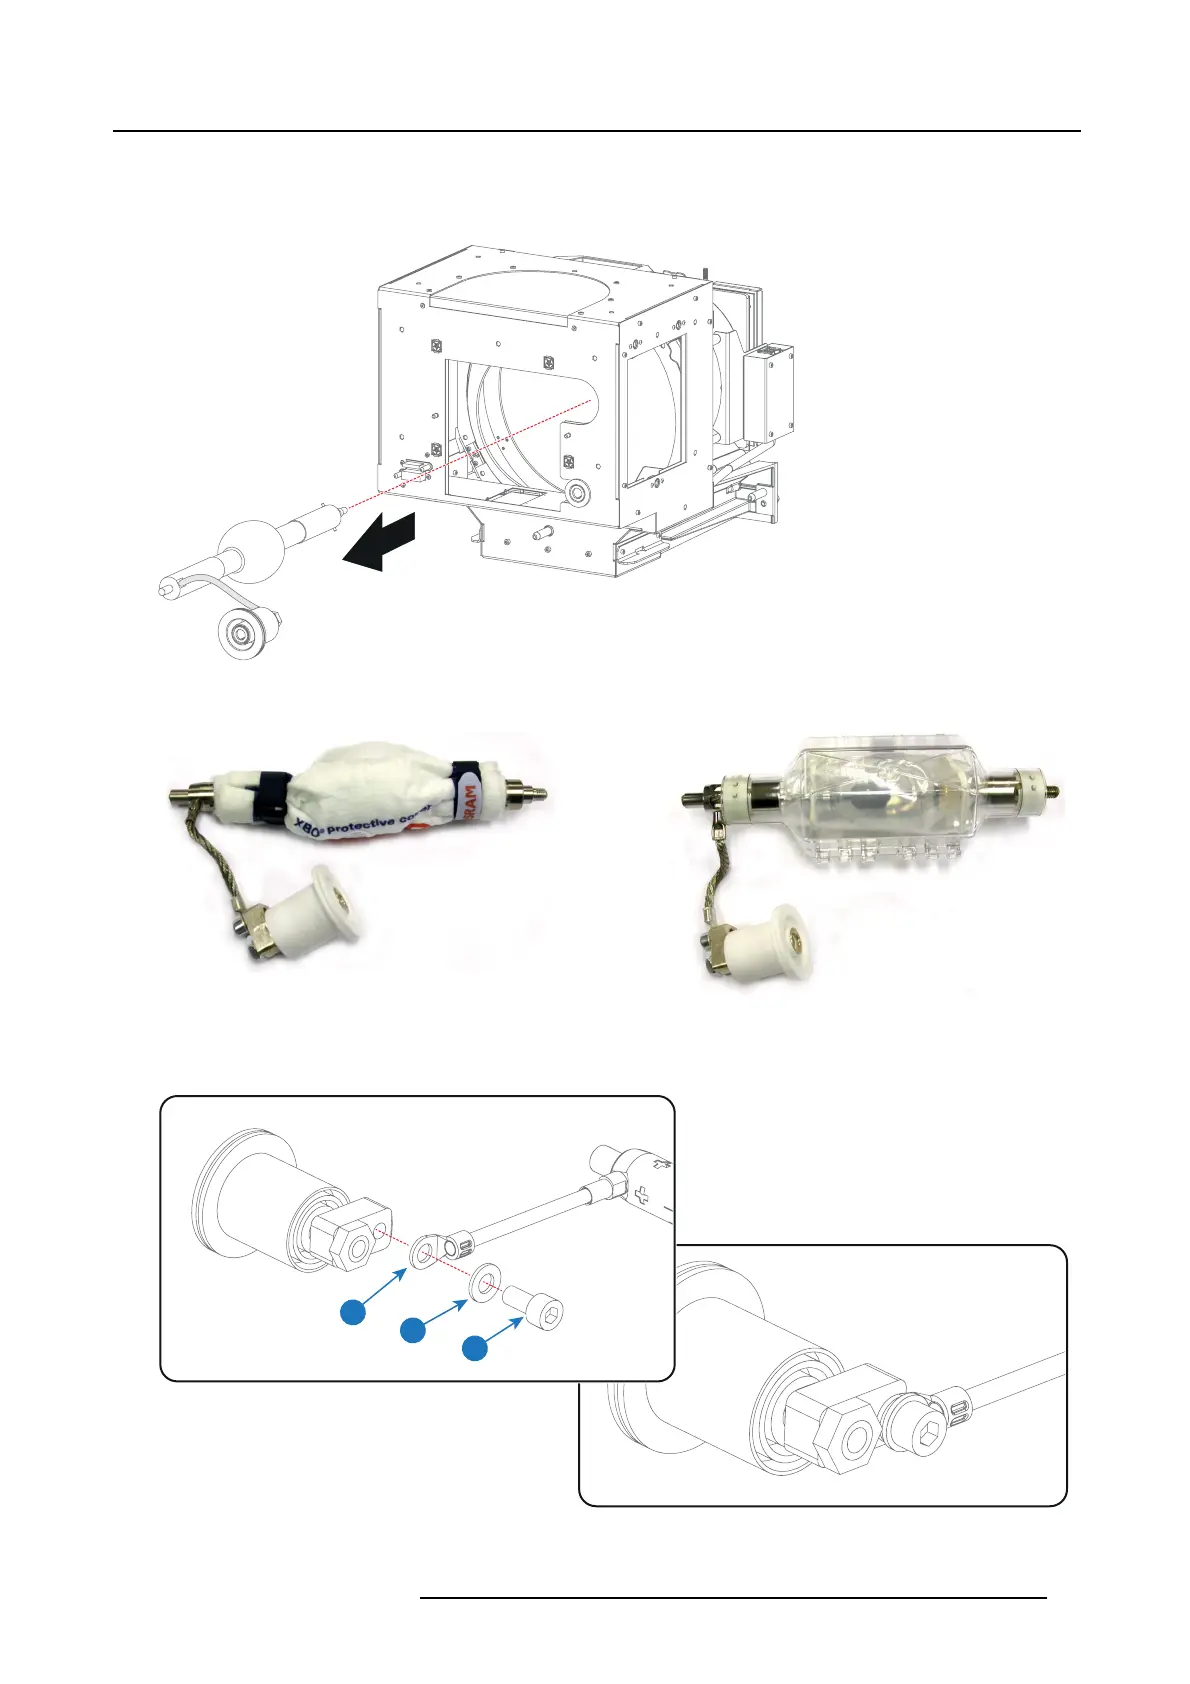
Image 4-11
7. Place the xenon lamp in its protective container or wrap the xenon lamp in a pr otective cloth and secure with two binders.
Image 4-12
Left: Xenon lamp wrapped in a protective cloth. Right: Xenon lamp captured in a p rotective container.
8. R emov e the anode wire lug (reference 6 image 4 -13) from the anode socket as illustrated. Use a 8m m Allen w rench.
Tip: Place the flat washer and bolt (reference 7 & 8 image 4-13) ba ck on its place after the lug is rem oved.
6
7
8
Image 4-13
R5905067 DPXK-19B/23B/P 17/09/2012 33
 Loading...


