46 Installation and Disassembly
CFPP Process Analyzer CFPP-4.2 03/2016
7.1 Installation
7.1.1 Operating Area Requirements
The analyzer is intended exclusively for stationary operation in a weather-protected
analysis building. For details on environmental conditions in the operating area, please
refer to the chapter Technical Data.
The analyzer must be freely accessible from the front. On the right and left of the
analyzer, a minimum distance of 0.5 m is required for proper ventilation of the Chiller for
Liquids. The drain outlet connection on the analyzer must be at most 200 mm above the
floor. For details on dimensions, please refer to the supplied layout drawing.
If a vortex cooler (optional) is used for the control box, the analyzer must be protected
except from dripping water according to EN 60529. The warm air outlet of the vortex
cooler must not be obstructed.
The floor in the operating area must be even and level, and capable of supporting the
weight of the analyzer. The analyzer building must be ventilated sufficiently, and the
analyzer must be well-lit.
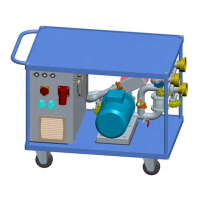
7.1.2 Assembly of the Sample Conditioning System (Optional)
Before making any pipe connections, install a manual shut-off valve on the product feed
line into the sample conditioning system. The shut-off valve must be installed near the
sample conditioning system and must be easily accessible. It must be clearly marked so
that it can be identified as belonging to the sample conditioning system and the analyzer.
Install the sample conditioning system near the analyzer, at a height where instruments
can be read easily. For mounting, use the fixing holes in the mounting plate. The distances
between the fixing holes can be found in the supplied plan.
Observe the regulations for mounting the pipe connections. Please refer to the supplied
manufacturer’s documentation. Make sure that the minimum bending radius of the pipes is
observed.
Note: Your sample conditioning system may be different from the one described
here. If in doubt, please contact BARTEC BENKE.