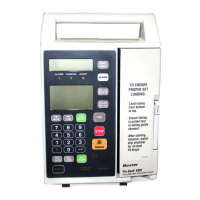
07-19-B1-688 FLO-GARD 6201 VOLUMETRIC INFUSION PUMP SERVICE MANUAL 8-17
Removal/Replacement Procedures Disassembly/Reassembly
3. Remove pump head assembly in accordance with “Replacement of
Pump Head Assembly” on page 8-12.
4. Close the pump door.
5. Carefully place the pump head assembly face down on the work surface.
Note: Perform the following step carefully to avoid losing springs.
6. Carefully remove the two springs (Figure 11-8 , item 9) above the motor
coupling.
7. Remove two screws (Figure 11-9 , item 30) that secure the motor
holding plate to the safety/slide clamp assembly.
8. Remove two screws, washers and spring washers (Figure 11-8 , items
22, 14 and 25) securing the encoder cover (Figure 11-8 , item 16) and
finger box cover to the finger box. Do not lose the short nut bar
(Figure 11-8 , item 31).
9. Remove two screws, washers and spring washers (Figure 11-8 , items
22, 14 and 25) securing the finger box cover to the finger box (item 15)
above the motor coupling. Do not lose the long nut bar (Figure 11-8 ,
item 32).
10. Remove the finger box cover.
Note: Slide the encoder cover toward the encoder to prevent it from sticking to the
encoder screw head.
11. Carefully lift the motor and remove motor and its associated assembly
from the pump head base plate. Take care not to deform the encoder or
damage the fingers. Keep the finger box and the fingers away from dirt
or dust.
12. Remove the motor holding plate (Figure 11-9 , item 8) from the motor
shaft bottom and carefully place on the work surface.
13. Remove two set screws (Figure 11-8 , item 27) closest to the motor.
14. To install the motor, push motor shaft into motor coupling (item 8).
15. Install set screws (item 27). Do not tighten them at this time.
16. Attach the spring retainer (item 2) to the replacement motor, as
necessary.
17. Place the motor holding plate (Figure 11-9 , item 8) onto the motor shaft
bottom such that the plate sticks out of the motor housing on the side
with the motor wires (Figure 11-8 ).


 To Next Page