Embroidery preparation
43
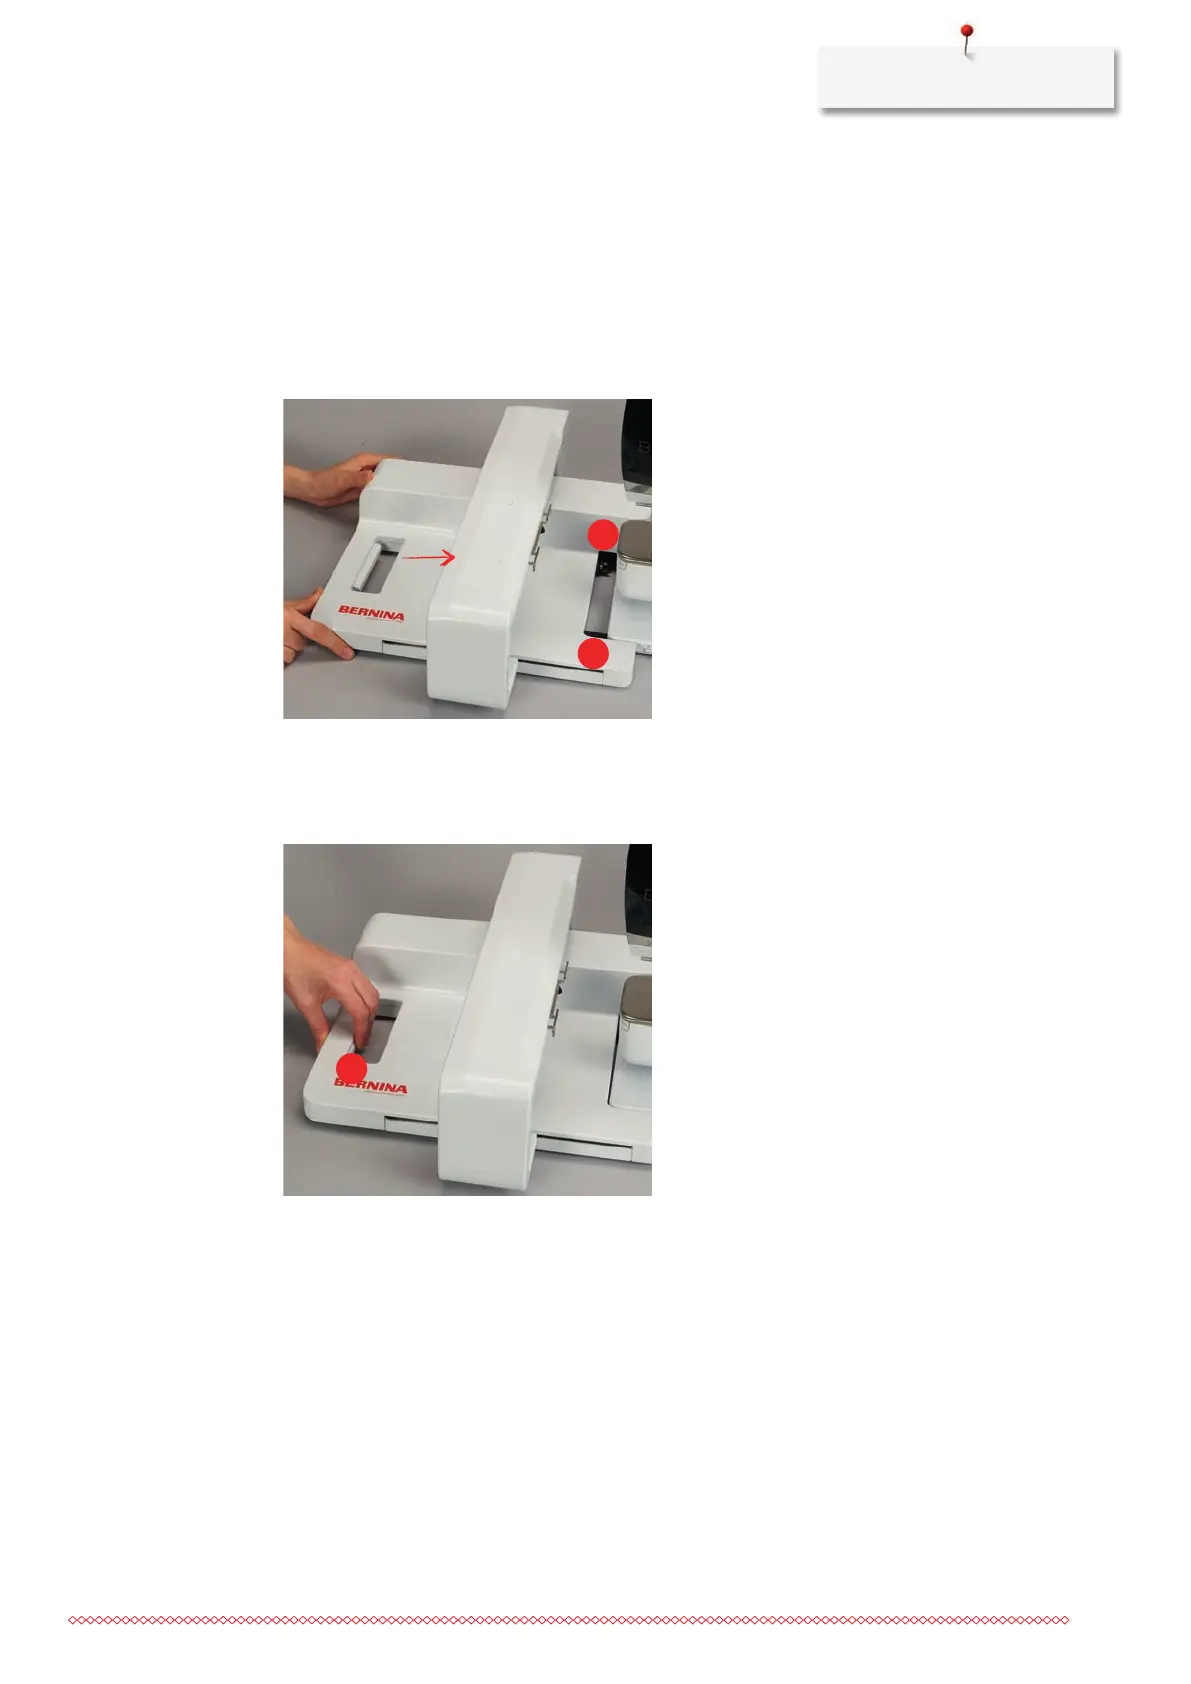
2.9 Attaching the Module
Prerequisite:
• Extension table must not be fitted.
> Make sure that the module and the machine are placed on a stable, even surface.
> Ensure that the embroidery arm can move freely.
> Carefully slide the embroidery module from left to right into the machine's embroidery module
connection (1) and the guide rail (2).
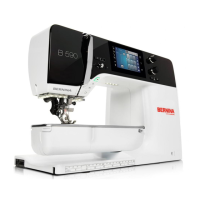
2.10 Removing the embroidery module
> Push the release lever (1) at the carrying handle of the embroidery module, keep it pressed and at the
same time, move the embroidery module carefully to the left.
2.11 Selecting the embroidery motif
All embroidery motifs can either be embroidered as-is or changed using the various functions offered by the
machine. All embroidery motifs can be found in the attachment. In addition to that, embroidery motifs from
the personal memory or from the BERNINA USB stick (optional accessory) can be loaded.
Prerequisite:
• The Embroidery foot No. 26 is attached.