Embroidery preparation
48
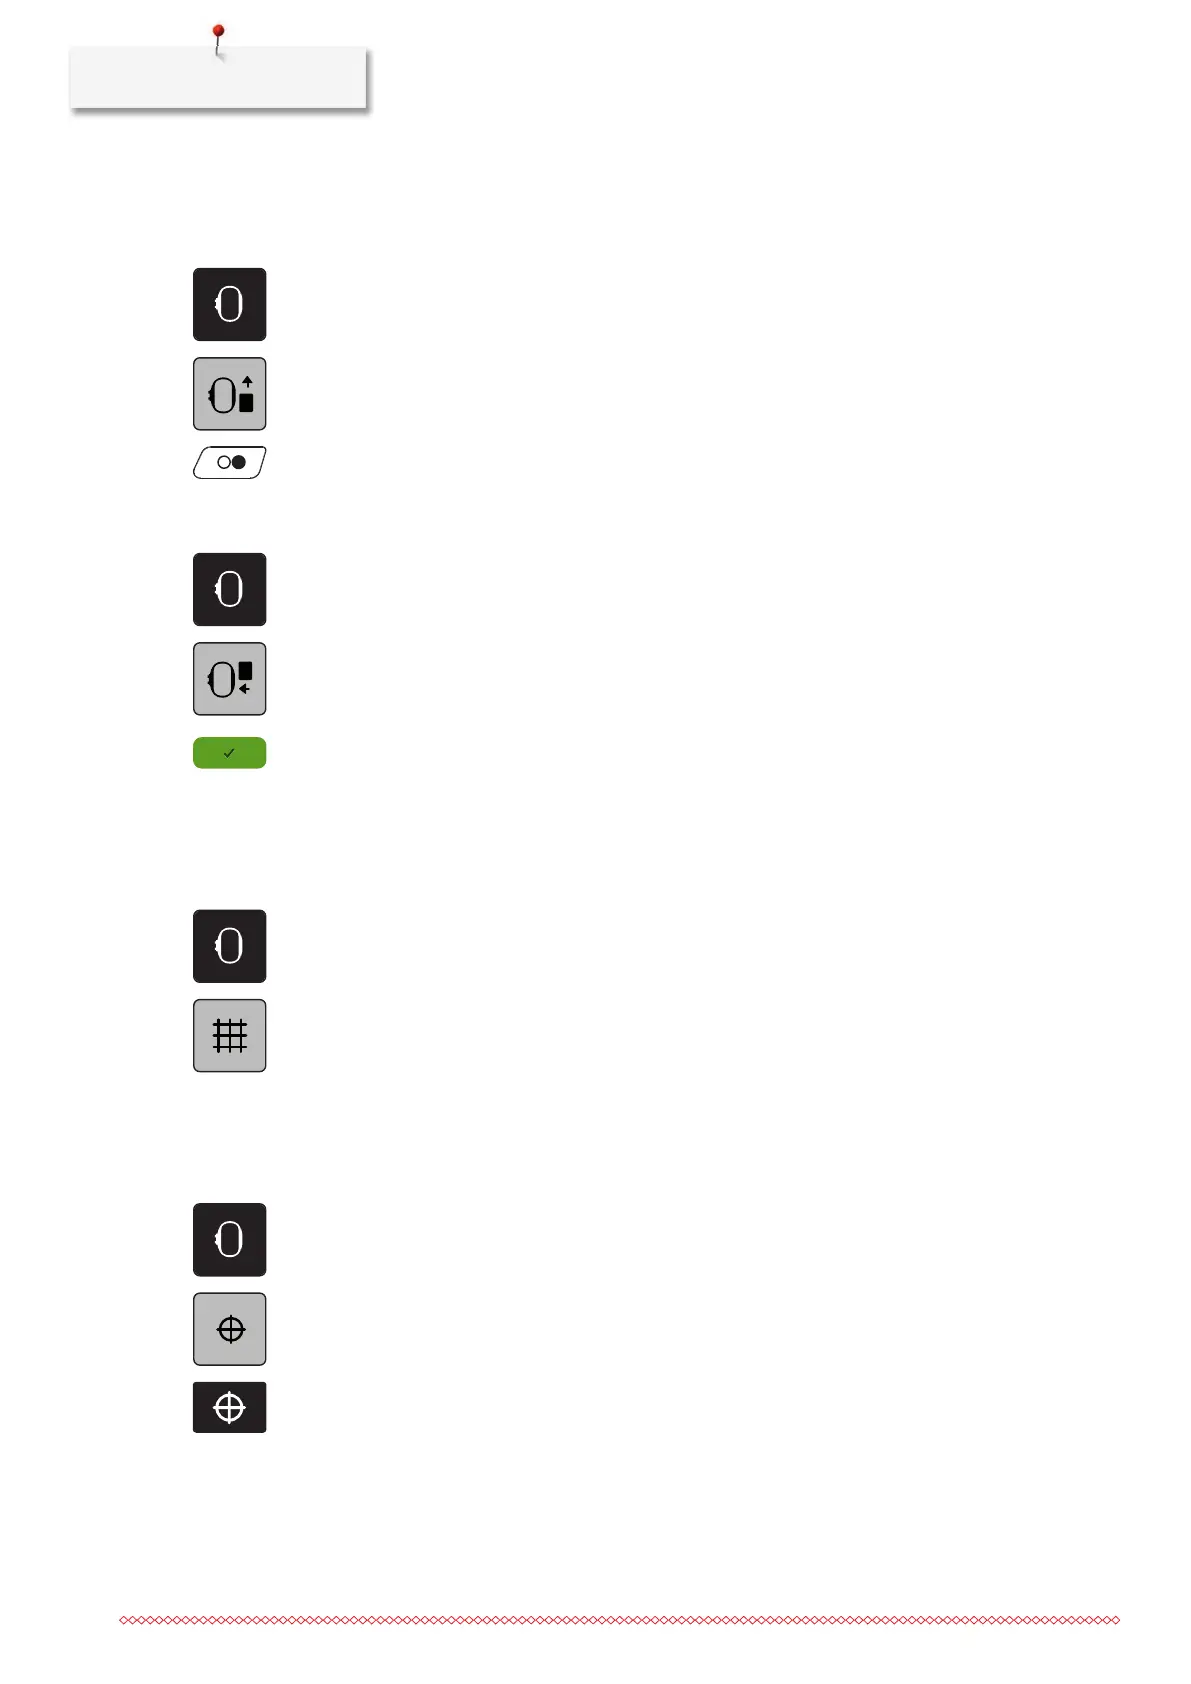
Moving the hoop to the back
To facilitate changing the bobbin, it is recommended to move the hoop to the back before threading. This
makes it easier to open the bobbin cover.
> Touch the icon «Embroidery hoop display/Embroidery hoop selection».
> Touch the icon «Move the hoop to the back».
> Thread the bobbin thread (see page40).
> Push the button «Start/Stop» to move the embroidery hoop back to the last position. If necessary, pull
the upper thread back.
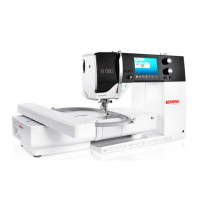
Moving the embroidery arm to the left
> Touch the icon «Embroidery hoop display/Embroidery hoop selection».
> Remove the embroidery hoop.
> Touch the icon «Moving the embroidery hoop to the left».
– An animation «Remove the embroidery hoop» appears.
> Touch the icon «Confirm».
– The embroidery arm moves to the left into the parking position.
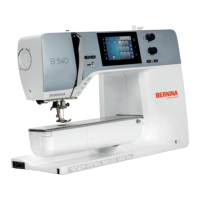
Grid on/off
When the center of the hoop and the grid are displayed, the embroidery motif can be positioned more
exactly.
> Touch the icon «Embroidery hoop display/Embroidery hoop selection».
> Touch the icon «Grid on/off» to display the center of the hoop on the display.
> Touch the icon «Grid on/off» again to display the grid.
> Touch the icon «Grid on/off» again so that the center of the hoop and the grid disappear.
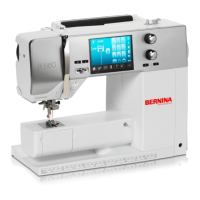
Locating the center of the embroidery motif
The embroidery hoop is positioned so that the needle is exactly above the center of the embroidery motif or
the motif begin.
> Touch the icon «Embroidery hoop display/Embroidery hoop selection».
> Touch the icon «Center of embroidery motif» or
> push the button «Center of embroidery motif» to position the embroidery hoop so that the needle is
exactly above the center of the embroidery motif.
> Touch the icon «Center of embroidery motif» again or
> push the button «Center of embroidery motif» again to position the embroidery hoop so that the needle
is exactly above the pattern begin.