11
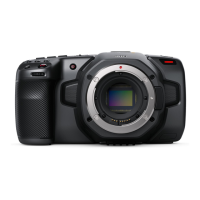
Camera Connections
Blackmagic Studio Camera - Right Side
Optical Input/Output
For optical fiber input and output, you will need to install an optional optical fiber SFP module. This
lets you connect industry standard LC connectors, supporting 3G-SDI on Studio Camera HD, and
6G-SDI on Studio Camera 4K. Optical fiber cable is widely available because it's the same cable used
in computer networking. Optical fiber allows cable runs of up to 28 miles which is more than enough
for even the most demanding outside broadcast event. If both optical and SDI inputs are connected,
the output from the device which was connected first will be used. To purchase an optical fiber SFP
module for your Blackmagic Studio Camera, contact your nearest Blackmagic Design reseller. You
can find your nearest reseller on our website at www.blackmagicdesign.com/resellers.
SDI Out
Use the SDI Out connector to output 10-bit 4:2:2 video to professional SDI video equipment such
as routers, monitors, SDI capture devices and broadcast switchers. Blackmagic Studio Camera HD
supports 3G-SDI, and Studio Camera 4K supports 12G-SDI.
SDI In
The SDI input allows the camera operator to view the Program (PGM) output. Simply press the PGM
button to toggle between live camera output and Program output from a switcher control room.
If both optical and SDI inputs are connected, the output from the device which was connected first will
be used. If you're using the Studio Camera to record to a device such as the Blackmagic Hyperdeck
Shuttle, the output from the Hyperdeck can be connected to the SDI input so you can playback what
you have just recorded.
Reference Input
This allows multiple cameras to be genlocked to a blackburst or tri-level reference signal. Genlocking
cameras to an external reference signal helps to prevent timing errors which may result in the picture
jumping when switching between different cameras.
Power
Use the 12 – 24V power input for connecting your power supply and to charge the internal battery.
When the battery is fully charged it will power the camera for up to 4 hours on Studio Camera HD,
and up to 3 hours on Studio Camera 4K .
OPTICAL OUT
OPTICAL IN
SDI OUT
SDI IN
REF
12V