30
Using ATEM Software Control
Manual Focus Adjustment
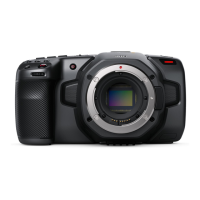
When you want to adjust the focus on your camera manually, you can use the focus adjustment
located at the bottom of each camera controller. Drag the wheel control left or right to manually
adjust focus while viewing the video feed from the camera to ensure your image is nice and sharp.
Camera Gain
The camera gain setting allows you to turn on additional gain in your camera. This is important when
you are operating in low light conditions and need extra gain in the front end of your camera to avoid
your images being under exposed. You can decrease or increase gain by clicking on the left or right
arrows on the dB gain setting.
You can turn on some gain when you need it, such as outdoor shoots when the light fades at sunset and you
need to increase your image brightness. It's worth noting that adding gain will increase noise in your images.
Shutter Speed Control
The shutter speed control is located in the section between the color wheel and the iris/pedestal
control. Decrease or increase the shutter speed by hovering your mouse pointer over the shutter
speed indicator and then clicking on the left or right arrows.
If you see flicker in lights you can decrease your shutter speed to eliminate it. Decreasing shutter
speed is a good way to brighten your images without using camera gain because you are increasing
the exposure time of the image sensor. Increasing shutter speed will reduce motion blur so can be
used when you want action shots to be sharp and clean with minimal motion blur.
White Balance
The white balance setting next to the shutter speed control can be adjusted by clicking on the left
or right arrows on each side of the color temperature indicator. Different light sources emit warm or
cool colors, so you can compensate by adjusting the white balance. This ensures the whites in your
image stay white.
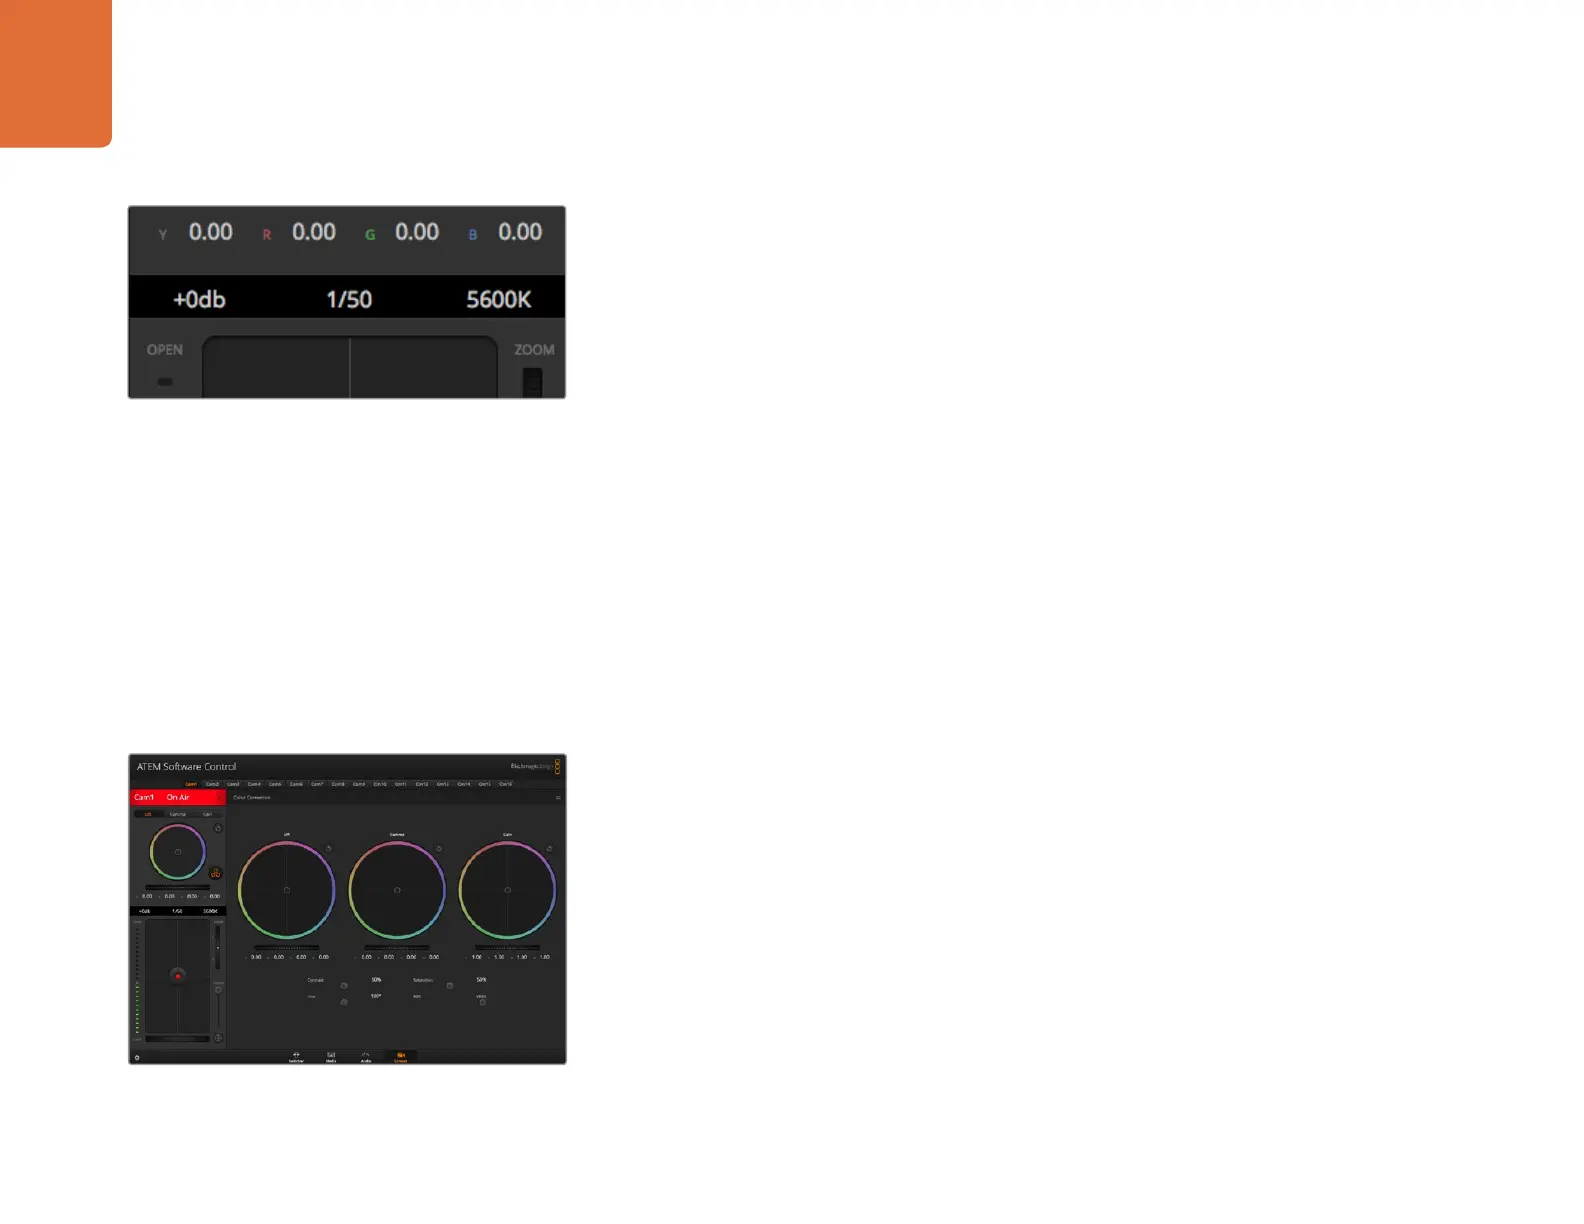
DaVinci Resolve Primary Color Corrector
If you have a color correction background, then you can change the camera control from a switcher
style CCU interface to a user interface that's more like a primary color corrector on a post production
color grading system.
Your Blackmagic Studio Camera features a DaVinci Resolve primary color corrector built in. If you have
used DaVinci Resolve, then creatively, grading in your Blackmagic Studio Camera will be identical so
you can use your color grading experience for live production.
Click on the DaVinci Resolve primary color corrector button
to expand the color correction window and adjust settings.
Hovering your mouse pointer over the gain, shutter speed
and white balance indicators reveal arrows you can click on
to adjust their respective settings.