Mechanical Dock Leveler – M and FMC Group 08, Section 05, Page 3
Issue Date: 10/01/01, Rev. 0 (Part #038-550E)
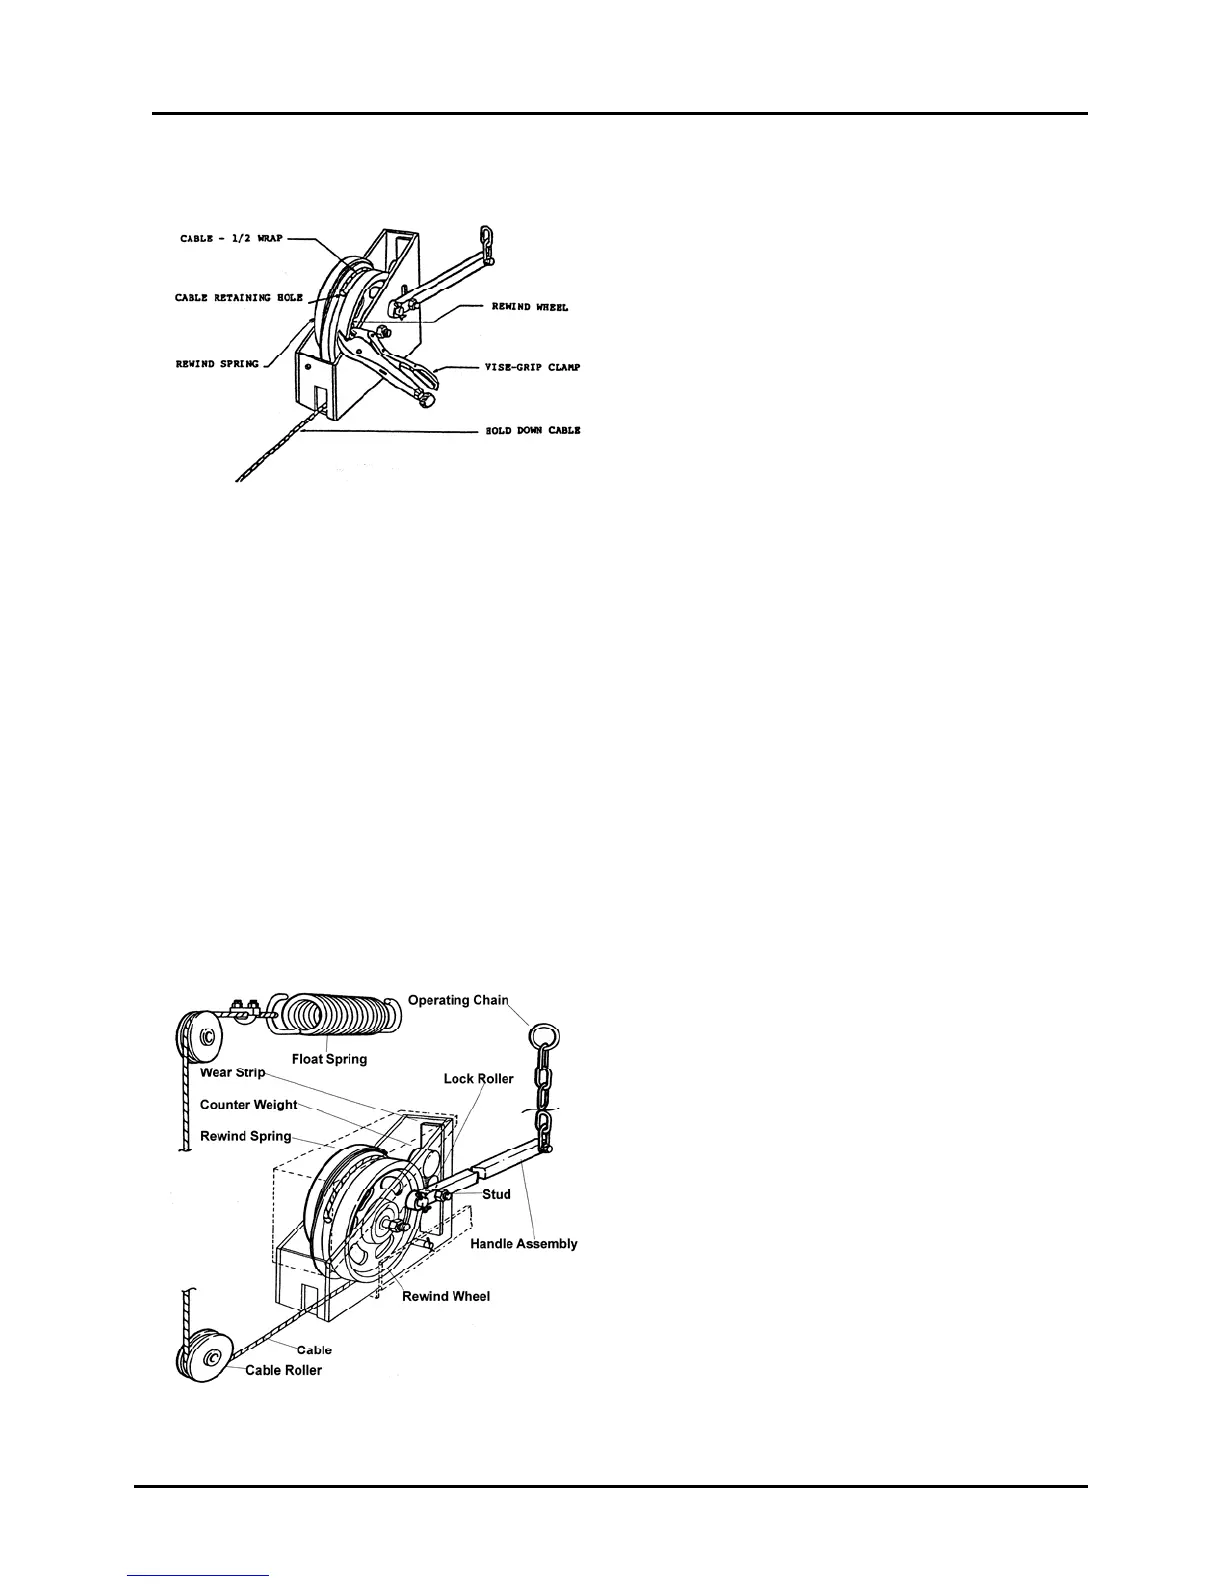
REWIND SPRING REPLACEMENT – cont’d
11) Pull cable slowly out of the box to
rotate rewind wheel and wind the
rewind spring onto the wheel hub. As
the loose end of the spring
approaches the box anchor pin, slip
the spring end securely over the
anchor pin and continue to pull the
cable out of the box, hand over hand,
until the rewind spring is fully
tensioned and will allow no further
rotation of the rewind wheel. Securely
lock the rewind wheel in this position
with the vice-grips or other suitable
clamping device.
Figure 24
12) With the rewind wheel securely locked, observe the amount of cable remaining on
the cable drum. If there is less thane 1/2 wrap of cable, grasp the cable firmly and
apply tension, slowly release the clamping device and allow the rewind spring to
rotate the wheel until there is 1/2 wrap of cable on the drum. Lock the rewind wheel
in this position. If there is more than 1/2 wrap of cable on the drum, unwrap the
cable by pulling it out the top of the box. Feed the loose end of the cable down the
inside front of the box and out through the front cable slot, ensuring there are no
kinks or twists. Grasp the cable firmly and apply tension, slowly release the
clamping tool and allow the rewind spring to rotate the wheel until there is 1/2 wrap
of cable on the drum. Lock the wheel in this position.
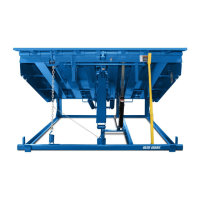
13) Replace wear strip, if removed, lock roller and counter weight in that order.
14) Feed loose cable end through lower
and upper cable rollers and through
float spring eye. Loop cable back and
install cable clamp loosely. Apply
tension to loose end of cable,
removing all slack between hold down
box and float spring while maintaining
tension of cable, and tighten clamp
securely. See Figure 25.
15) Carefully release the vice-grip clamp
that was holding the rewind wheel in
position.
Figure 25