Solution 6000-IP
18
Bosch Security Systems 10/22 BLCC615R
Quick Start Guide
Exiting Programming Mode
Press and hold down [MENU] key for 2 seconds.
Navigating The Menu
Using the up and down arrow keys to navigate, locate the
desired menu item using the highlight bar and then press
the [OK] key to select.
A new list of menu items will appear. Repeat the above
until the desired menu item is located.
To navigate backwards through the menu items press
the [MENU] key at any time. Alternatively if you know the
direct menu item number press [MENU] + Item Number.
Key Description
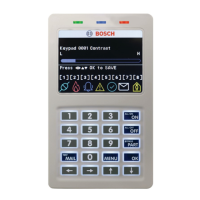
Scrolls Cursor Left
Scrolls Cursor Right
Scrolls Cursor Up
Scrolls Cursor Down
OK Enter Menu Options or Saves Changes
MENU
Go Back One Level, Hold Down to Exit
Programming Mode
0 to 9 Enter Data Value
ON Turn On Bit Option
OFF Turn Off Bit Option, Clear to End of Line
Table 11: Keys Used During Programming
Command Menu
When you first enter programming mode a special menu
called the Command Menu will appear at the top of the
menu tree. The Command Menu provides a list of the
most common system funtions like “Turn Chime Mode On”,
“Move To An Area” or “Turn An Area On”. Use the up and
down arrow keys to navigate and press [OK] to select the
command.
Programming Option Bit Menus
Use the up and down arrow keys to scroll through the 8
different options. To select an option, press the [ON] key
– a tick [] will be displayed. To deselect an option, press
the [OFF] key.
O On Low Battery
Show Overload
Report Overload
Press OK ON OFF MENU
Figure 25: Sample Option Bit Menu Display
To save programming changes, press [OK], else press
[MENU] to exit without saving.
Alpha Text
Text descriptions are available for Area Name, Zone Name,
User Name, TimeZone Name, Holiday Name Prox Reader
Name and Output Name. Each name can have a maximum
of 20 characters.
Area 2 Name
Reception Area
Press OK or MENU
Figure 26: Area Text Programming Display
When programming text, each numeric key represents a
different group of characters.
Pressing the same numeric key repeatedly will step you
through the available characters assigned to the key. The
text key layout is the same as most phones. Refer to the
table below for detailed character information.
Key Characters Assigned To Each Numeric Key
1 . , ? ! - & ` 1
2 A B C a b c 2
3 D E F d e f 3
4 G H I g h i 4
5 J K L j k l 5
6 M N O m n o 6
7 P Q R S p q r s 7
8 T U V t u v 8
9 W X Y Z w x y z 9
0 SPACE 0
Scroll Up through entire character list
Scroll Down through entire character list
Move to left one character position
Move to right one character position
OFF Clear from cursor postiion to end of line
Table 12: Text Keypad Character Set
Once the desired character is displayed press the right
arrow key to move to the next character position. To save
programming changes, press [OK], else press [MENU] to
exit without saving.
The following additional special characters are
available by scrolling using the up and down arrow
keys. + - @ # $ “ & % * : ( ) / < > =
 Loading...
