Brookeld Engineering Labs., Inc. Page 9 Manual No. M13-167
ElectricalCertications:
Conforms to CE Standards:
BSEN61326: Electricalequipmentformeasurement,controlandlaboratoryuse-EMC
requirements
BSEN61010-1: Safetyrequirementsforelectricalequipment,formeasurement,control
and laboratory use
Notice to customers:
Thissymbolindicatesthatthisproductistoberecycledatanappropriatecollectioncenter.
Users within the European Union:
Pleasecontactyourdealerorthelocalauthoritiesinchargeofwastemanagementonhowtodispose
ofthisproductproperly.AllBrookeldofcesandournetworkofrepresentativesanddealerscan
befoundonourwebsite:www.brookeldengineering.com
Users outside of the European Union:
Pleasedisposeofthisproductaccordingtoyourlocallaws.
I.4 Installation
Note:“IQ,OQ,PQ”,anabbreviatedguidelinedocumentforinstallation,operationand
performancevalidationforyourDV2Tdigitalviscometercanbedownloadedfrom
ourwebsitewww.brookeldengineering.com.AmoredetailedIQ,OQ,PQprocedure
isavailableforpurchasefromBrookeldoryourauthorizeddealer.
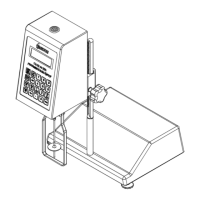
1) AssembletheModelGLaboratoryStand(refertoassemblyinstructionsinAppendixH).
2) Puttheviscometeronthestand.
3) ConnecttheRTDprobetothesocketontherearpaneloftheDV2T.
4) TheViscometermustbeleveled.Thelevelisadjustedusingthetwolevelingscrewsonthe
base.AdjustsothatthebubblelevelonthefrontoftheDV2T iscenteredwithinthecircle.
Note: Checklevelperiodicallyduringuse.
5) RemovetheshippingcapwhichsecuresthecouplingnutontheViscometertothepivot
cup.ForCone/PlateModels,holdtheSampleCupandswingthetensionbaraway
fromthebottomofthecup.Lowerthecupandremovethefoaminsert.(Saveforfuture
shipments.)
6) MakesurethattheACpowerswitchattherearoftheDV2TisintheOFFposition.
Connectthepowercordtothesocketonthebackpaneloftheinstrumentandplugitinto
theappropriateACline.ForCone/PlateModels,besurethatthetoggleswitch,usedto
activatetheelectronicgap,istotheleftposition.(Leftwhenfacingtheviscometer.)
TheACinputvoltageandfrequencymustbewithintheappropriaterangeasshownon
thenameplateoftheviscometer(seeSectionI.2).