42
ZTKS0156 / Z31820 / Rev.: 03
Assembling
Removing the lower Transportation Lock
i
Each transportation lock is adapted to only one cryostat, indicated by the magnet system
number in each part of the transportation lock.
Do not mix-up transportation locks from other cryostat. Keep all transportation lock parts
for future transportation.
For storage use the compartment of the shipping box of the cryostat.
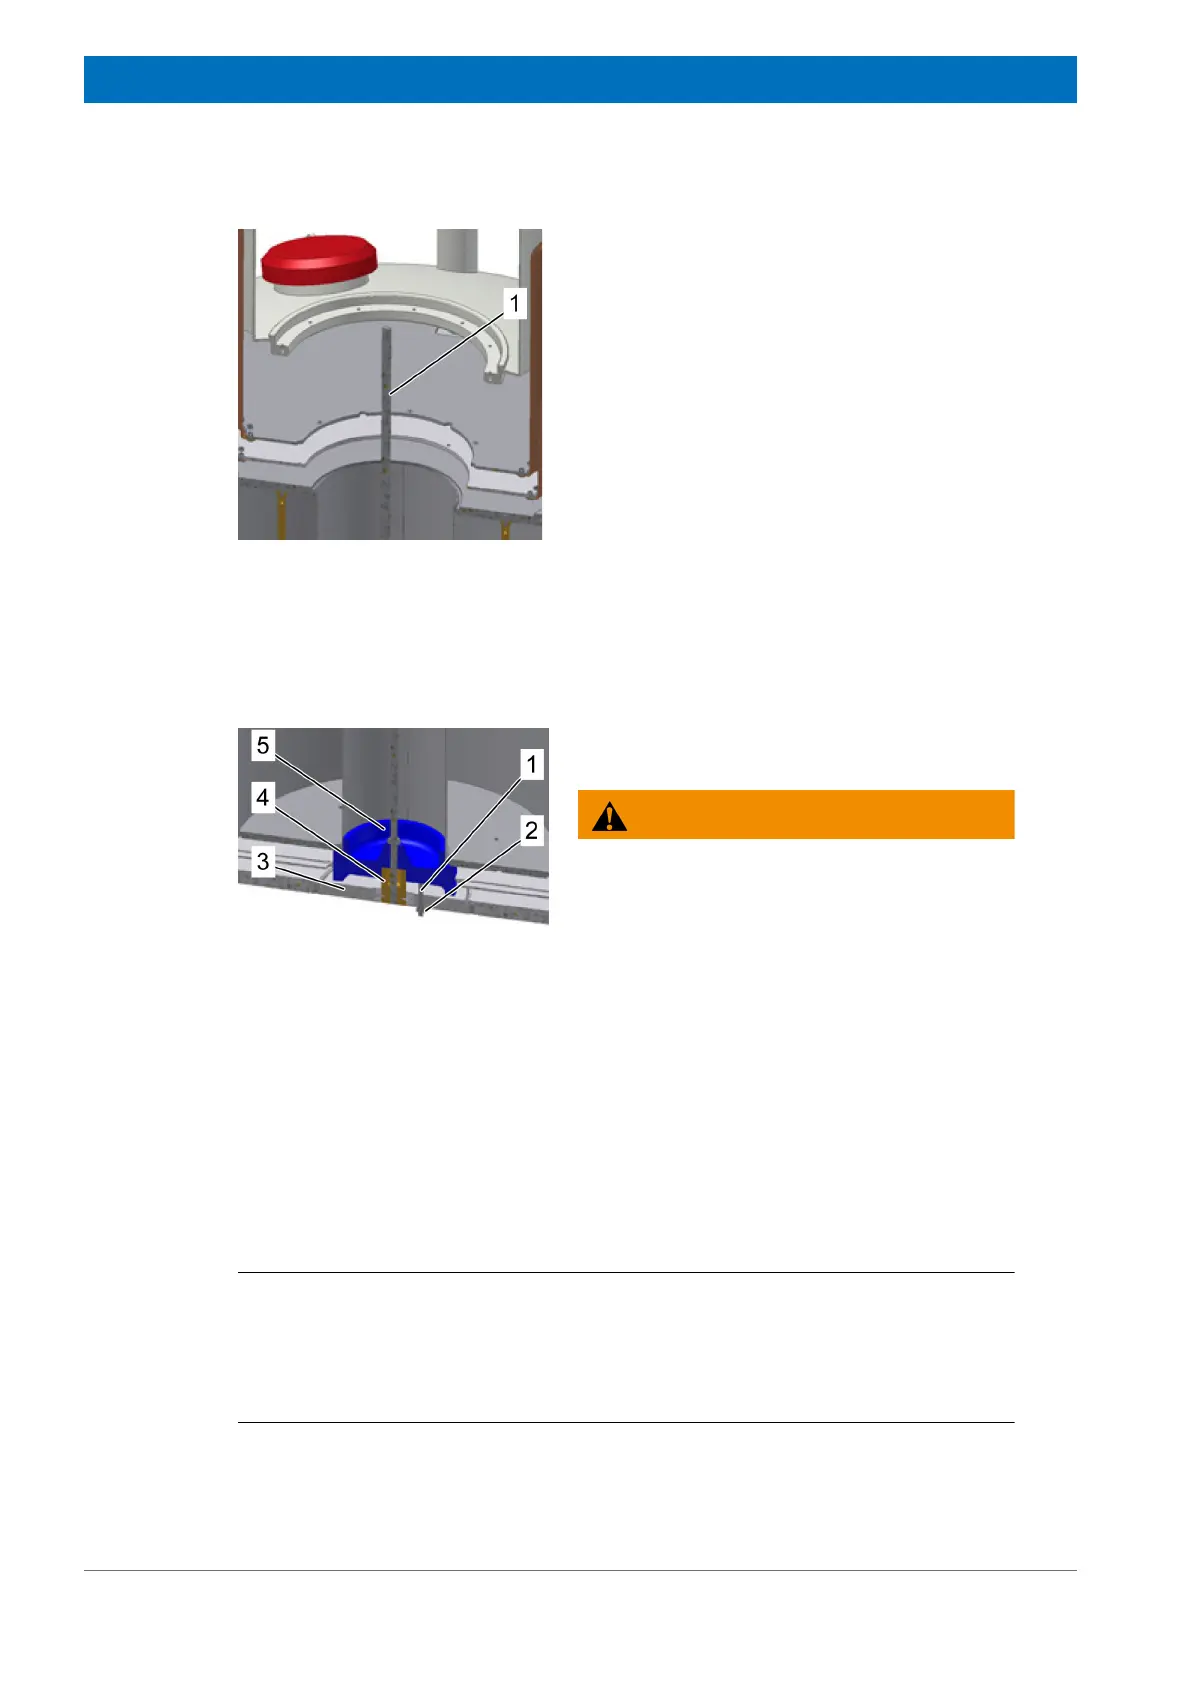
Figure 4.7: Removing the Transportation Lock - step 4
10. The threaded bar (1) remains until removing
the lower transportation lock. Afterwards
remove the threaded bar from the top.
Figure 4.8: Removing the Transportation Lock - step 5
11. Remove three nuts M 8 (2).
12. Remove the threaded bolts M 8 (1).
13. Loosen the twelve screws M 5 x 12 at the
lower transportation lock plate (3). Secure
the lower transportation lock plate against
falling.
14. Remove lower transportation lock plate (3),
the brass nut (4) and lower fixture flange (5).
15. Loosen the threaded bar from the brass nut
(4).
Continue on top of the cryostat:
16. Remove the threaded bar from the top.



 To Next Page