63
ZTKS0156 / Z31820 / Rev.: 03
Assembling
i
The sound-insulating material of the noise protection is pressure-sensitive. Damaging
the sound insulating material will reduce its performance.
Thus:
Prevent pressure on the sound insulating material. Prevent contact between the rotary
valve column assembly during insertion into the noise protection cover.
Figure 4.57: Mounting the Rotary Valve and Flex Lines - step 6
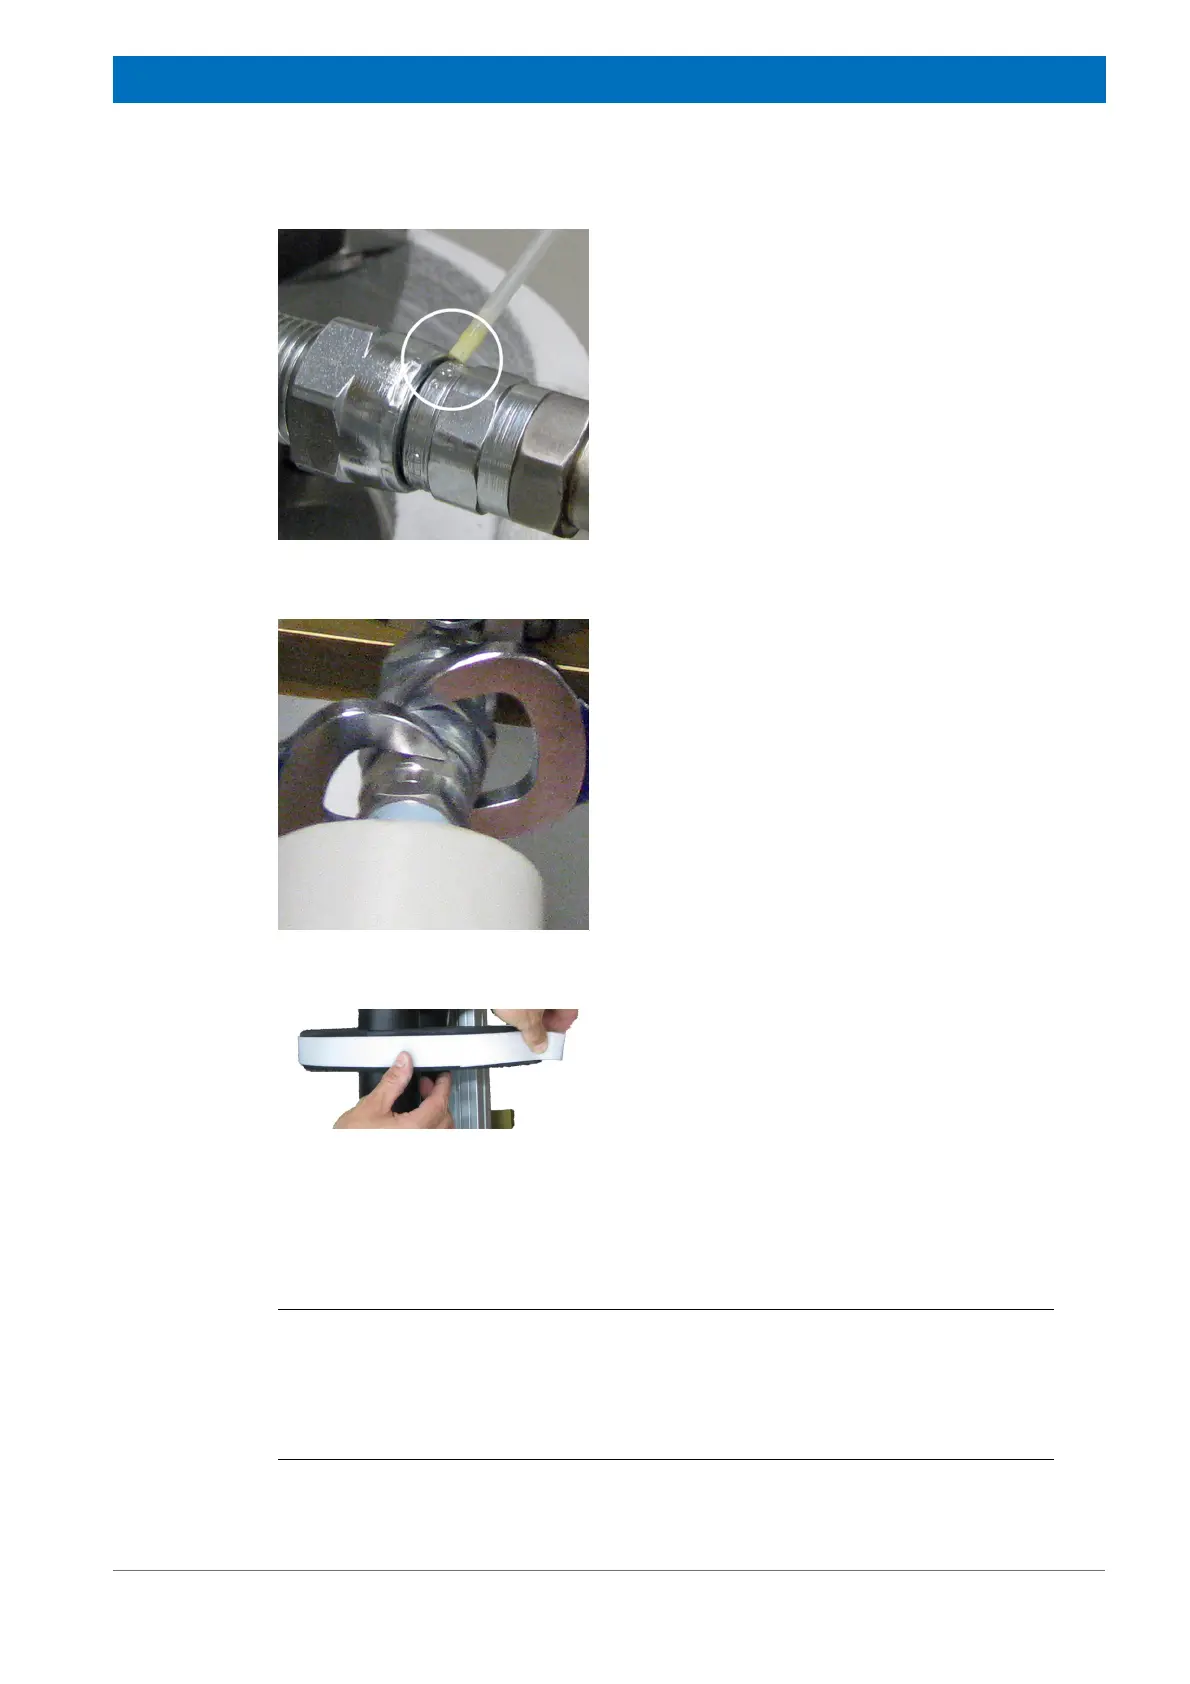
13. Grease the outside thread of the female part
behind the cap nut with PTFE-spray.
14. Connect the low pressure flex line to the low
pressure socket of the rotary valve (short
socket towards front plate).
15. Connect the high pressure flex line to the
high pressure socket of the rotary valve
(long socket behind front socket).
Figure 4.58: Mounting the Rotary Valve and Flex Lines - step 7
16. Tighten the cup nuts as shown and loosen
them with 1/4 rotation.
17. Connect the motor cord to the socket of the
rotary valve respecting the indexing.
Figure 4.59: Mounting the Rotary Valve and Flex Lines - step 8
18. Put up the rotary valve column carefully.
Arrange the flex lines inside the hole of the
base plate carefully. Prevent sharp bends to
the flex lines and the motor cord. Prevent
damage to the flex line or motor cord insula-
tion.
19. Close the flex line positioning disc with the
supplied Velcro® fastener.