75
ZTKS0156 / Z31820 / Rev.: 03
Assembling
21. Insert the current lead into the current lead turret respecting the correct position.
The current lead can only be inserted in one position.
22. Remove the auxiliary shorting plug out of the helium fill-in turret.
23. Connect the ACD with the current lead (1).
24. Connect the current lead to the Bruker power supply.
25. Check resistance of the magnet coils and shims at room temperature (see Appendix
Technical Data).
26. Check the zero readings of the PT 100 temperature sensors (see Appendix
Technical Data).
27. Check zero reading of the helium level sensor.
28. Check the connection between the PT 100 connector at the current lead and the
ACD. The ACD must show approximately room temperature (~293 K).
29. Connect the precooling tube (5) with the liquid nitrogen transportation dewar.
30. Adjust the pressure of the liquid nitrogen transportation dewar to 0.2 - 0.3 bar
(1 - 2 PSI).
=> liquid nitrogen transfer starts.
i
Precooling with liquid nitrogen reduces the consumption of liquid helium during cooling
down.
i
Time for cooling down to 80 K with liquid nitrogen will take 18 to 24 hours.
35. Set the Cryogenic Refrigerator into operation. Operating properly, the Cryogenic
Refrigerator will emit a rhythmic squeak or chirp. This noise is an indication of the
proper flow of the gas inside the system.
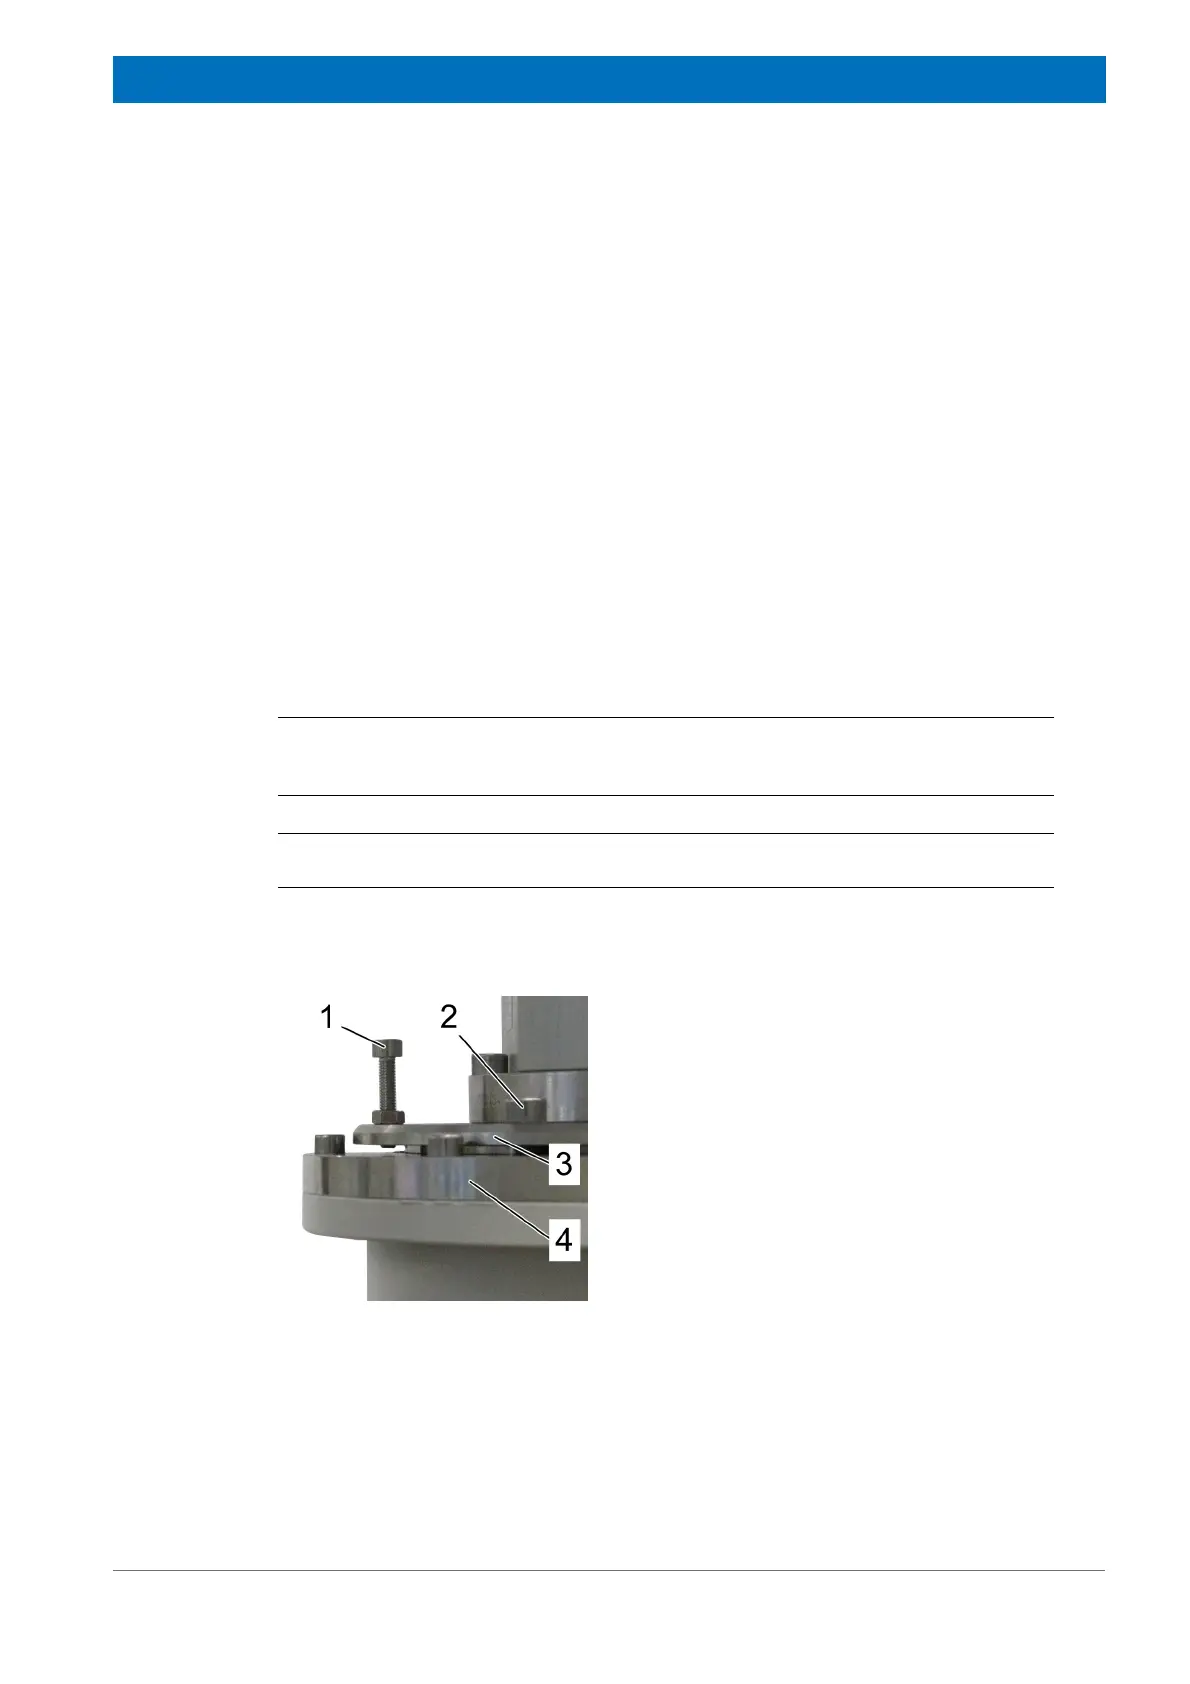
Figure 4.79: Adjusting the Cold Head
31. Turn the three M 5 adjustment screws (1) at
the cold head flange (3) counter clockwise
until the thread is not longer visible at the
bottom side of the cold head flange.
32. Tighten the three M 6 screws (2) (torque
less than 1 Nm) to push down the cold head
in operating position. The assembly is cor-
rect, if there is a gap of about 2 mm between
cold head flange (3) and turret flange (4).
33. Tighten the three M 5 adjustment screws (1)
(torque less than 1 Nm) against the cold
head flange (3).
34. Fix the three M 5 adjustment screws (1) with
the nut.