2. On the Tab Selection screen of the Control Panel, press ◀ or ▶ to select the Settings/Adj. tab ( ).
Note
• If the Tab Selection screen is not displayed, press the Menu button.
3. Press the OK button.
The Set./Adj. Menu is displayed.
4. Press ▲ or ▼ to select Adjust Printer, and then press the OK button.
5. Press ▲ or ▼ to select Head Posi. Adj., and then press the OK button.
6. Press ▲ or ▼ to select Manual, and then press the OK button.
A test pattern is printed for adjustment.
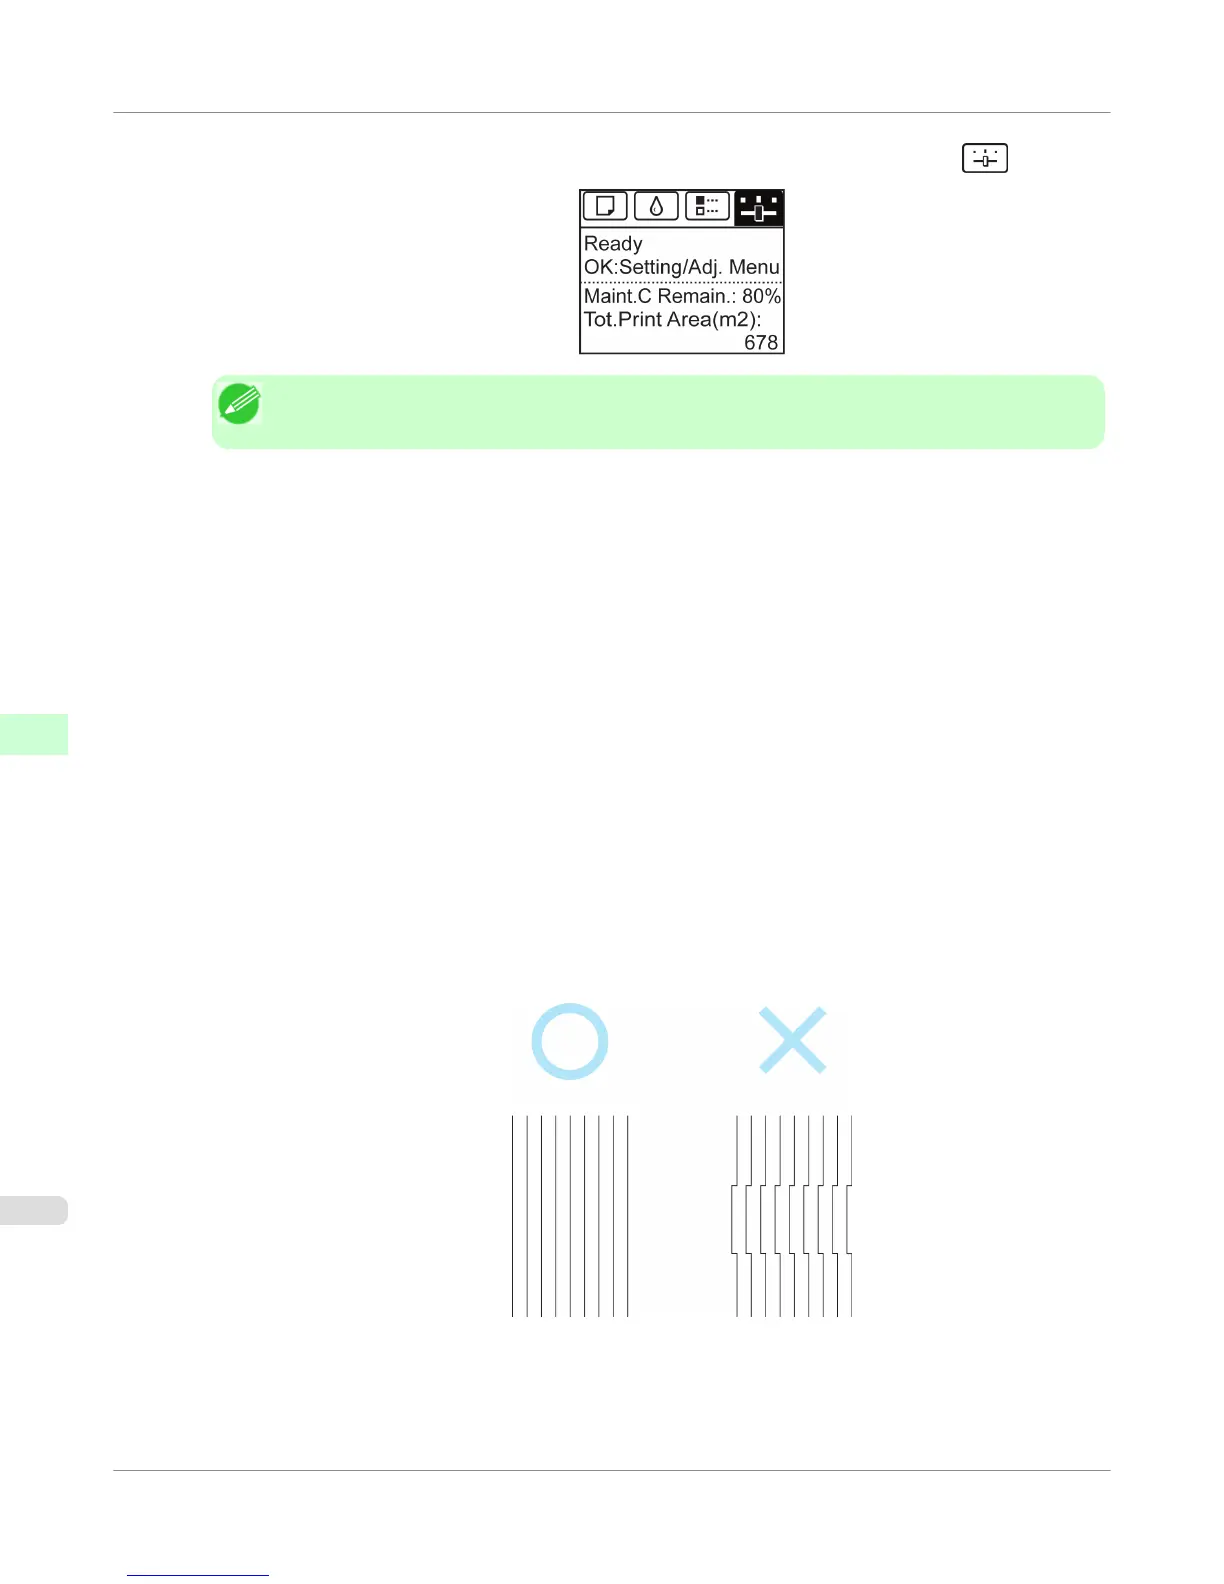
7. Press ▲ or ▼ to select D, and then press the OK button.
8. Press ▲ or ▼ to select D-1, and then press the OK button.
9. Examine adjustment test pattern D-1 and determine the number with straight lines.
Adjustments for Better Print Quality
>
Adjusting the Printhead
>
Manual Adjustment to Straighten Lines and Colors (Head Posi. Adj.)
iPF655
7
680
 Loading...