Troubleshooting Guide
4-16
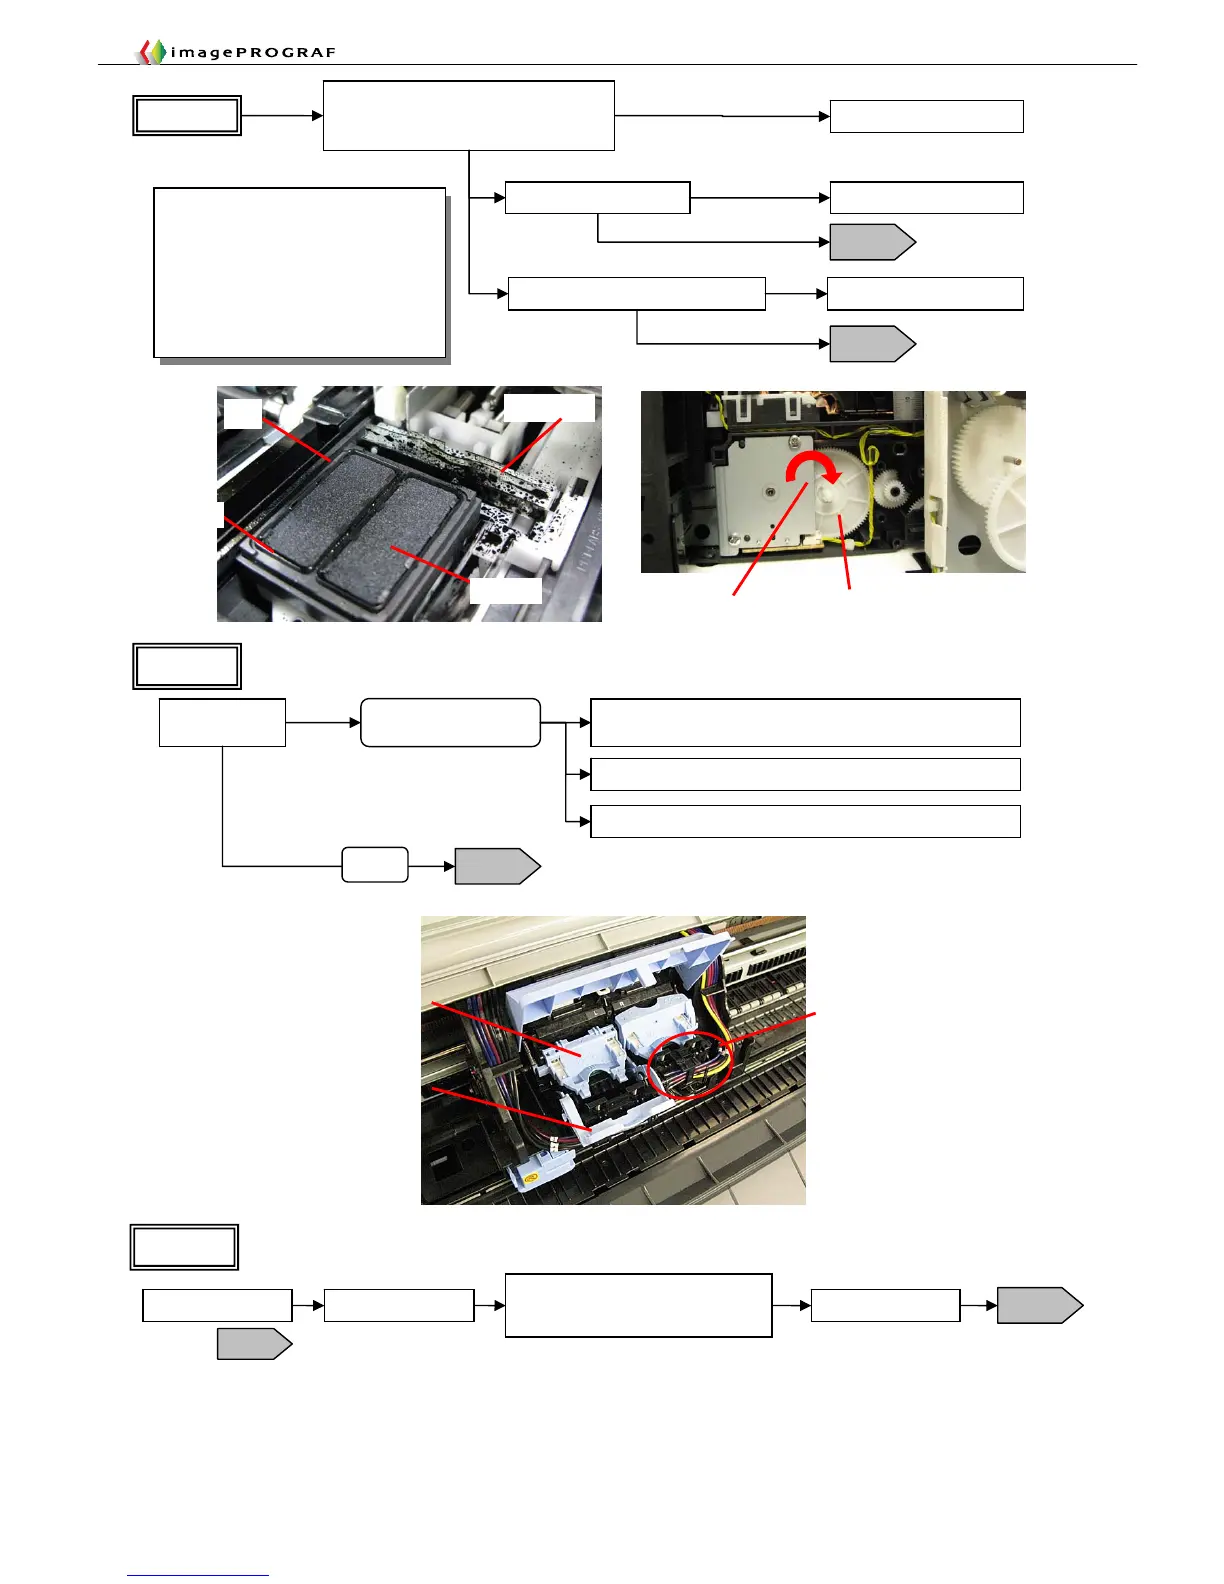
Head lever
Joint unit
Tube lever
Flow 2
Open the cap to locate air leaks.
Open the supply
valve
Ink drops
Air leak from the supply
unit
Replace the tube (for the iPF5000 Series, the tube is
integrated into the supply unit)
No ink drops
Leak from the joint unit (head joint, tube, supply unit)/replace
Flow 3
Possibly faulty head
Normal
Direction of gear rotation Gear
Flow 1
Turn the gear by hand to check the cap
moves up and down and that the wiper
blade moves forward and backward (*1)
Movable
Not movable
Replace the purge unit
Check the lip of the cap Replace the purge unit
Flawed
Not flawed
Flow 2
Is the absorber in the cap elevated? Correct the elevation
Flow 2
Yes
No
*1 Sequence of checking the purge unit
for normal operation
①The cap moves down.
②The wiper blade moves forward
and backward.
③The cap moves up.
Turn the gear clockwise (toward a
triangular mark) by giving it 11.25 turns
to complete one cycle of operation.
Air leak isolation
Air leak isolation
Wiper blade
Cap
Absorbe
Pull out the carriage
T14
Open the tube lever
Open the ink supply valve for about 2
seconds, observing the behavior of
the ink in the tube
Flow 4
Fill the tube with air to check the behavior of the ink.
Flow 3
* Do not open the head
lever.
Close the tube lever