33
The generator assembly has a support cradle used to
secure the generator assembly to the headgear and help
properly align the nasal prongs or mask to the infant’s nose.
Headgear should fit snugly to prevent slippage.
Do not overtighten. If the headgear is too tight, it may
cause head molding and additional pressure points
against the infant’s delicate skin.
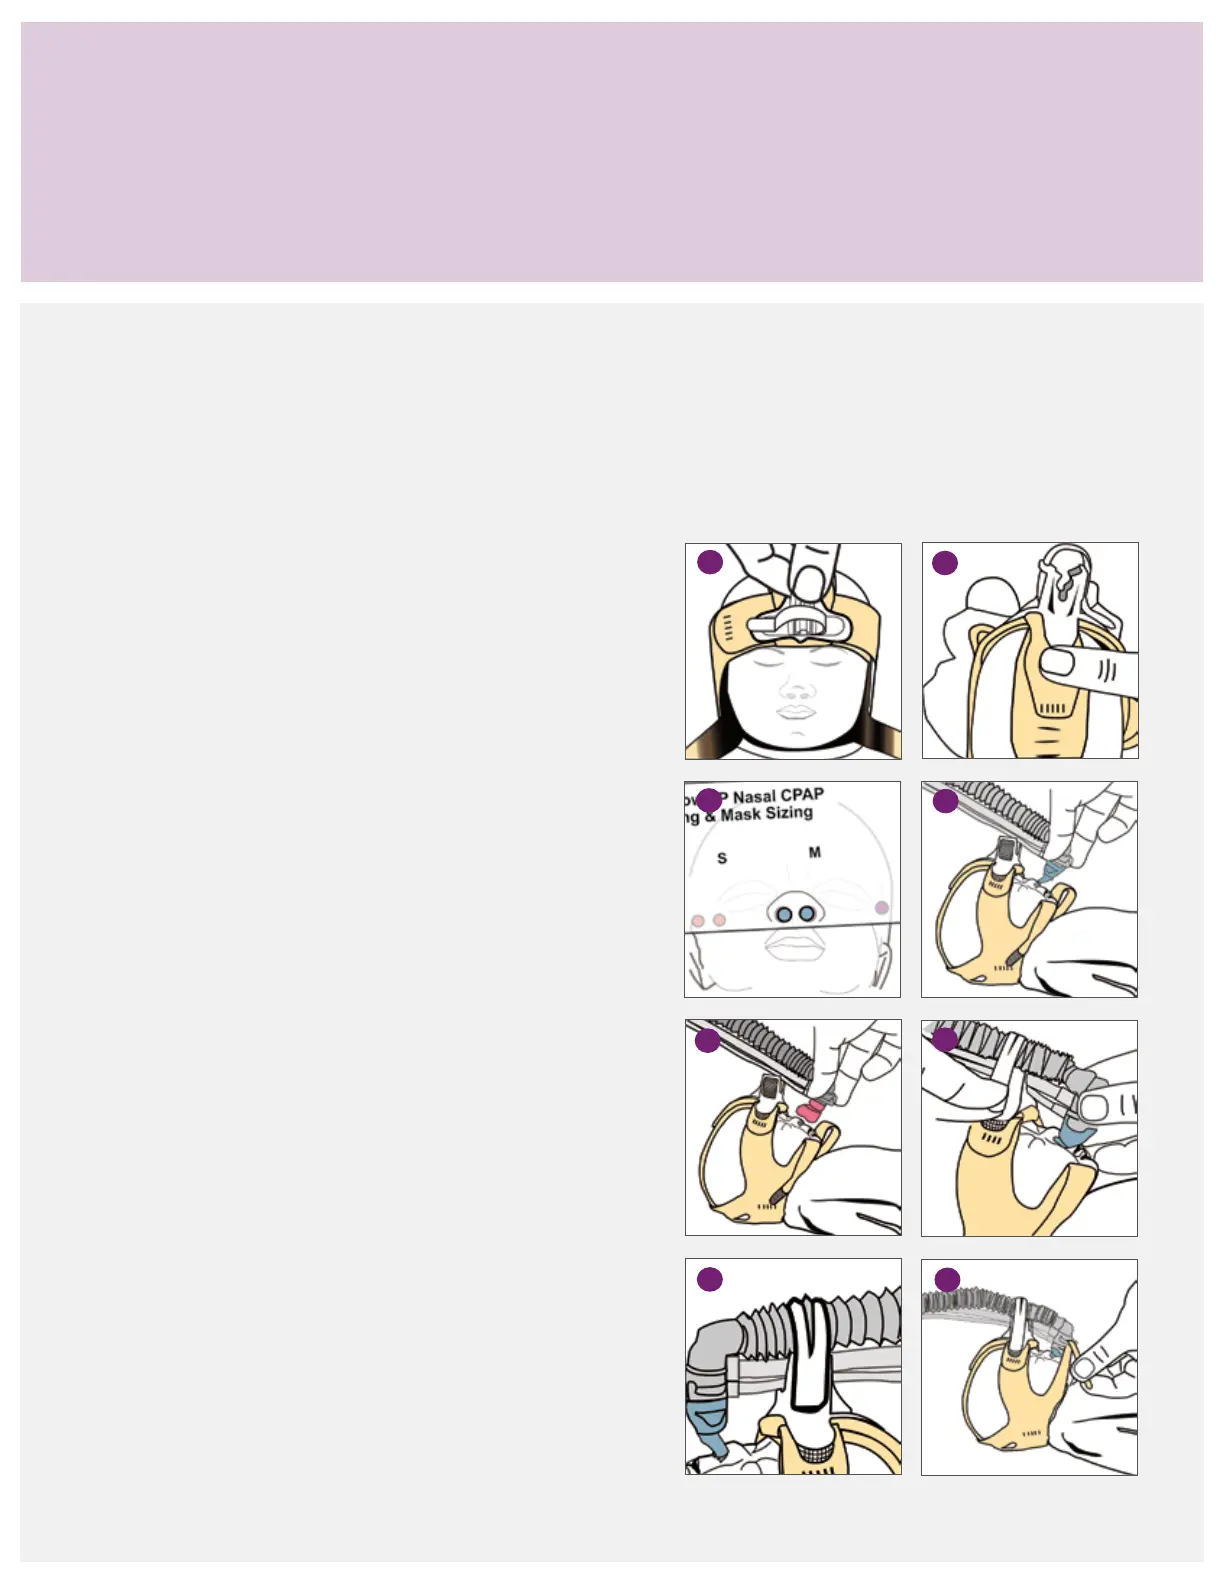
1. Attach the support cradle
Remove the support cradle from the generator assembly,
and position it in the center of the forehead strap. (1a)
Gently press the three tabs down. (1b) Ensure that the
support cradle does not overlap the edge of the strap or
touch the patient’s skin.
2. Insert the nasal prongs
Select the appropriate size of prongs, and attach them to
the generator. (2a) Grasp the generator assembly with two
hands. Use one hand to align the generator with the nasal
prongs perpendicular to the nose and the other hand to
align the exhaust tube over the support cradle. (2b) For easy
application, moisten the prong tips with sterile water. Start
one prong at a time, and use a gentle side-to-side motion
during insertion. A seal is created with the flared section of
the prong, not from inserting the prong to the base. Do not
insert the prongs beyond the flexible bellow section.
3. Apply the nasal mask
Select the appropriate mask size, and attach it to the
generator. Note that the mask size may vary from the
nasal prong size. Hold the generator assembly with two
hands, and center the mask over the nose. (3) Gently place
the mask on the infant’s face to retain the mask’s original
shape. The mask should fit around the perimeter of the
nose, without touching the eyes and blocking the nares.
4. Secure the generator assembly
After placing the nasal mask or prongs, position the drive
and pressure lines in the support cradle with the exhalation
tube resting on top of the cradle. Wrap the locking strap
over the exhalation tube, and attach it to the side of the
support cradle. (4a) To help hold the exhalation tube in
place, position the slit in the locking strap over a bend in
the corrugated tube—do not overtighten the straps. (4b)
5. Connect the side straps
Using the lower side strap, fold over the fixation tab and
secure it back onto the headgear. Attach the second side
strap to the generator. (5) The straps should lie low on
the cheeks and away from the infant’s eyes. Check that
the straps lie flat on the cheek and are not twisted—do
not overtighten the side straps.
Generator assembly and interface attachment
2b
2a
1a
1b
4a
3
4b
5

 Loading...