36
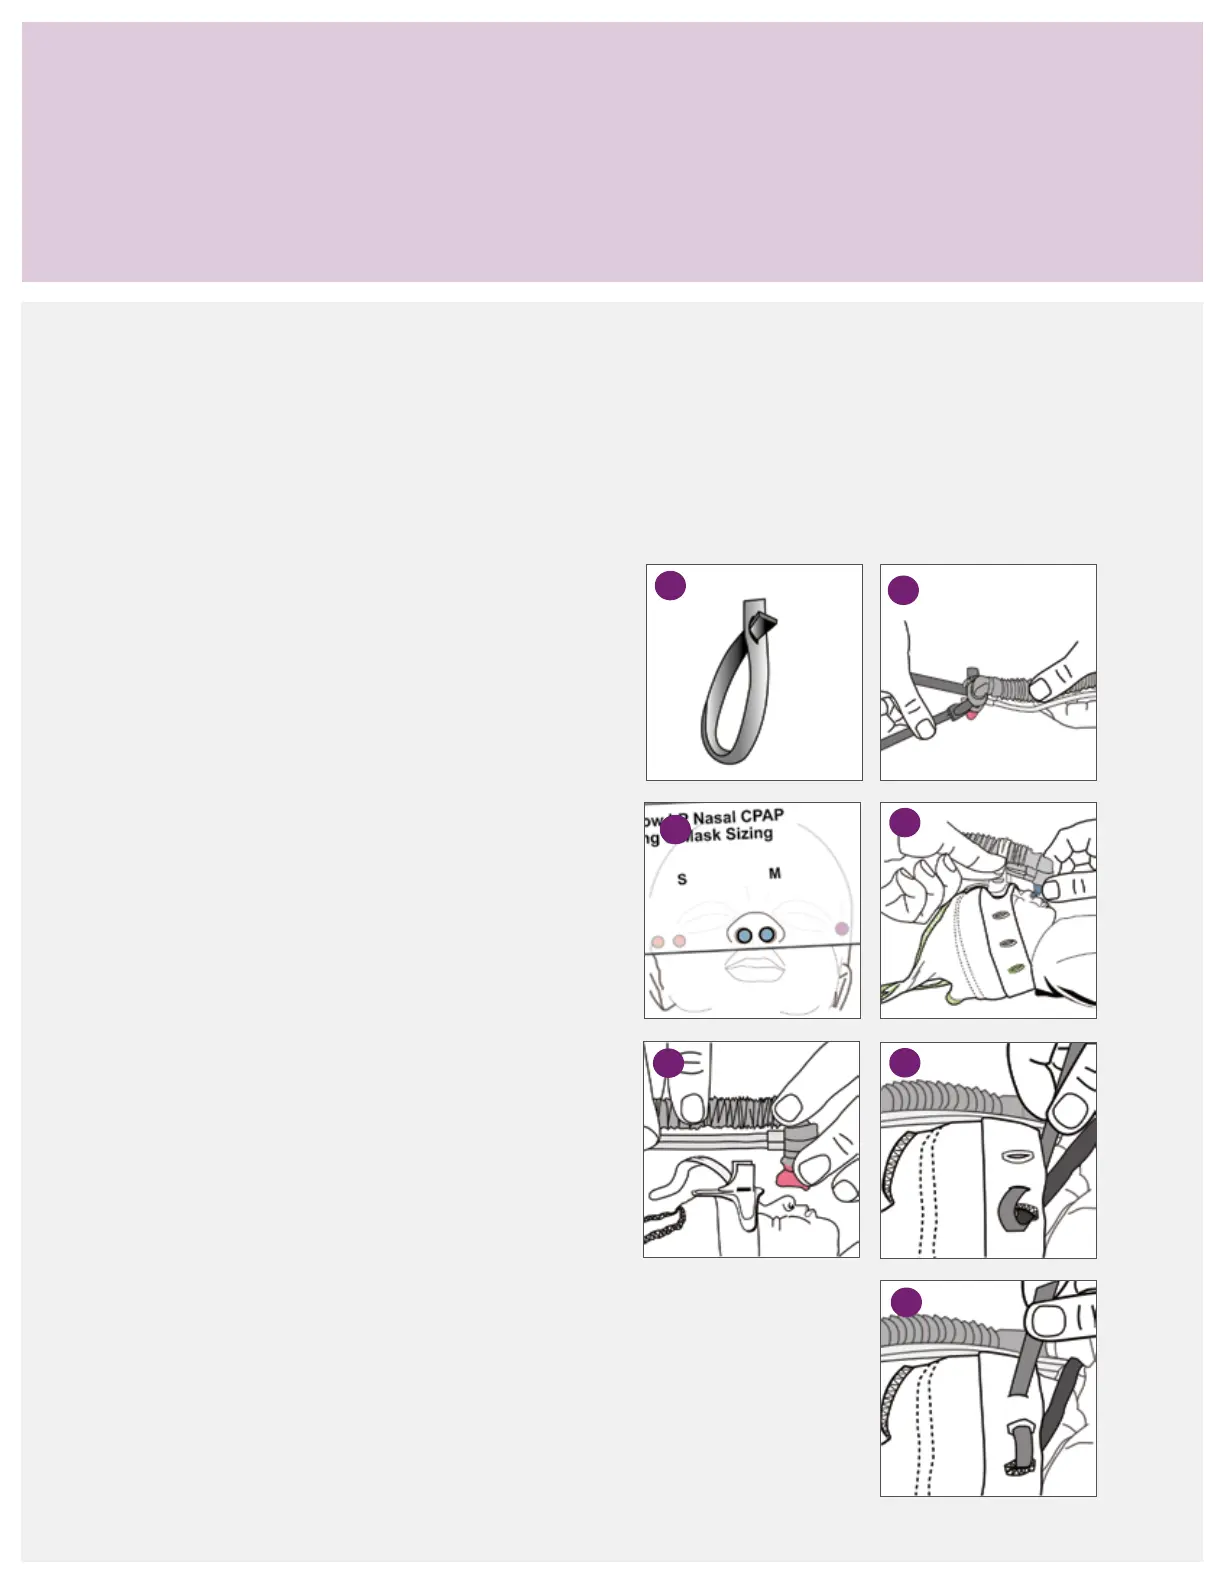
Attach the straps to the quick secure tab
1. Pull the slanted end of the gray strap through the slit on
the opposite end to form a loop. (1a) Slide the loop over
the quick secure tab on the generator, and pull it tight.
Repeat the procedure to attach the second gray strap to
the fixation tab. (1b)
Insert the nasal prongs
2. Select the appropriately sized prongs, and attach them
to the generator. (2a) Grasp the generator assembly
with two hands. Using both hands, align the generator
assembly perpendicular to the nose with the exhaust
tube above the support cradle. (2b)
For easy application, use a gentle side-to-side motion
to insert one prong at a time. A seal is created with the
flared tip. Do not insert the prongs beyond the flexible
bellow section or to the base of the prong. The septum
should be visible. Larger nasal prongs may be indicated
to obtain a seal if the straps are pulled too tight or the
prongs inserted too deep.
Apply the nasal mask
3. Select the appropriate mask size, and attach it to the
generator. Note the mask size may vary from the nasal
prong size. Hold the generator assembly with two hands,
and center the mask over the nose. Gently place the
mask on the infant’s face to retain the mask’s original
shape. The mask should fit around the perimeter of the
nose, without touching the eyes and blocking the nares.
Attach the generator assembly to the bonnet
4. To attach the generator assembly to the bonnet, turn
the infant’s head to one side. Have one clinician hold the
infant’s head to the side, while the other clinician threads
the gray straps to the bonnet. Starting with the colored
hole, weave the gray strap through the bonnet holes. (4a)
Thread up through the colored hole, down through the
second and up through the third. (4b)
Turn the infant’s head to the other side and repeat the
weaving process with the second grey strap. Adjust
the tension on the straps. The gray straps should lie
horizontally across the cheeks. Ensure the straps are not
resting close to the eyes.
A special pad on the bonnet holds the support cradle in
place. This secures the generator assembly to the bonnet
and helps properly align the nasal prongs or mask to the
infant’s nose. The bonnet should cover the ears and
fit snugly to prevent slippage—do not overtighten
the side straps.
Generator assembly and interface attachment to bonnet
2a
1a
1b
3
4a
4b
2b




 To Next Page