44
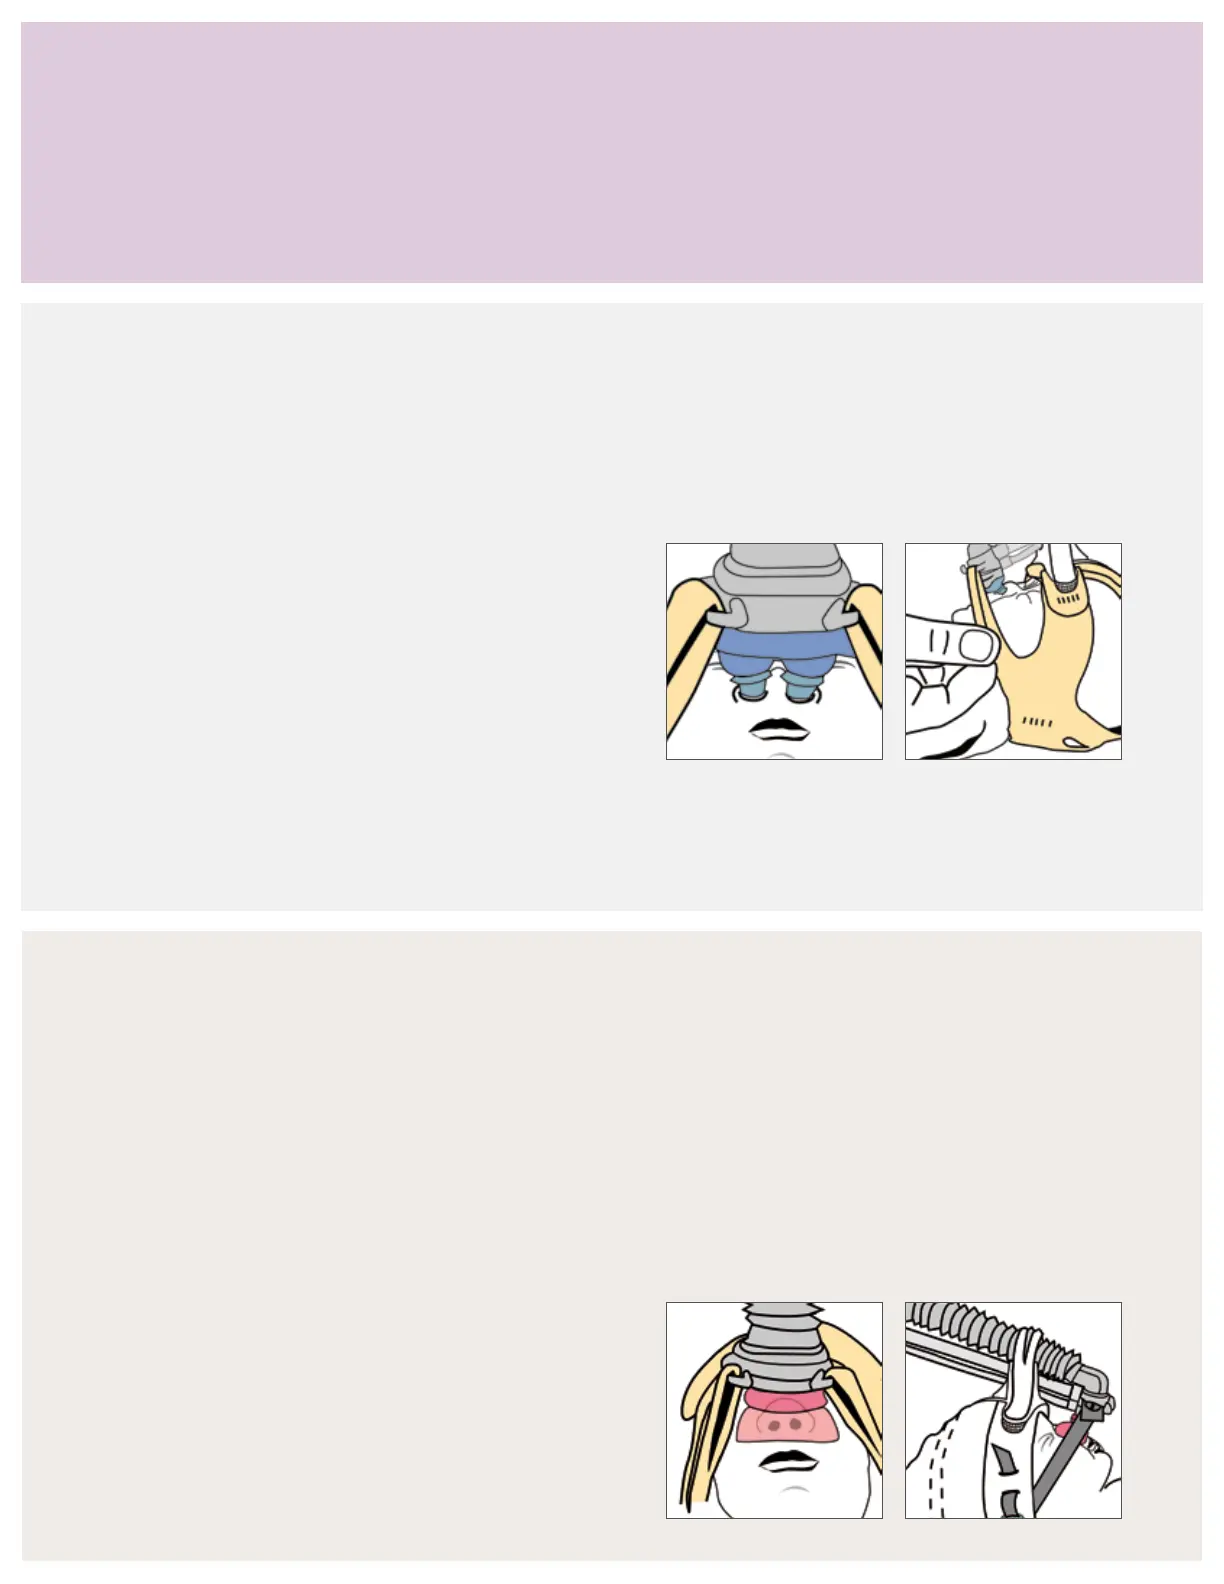
Nasal prong placement
For proper nasal prongs placement, check the following:
• The bellows are visible, not compressed. If the bellows
are compressed, use the side straps on the xation device
to adjust the tension applied to the nasal prongs. Loosen
the straps until the infant’s nasal septum is visible and
the bellows pop up.
• The generator and prongs are not touching the upper lip
or the apex of the nose.
• The prongs are not kinked or folded over.
• The upper portions of the prongs are in
both nares.
• The prongs create a good seal with minimal or no leaks.
• No blanching is on the outer side of the nares. This
indicates the prongs are too large.
After applying the fixation device and generator assembly,
conduct a final check for the proper placement of the nasal
prongs and mask. A properly sized and placed interface
is key to the success of nCPAP therapy. Confirm that the
prescribed pressure is being delivered.
Final inspection of nasal interface placement
Nasal mask placement
For proper nasal mask placement, check that:
• The generator and mask are centered over the
nasal area.
• The mask covers the perimeter of the infant’s nose.
• The mask sits midline between the nose and upper
lip. Make sure the mask is not resting on the lip or
blocking the nares.
• The bellow is visible, not compressed.
• The infant’s nares and septum are visible in the
assessment window.
• The mask is fully inated, not collapsed. If collapsed,
the tension on the side straps may be too tight.
Loosen the straps until the below and assessment
window are visible.
• The generator and interface are perpendicular to
the infant’s nose and not leaning to one side.
• The base of the interface is placed evenly on the
generator receiver.
• The mask is seated below the infant’s eyes and rests
on the bridge of the nose.
• The top of the mask is not resting on the glabella,
the area between the eyebrows.
• A good seal is formed with minimal or no leaks.
The prescribed pressure is being met.
• The side straps are not too tight.
 Loading...