44
Maintenance of the Liberty Blue
NOTE
As each position is backushed, the Last Backush date will be updated to the current date and time.
8. Once all reagent positions have been backushed, the manifold will be cleared, and the system will perform a
backpurge of selected positions.
9. After backushing, observe the volume in the amino acid bottles. If the bottles have less than 2 mL of Main Wash
added, replace the dip tube lter in the bottle(s) that are low and perform a backush on those specic positions
again. If volume is still below 2 mL, contact CEM.
10. Once all positions have been backpurged, remove the bottles from those positions and dispose of the liquid.
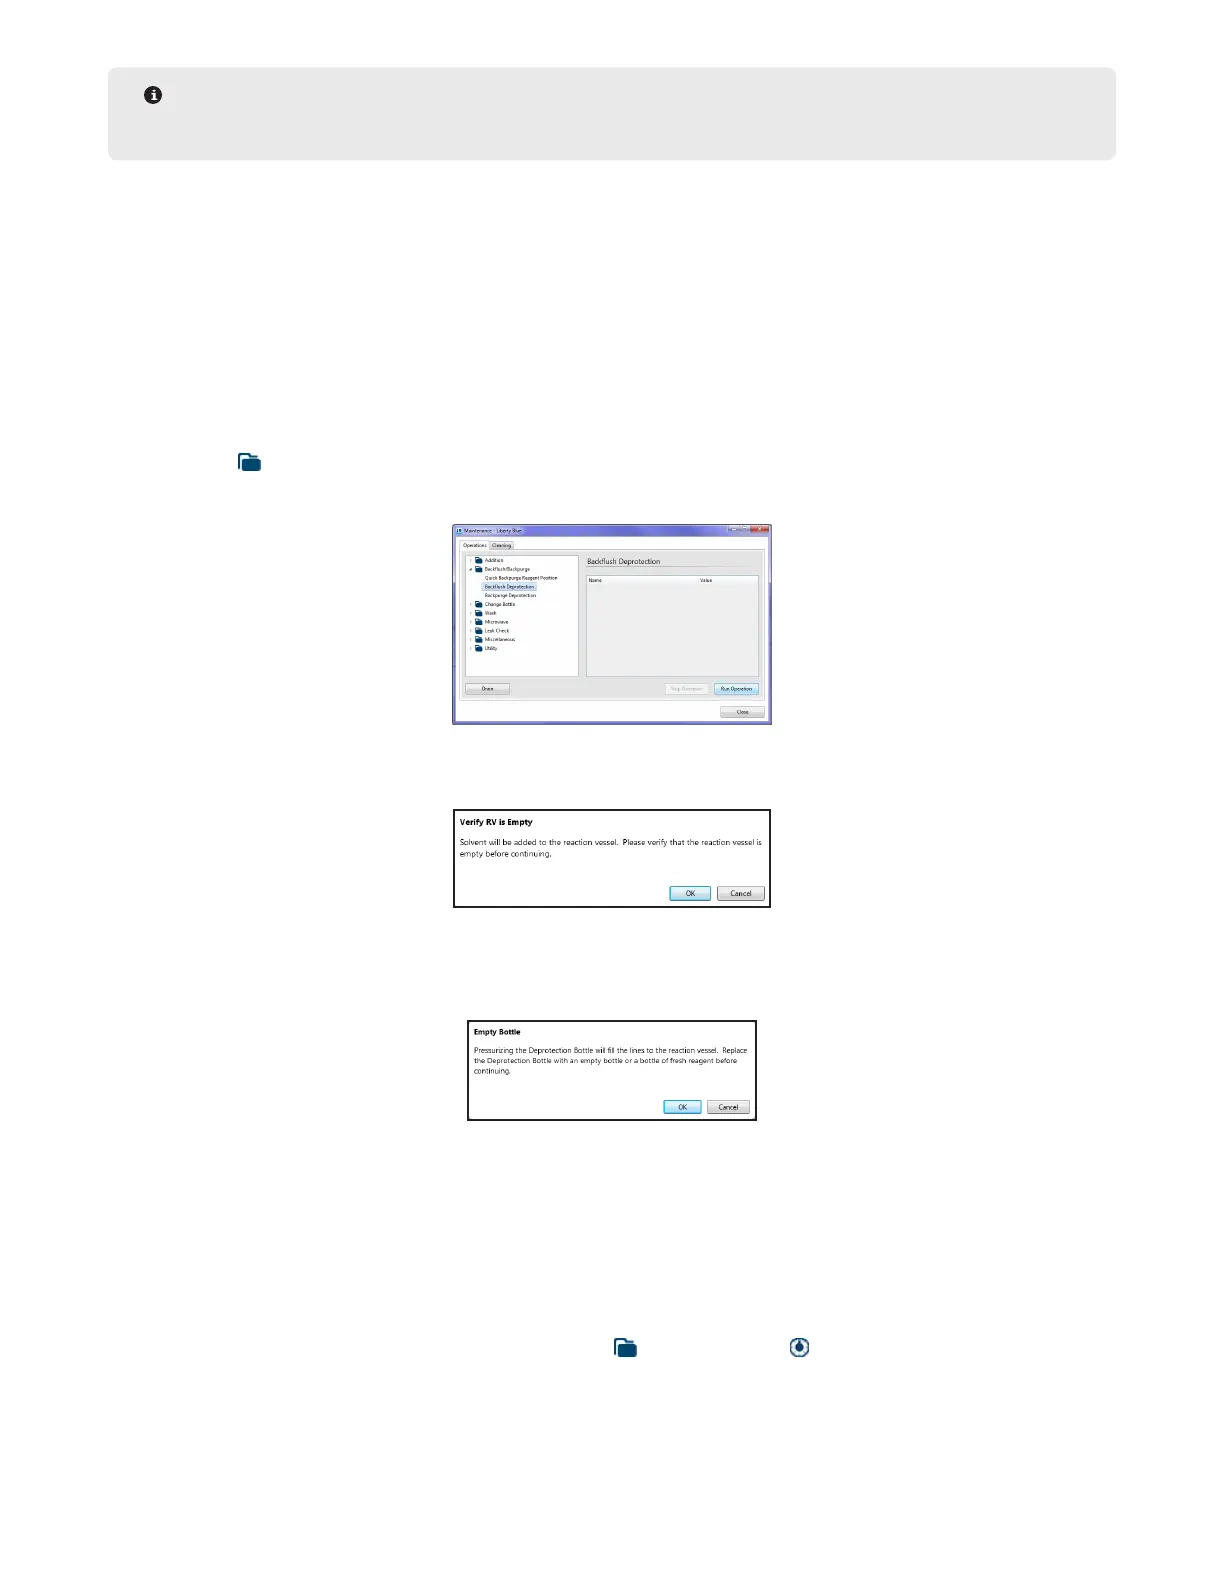
Backflush Deprotection
1. Select “Maintenance” from the “Options” menu.
2. Select the Backush/Backpurge folder and then select the Backush Deprotection operation
3. Click Run Operation.
4. The software will prompt to verify the reaction vessel is empty. Ensure the reaction vessel is empty, then click
OK to continue.
5. Solvent will be added to the reaction vessel, then backpurged into the deprotection bottle. To avoid lling
the lines with the solvent, the software will prompt to replace the bottle. Replace the bottle, then click OK to
complete the backush operation.
Timed Addition Calibration
There are four timed additions that must be calibrated for optimal functionality of the Liberty Blue: Wash, Wash
Thru Manifold, Deprotection, and Wash Thru RV Bottom. To calibrate a timed addition:
1. Place the reaction vessel into the volume calibration stand.
1.1. Remove the reaction vessel assembly from the cavity of the Discover.
1.2. Insert the reaction vessel into the calibration stand so that the drain line from the bottom of the
vessel ts into the slot on the right of the stand.
2. From the Calibration screen, under the Timed Addition folder, select the addition to be calibrated. The table
on the right will update with the calibration history for the selected addition.
3. Click the Calibrate button to begin the calibration operation.
 Loading...