Evolution® IP-20LH Installation Guide
Ceragon Proprietary and Confidential Page 31 of 101
To avoid malfunctioning or personnel injuries, equipment or
accessories/kits/plug-in unit installation, requires qualified and trained
personnel.
Changes or modifications not expressly approved by Ceragon Networks could
void the user's authority to operate the equipment
Where special cables, shields, adapters and grounding kits are supplied or
described in this manual, these items must be used, to comply with the relevant
regulations.
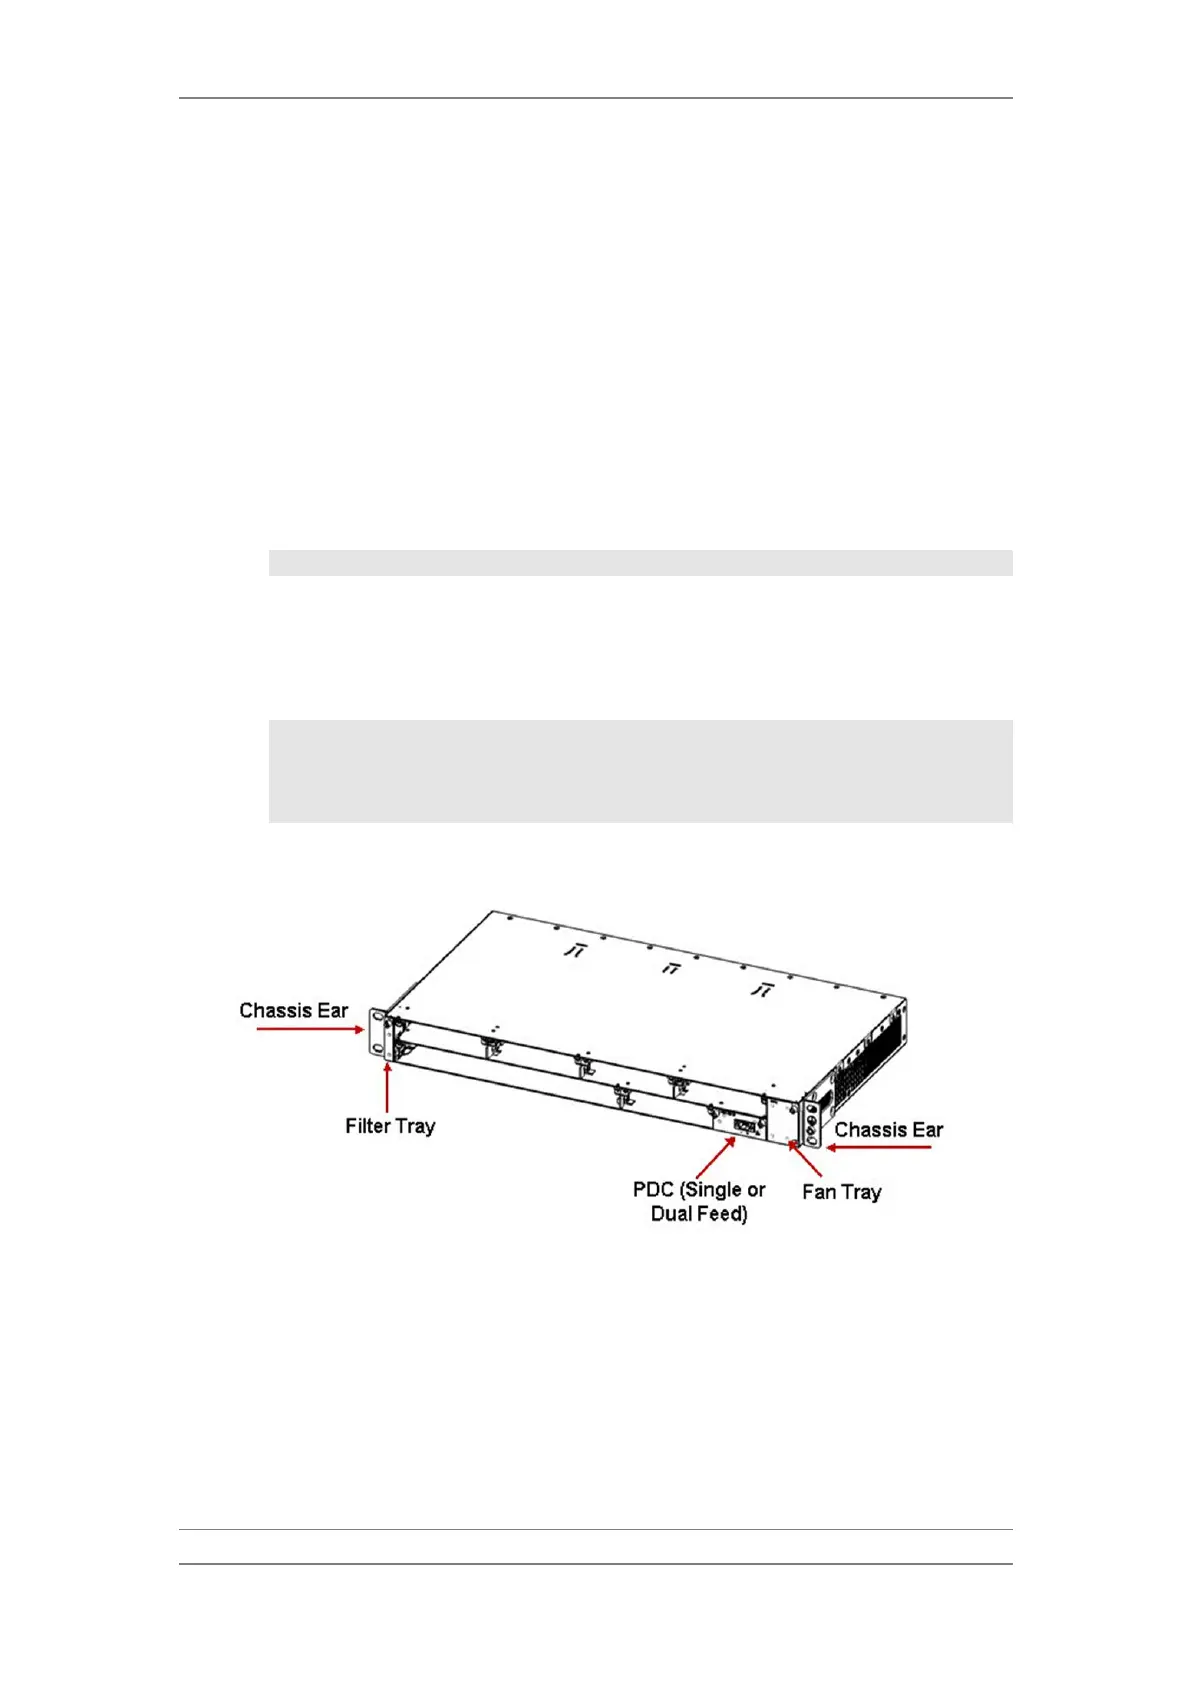
3.4 Verifying Initial Hardware Configuration
Before installing the IDU in the rack, verify placement of the following trays
according to the label on the fan tray.
Note: This step is not necessary for an empty chassis.
A fan tray in right vertical slot.
A PDC card in PDC Slot 1.
A blank filter tray in left vertical slot.
An IVM on the rear side.
Note: In most cases, an Evolution IP-20LH chassis is delivered
with an IVM already installed. However, if you are required
to install or replace an IVM, refer to Installing an IVM on
page 42.
1RU IDU Chassis - Front View