Evolution® IP-20LH Installation Guide
Ceragon Proprietary and Confidential Page 44 of 101
5. Installing and Replacing Cards in the
Chassis
Note: When replacing a card, the new card must have exactly the
same unit code (Code:) as the unit to be replaced.
5.1 TCC Installation and Replacement
5.1.1 Inserting the SD Card in the TCC
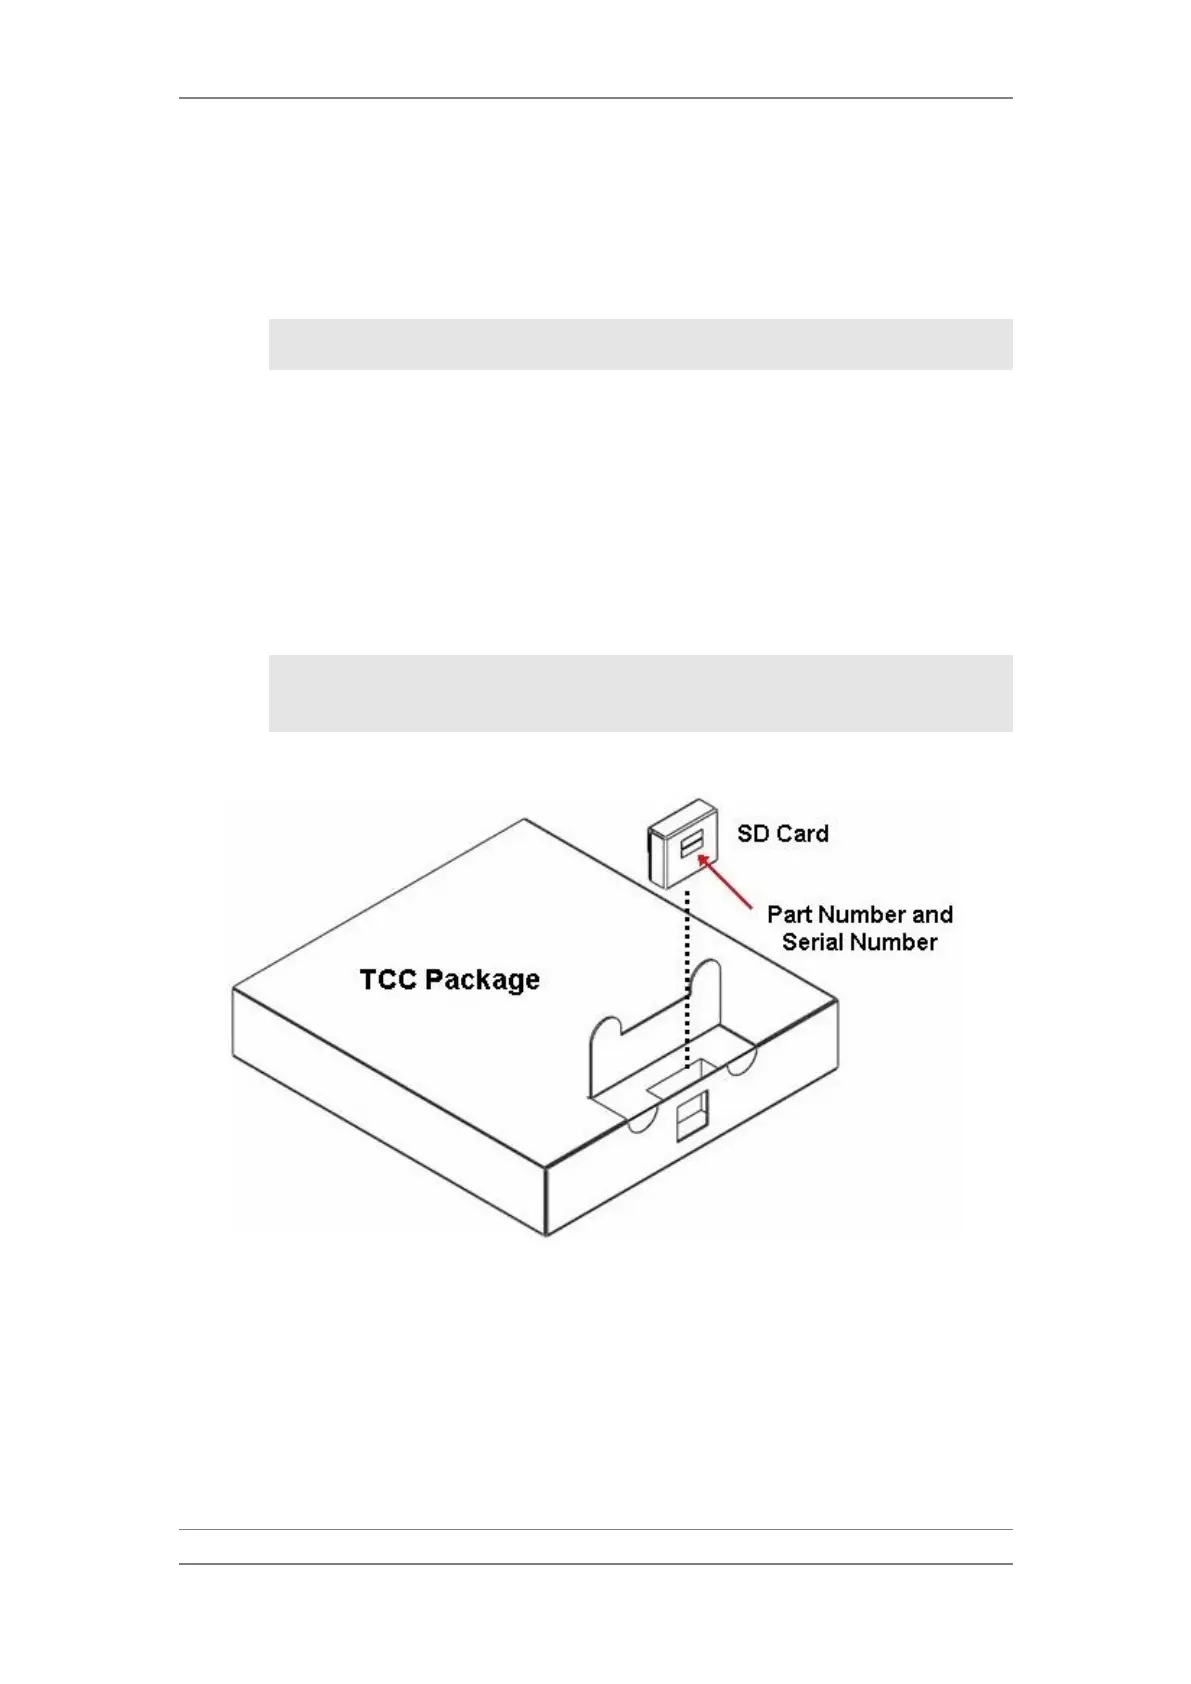
When installing a new system, the new TCC is delivered with an SD card,
which stores the unit's software version and configuration. The SD card is
packaged in a compartment in the front portion of the TCC package. It is
placed in such a way that you can view the label and serial number of the SD
card before opening the package.
Note: In some cases, the TCC is delivered with the SD card already
installed. If the SD card is already installed, proceed directly
to Inserting a TCC in the Chassis on page 46.
TCC Package with SD Card
1 Carefully remove the SD card from the package.
2 Before installing the TCC, insert the SD card into its socket on the upper
left side of the TCC. Make sure the orientation of the SD card is correct, as
shown in the figure below