Edge MAXX Repair
7-19
Loosen the locknuts (Figure 7-22, B) and
turn each bolt the same number of turns
counterclockwise to relax tension on the
belt.
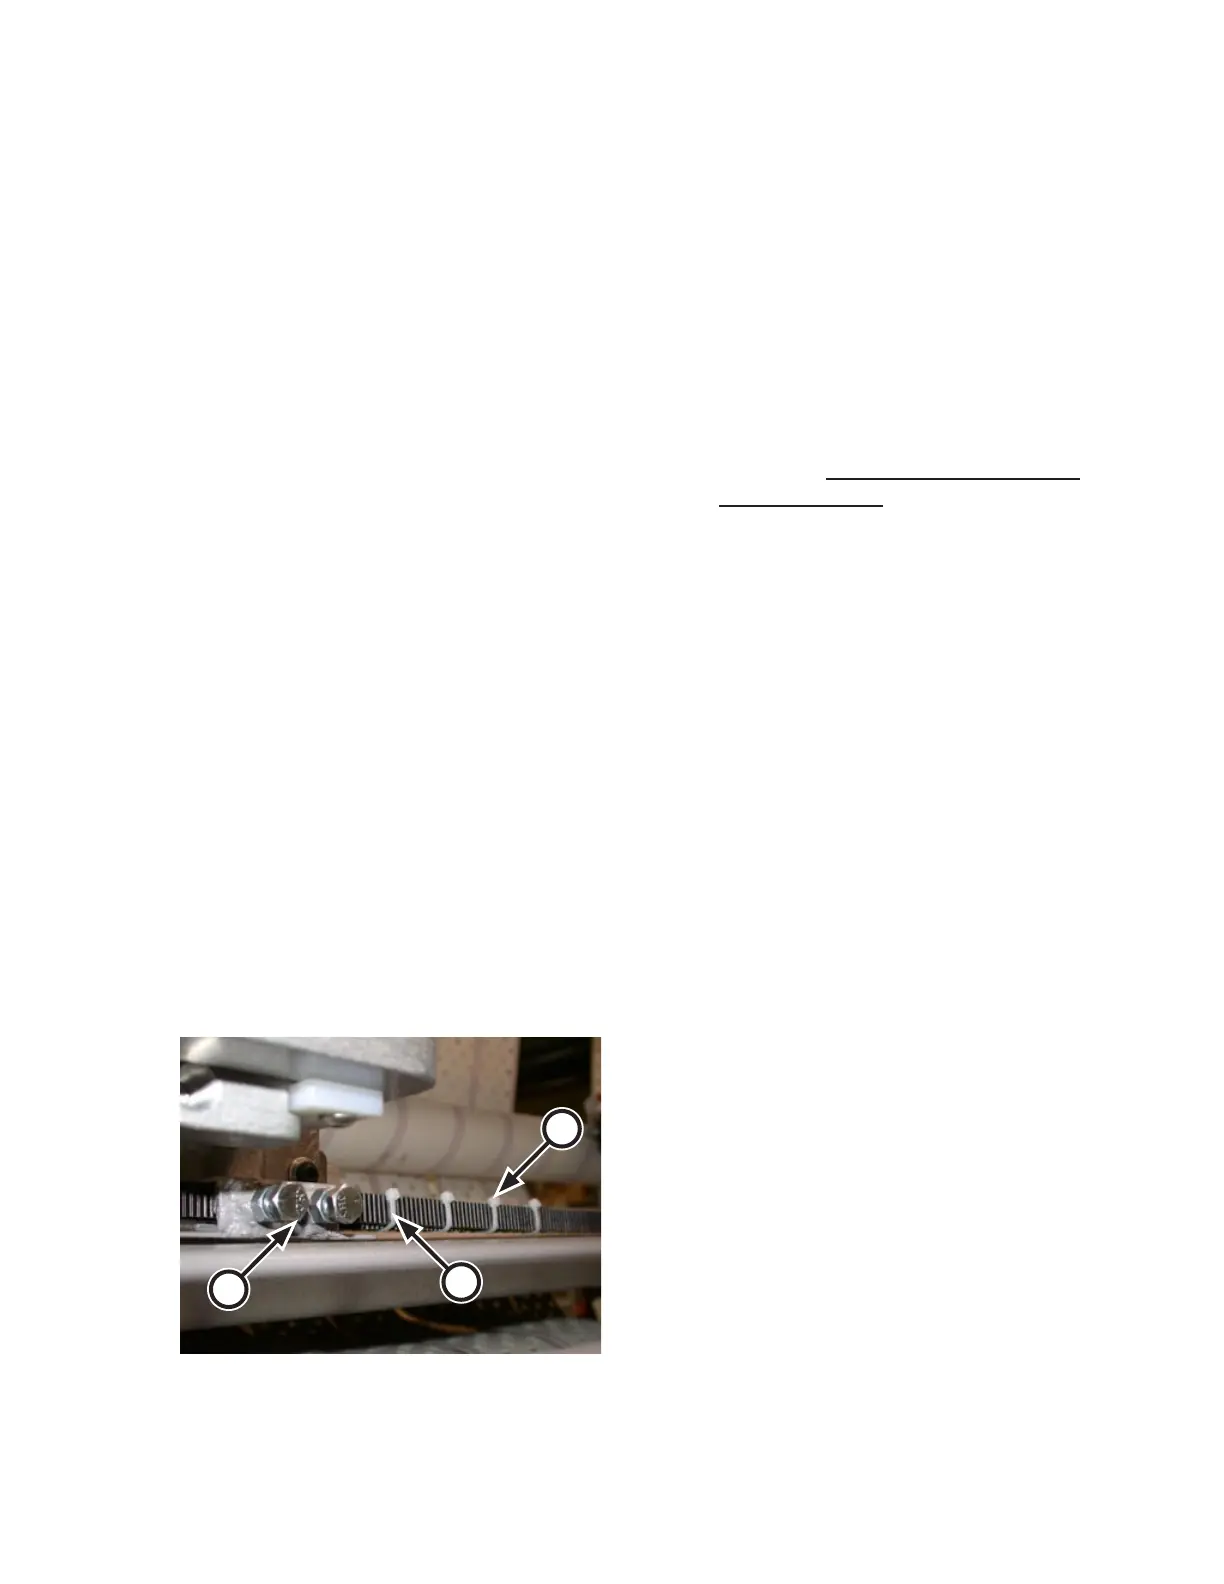
Locate one of the two bracket assemblies
which secure the two sections of the belt
(Figure 7-24, A) and cut the plastic wire
ties which secure the ends (B).
Loosen the bracket bolts which secure the
belt and remove the bracket assembly.
Repeat Steps 5 and 6 for the other bracket
assembly.
Remove the two sections of the belt from
the machine and discard.
Secure one end of each of the two sections
of the replacement belt by reversing Steps
5 and 6.
Make sure the “teeth” of each segment
are properly oriented. If necessary,
refer to Figure 7-24.
The belt ends should extend 1 to 3”
(25 to 75 mm) beyond the edges of
the bracket.
Make sure the plastic wire ties are
pulled very snug. These keep the ends
of the belt from interfering with proper
operation.
6.
7.
8.
9.
10.
11.
•
•
•
Route the belts around the timed drive pul-
ley in the right endframe and around the
timed idler pulley in the left endframe.
Use the second bracket to secure the other
two ends of the belt. Manually pull the
two belt sections tight before completely
tightening the bracket bolts.
Secure the ends with plastic wire ties.
Remove the C-clamps placed in Step 2.
Follow the Upper Spreader Belt Ten-
sion Adjustment procedure earlier in
this section.
Close and secure both endframe doors.
12.
13.
14.
15.
16.
17.
Figure 7-24: Two bracket assemblies hold the
sections of the upper spreader belt in
position.
A
B
B
 Loading...