Installation Edge MAXX
2-16
NOTE: Do not press a red
Safety STOP button. This will
cause the compressed air system
to depressurize.
Wait about 2 seconds and then press the
square red Stop button at either station.
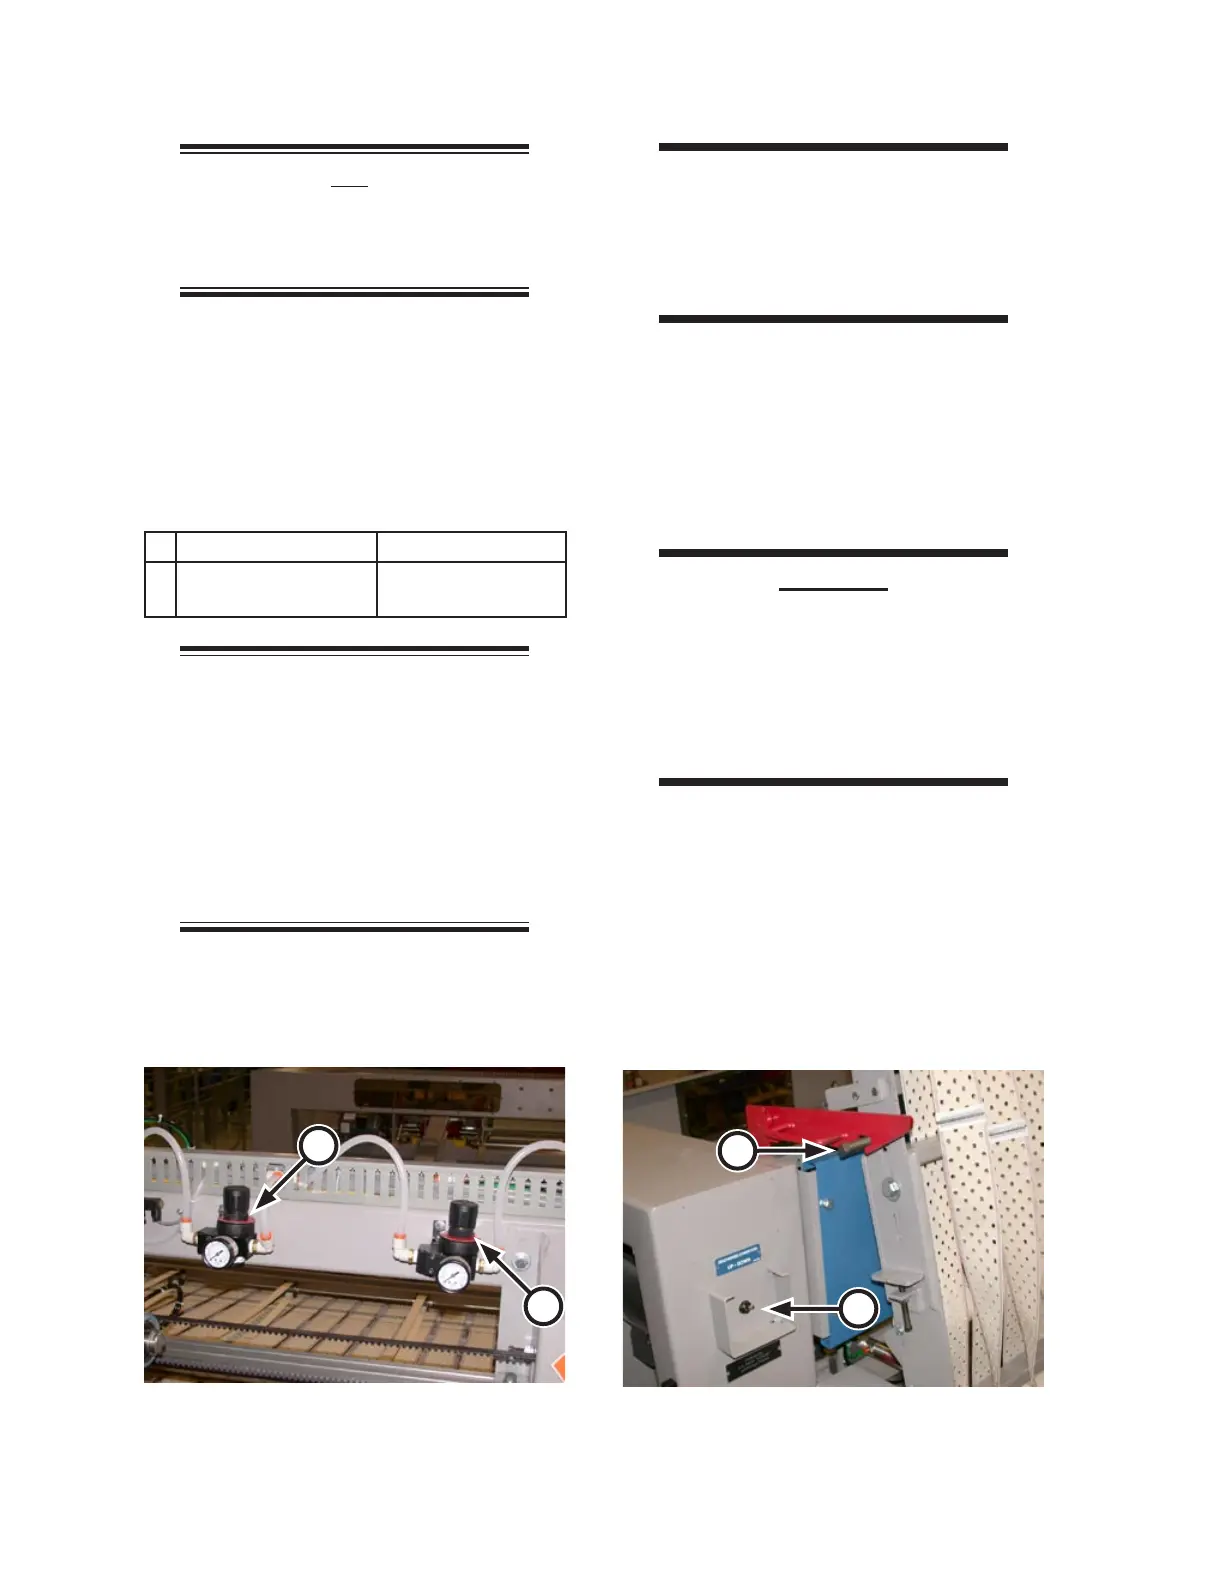
Looking in from the front of the machine,
locate the low pressure gauges at the back
center (Figure 2-27). They should be set
at listed in the table below:
A Clutch Pressure 60 psi (415 kPa)
B All Clamps Close
Pressure
60 psi (415 kPa)
NOTE: These settings are pre-
set at the factory. Air pressures
can be changed to meet the needs
of different weights of flatwork.
The remaining pressure regulators
only need to be checked and/or
adjusted in the case of a specific
machine performance problem.
7.
8.
WARNING
Stand clear whenever the
discharge conveyor is
moving. Failure to do so
could result in serious injury.
Standing clear of the discharge conveyor,
flip the discharge conveyor toggle switch
(Figure 2-28, A) to UP to raise the dis-
charge ribbons.
Make sure the red discharge conveyor
safety bracket engages (Figure 2-28, B).
CAUTION
Be sure to release the
discharge conveyor safety
bracket before flipping the
DISCHARGE CONVEYOR UP/
DOWN switch to the DOWN
position.
Disengage the safety bracket and flip the
DISCHARGE CONVEYOR UP/DOWN
switch to the DOWN position.
Leave power turned ON at the main dis-
connect switch and the compressed air
supply ON for the next procedure.
9.
10.
11.
12.
Figure 2-27: Clutch and clamps pressure regulars
at back/center of machine.
A
B
Figure 2-28: Test the DISCHARGE CONVEYOR
UP/DOWN switch.
B
A
 Loading...