• Supervisor PIC
• Supervisor PIC cable management bracket
• 3/16" flat-blade torque screwdriver
Step 1 Align the captive screws on the Supervisor PIC cable management bracket with the mounting holes on the Supervisor
PIC.
Ensure that the upper slot in the cable management bracket is the smaller slot for fiber-optic cables and the
lower slot is the larger slot for RJ-45 cables.
Important
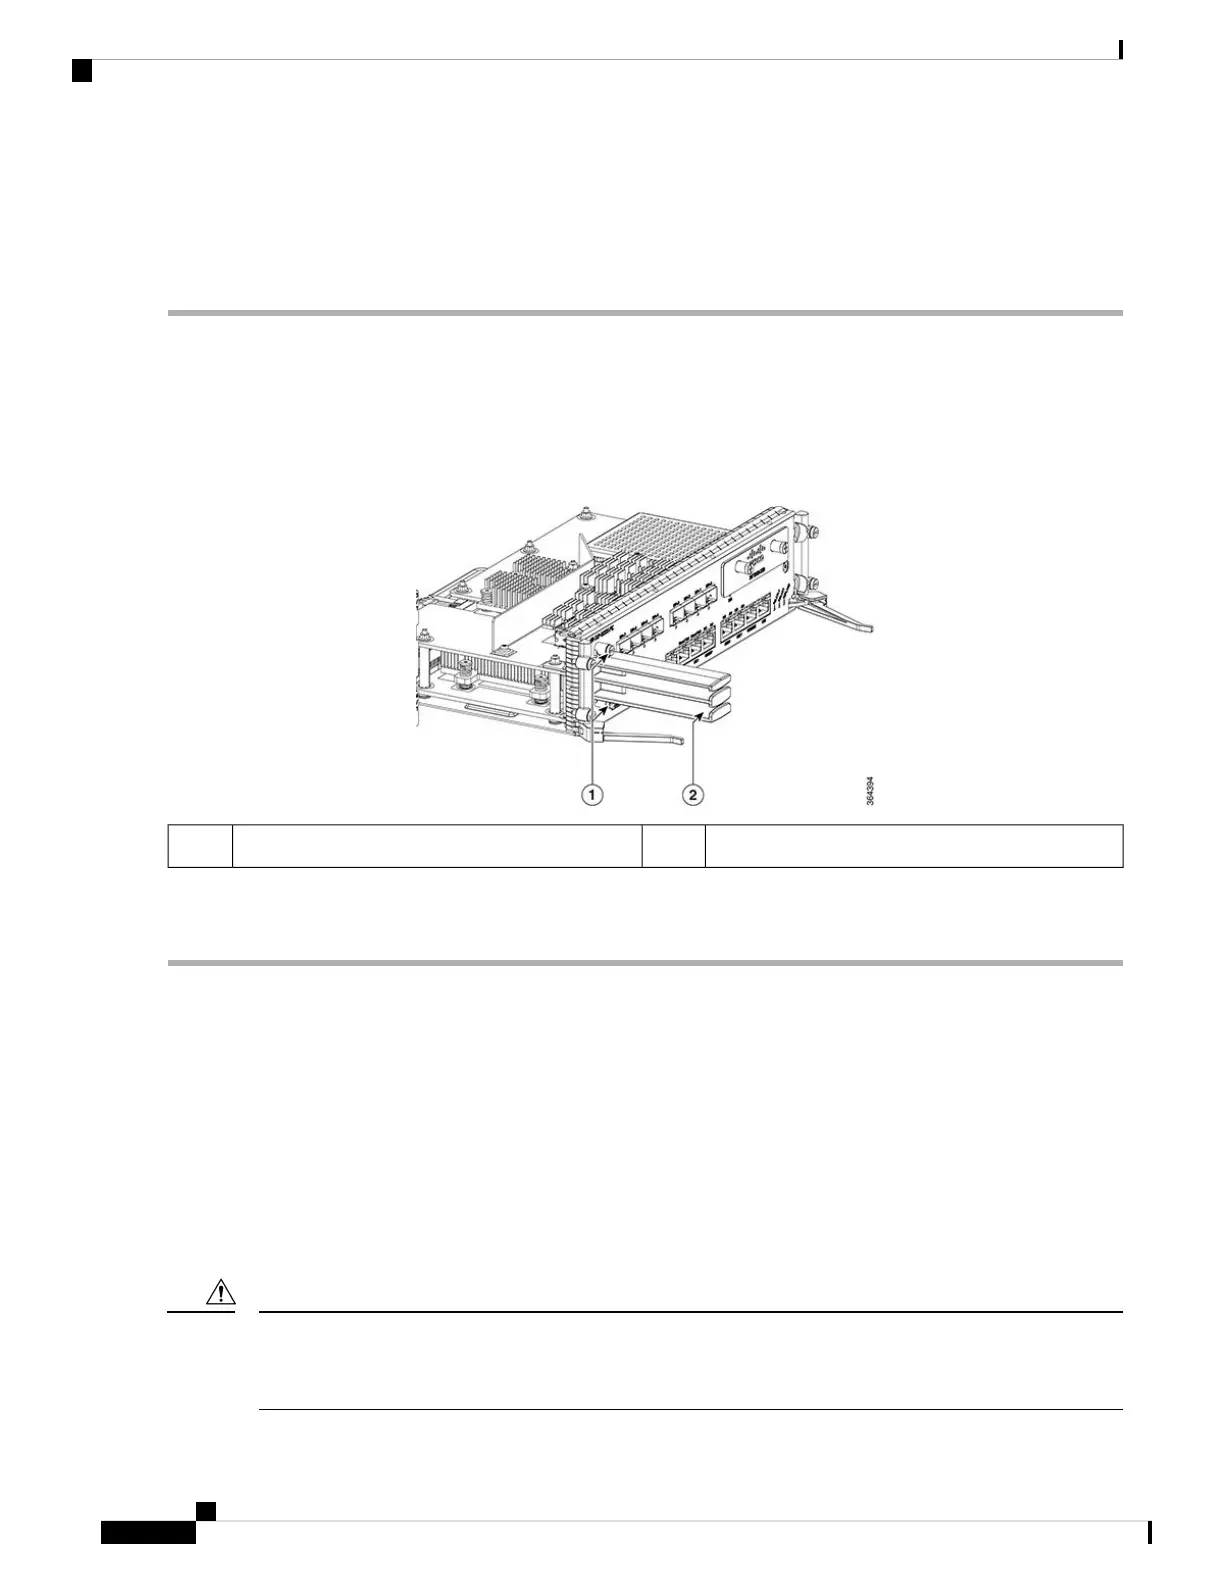
Figure 47: Installing the Supervisor PIC Cable Management Bracket
Supervisor PIC cable management bracket2Captive screws1
Step 2 Tighten the captive screws using a 3/16" flat-blade torque screwdriver with a torque of 6-8 in-lb (0.68-0.90 Nm) to secure
the Supervisor PIC cable management bracket.
What to do next
• Install the chassis-mounted fiber/cable routing guide (if not already installed).
• Route the Supervisor PIC cables through the Supervisor PIC cable management bracket and
chassis-mounted fiber/cable routing guide.
Installing the SFP+ Modules in the Supervisor PIC
Before you begin
Do not install or remove the SFP+ module with fiber-optic cables still attached to it. Doing so may damage
cables, cable connectors, or the optical interfaces and may interfere with the SFP+ module latching properly
into its socket connector. Disconnect all cables before removing or installing an SFP transceiver module.
Caution
Cisco Converged Broadband Routers Hardware Installation Guide
92
Installing the Supervisor in the Cisco cBR Chassis
Installing the SFP+ Modules in the Supervisor PIC

 Loading...


