Comau Robotics Product Instruction
38
ROBOT CONFIGURATION CUSTOMIZATION
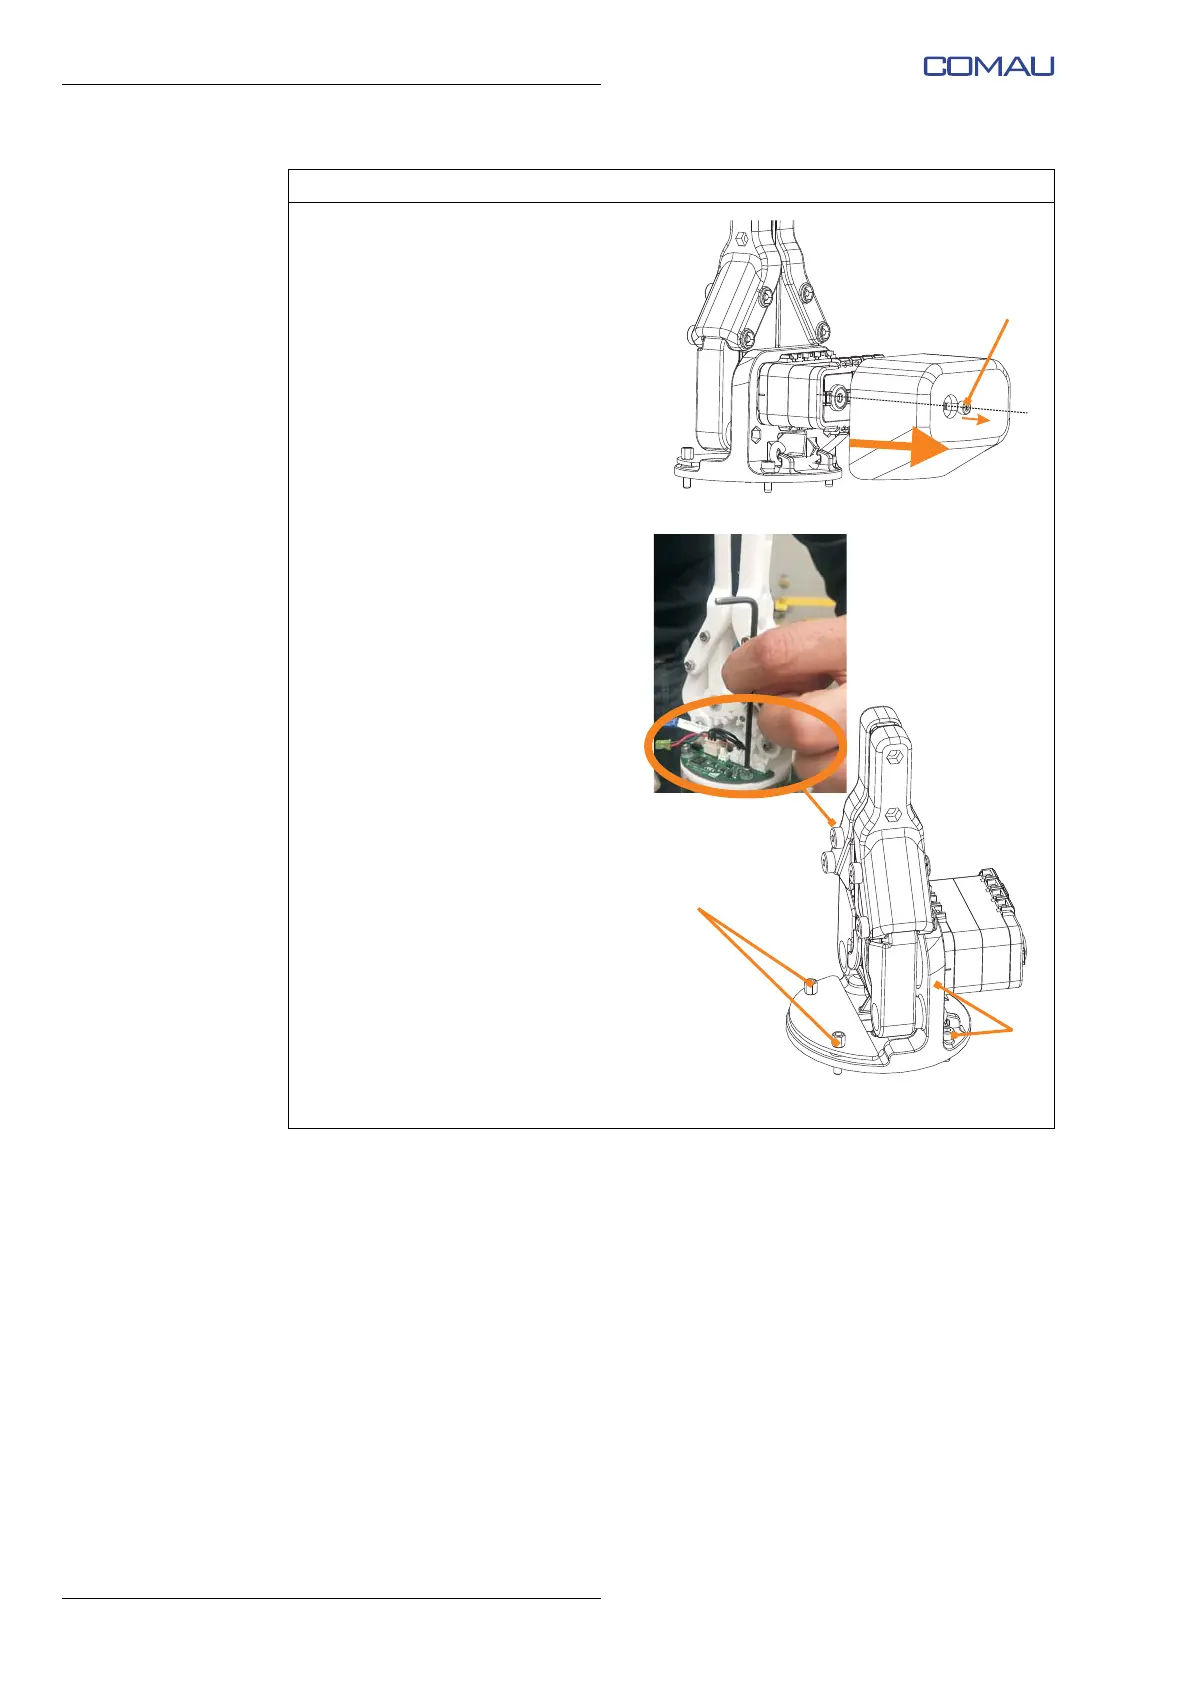
k. Using the 2.5 mm Allen wrench,
unscrew completely but without
removing (captive screw) the
fixing socket hex head screw (J)
M3x8 and remove the plastic
protective cover of the e.DO
Gripper rear side.
l. Using a 2.5 mm Allen wrench,
fix the e.DO Gripper to the
flange of the last Robot joint
using 2 screws (K) M3x10 (side
opposite to the electronic PCB
board).
m. Using a 5.5 mm open-end
wrench, fix the e.DO Gripper to
the flange of the last Robot joint
using 2 hex spacers (L) M3 l=12
(electronic PCB board side).
n. Tighten all the fixing screws to
the torque of 0.5 Nm.
o. To avoid possible damage, do
not overtighten the screws.
Representative figure
Operating procedure (Continued)