Comau Robotics Product Instruction
52
ROBOT CONFIGURATION CUSTOMIZATION
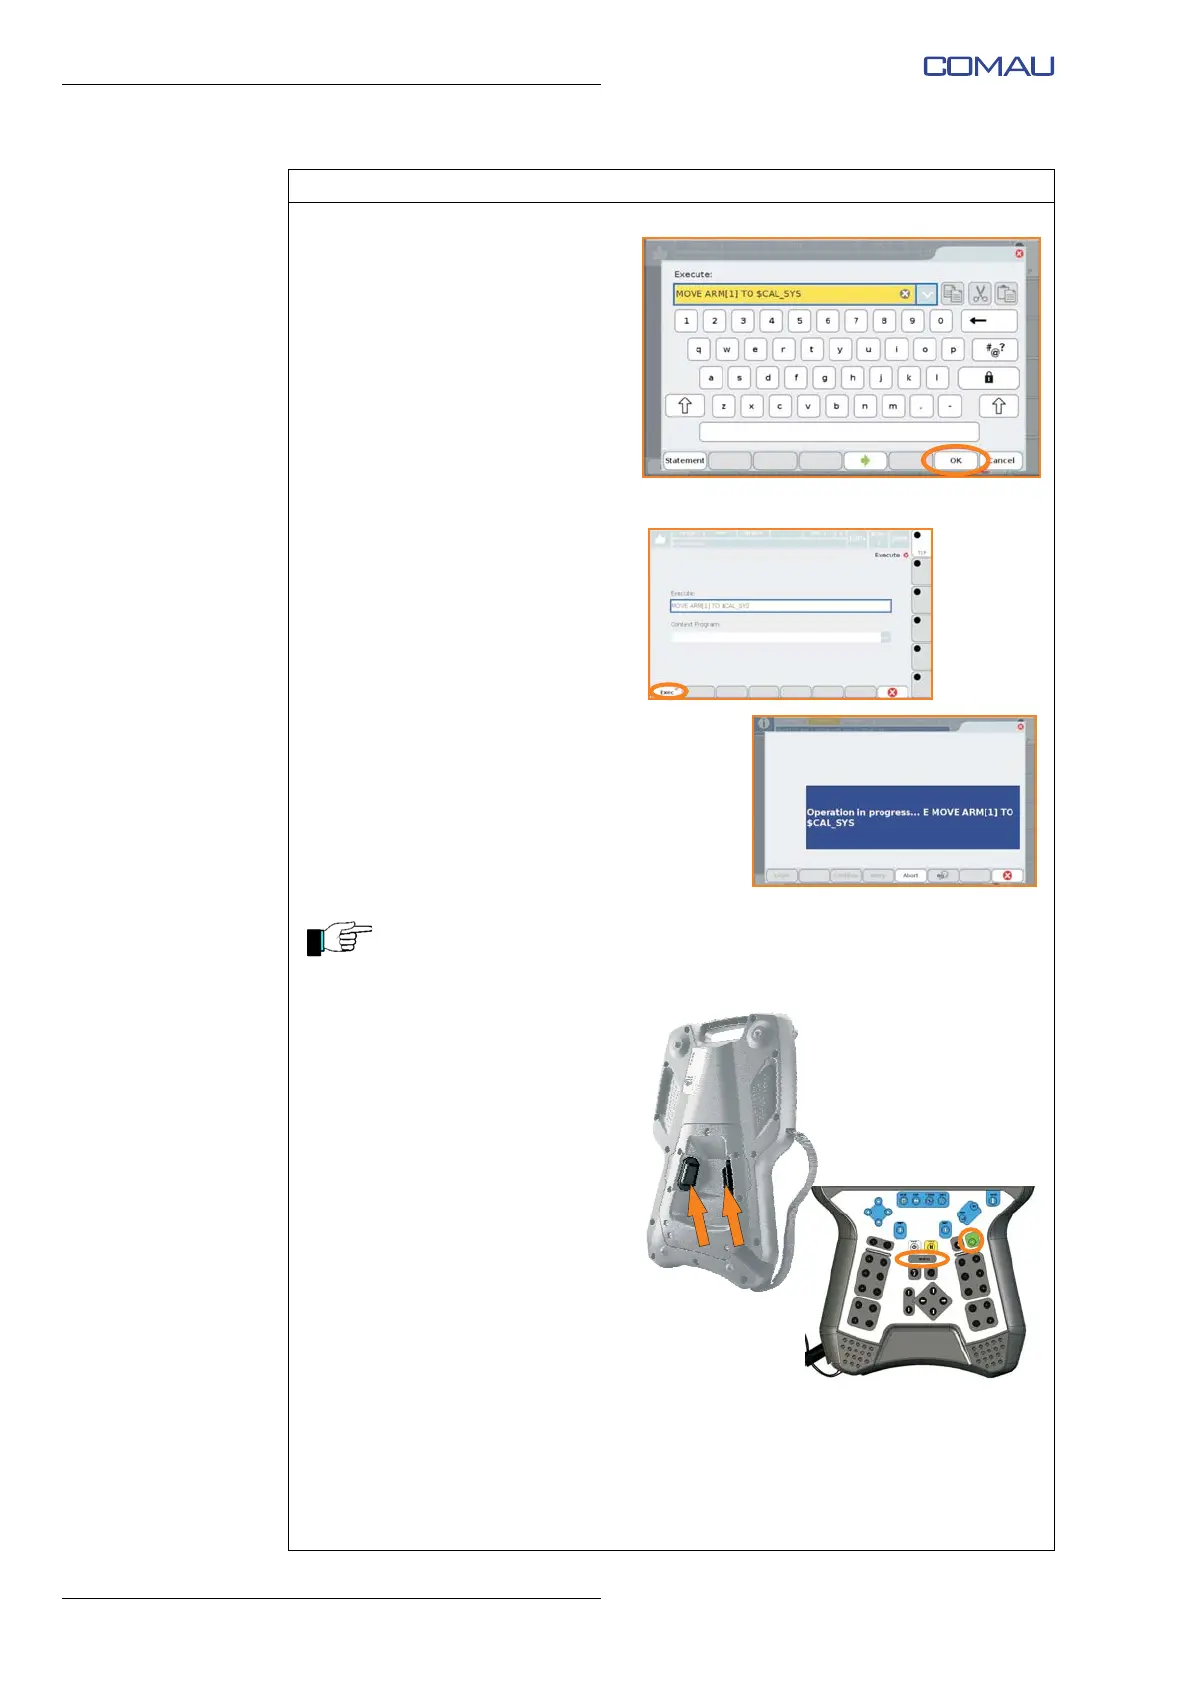
k. Confirm with “OK”.
l. The MOVE instruction for
moving to $CAL_SYS position
is indicated in the “Execute”
field.
m. Confirm the execution of the
instruction by pressing “Exec”
on the lower left side of the
window.
n. During the execution of the
instruction, the screenshot
shown in the figure alongside
will appear.
The MOVE TO_CAL_SYS instruction will move the virtual model of the
Robot to the calibration position (Axis 1, Axis 2, Axis 3, Axis 4, Axis 5, Axis
6 in position 0°).
o. To give consent to the
movement it is necessary to
provide the “DRIVE ON” by
pressing, in an intermediate
position, one of the enabling
push-buttons on the rear side of
the Teach Pendant.
p. The DRIVE ON status is
indicated by lighting of the
relative LED on the Teach
Pendant.
q. To carry out the movement it is
necessary to press and hold
(until the end of the movement)
a green “START” push-button
on the Teach Pendant.
r. At the end of the movement, the
virtual model of the Robot will
be in the calibration position.
Operating procedure (Continued)